Creating a CP assault map
January 2024
This gametype is included in A Boojum Snark's Team Fortress 2 Gametype Library
The complete entity setup for this gametype is included in "A Boojum Snark's Team Fortress 2 Gametype Library," a downloadable VMF that includes all official Team Fortress 2 gametypes. The entities can easily be transferred from the VMF to your own custom map without the hassle of having to build it yourself or debugging it.
"A Boojum Snark's Team Fortress 2 Gametype Library" can be downloaded here: TF2Maps.net
This tutorial covers the creation of a dustbowl-style system of rounds.
Step 1 - Outlining
This section will cover the outlines of the linear system.
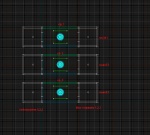
This tutorial is assuming that you already created the skeleton of your map - which would be the status when the map is nearly completed. The map this tutorial is going to use is a simple, three round map you can see on the picture. It would be vital that you check out the labels on the picture, as everything is written down using those labels.
Step 2 - Control points
This step introduces the usage of the team_control_point_master and team_control_point_round entities.
- Place a
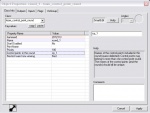
team_control_point_masteranywhere on your map and go to its properties.
team_control_point_round entities control the gameplay - much like in a parliamentary democracy: the nation has its own head of the state, but the parliament is governing.- Set the Switch teams on map win? field to
Yes. - The next step is placing a
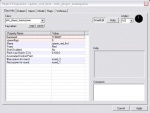
team_control_point_roundentity for each round your map has. The properties of these entities are much like those of theteam_control_point_master. Make sure you set an easily identifiable name for each round, such asround_1. The priority field will make sure that the game is linear: Set it to 100 for the first round, 99 for the second round and so on. You may also want to restrict the defending team from winning - set the Restrict team from winning to RED. Finally, in the Control points in this round field, input the Names of the control points for that round, separated by a space.
<br˛/>
Step 3 - Respawn points
Now that you have your rounds, you might want to specify the entry points of each team.
- Fill your respawn rooms with info_player_teamspawn entities and set their Team key value to any of the teams, it doesn't matter. What might matter is Associated Control Point: if you want the spawn place to be usable by the team who owns a certain control point, then input its name into this field. Important fields are Blue and Red spawn for round. Type the name of the rounds into these fields for which you want a team to spawn at these spawn points.
Step 4 - Timers and rounds
The map has almost everything it requires, there is only one little problem: neither teams can win. To set this up, this step explains the creation of a basic timer with additional options.
- Add a
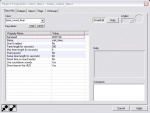
team_round_timerentity. Its key values are explained in the table below.
Property Name Description Value Name Name of the entity start_timer Timer Length Time limit at the beginning (in seconds) 180-300 Max Timer Length Max amount of time limit (0 = no limit) 0 Setup Timer Length Setup time before gates open (in seconds) 45-60 Reset Time on Round Restart Self-explanatory No Use Countdown Seconds Self-explanatory Yes Show Timer in Hud Self-explanatory Yes
Handling doors
- This entity can open the doors of the attacking team's spawn rooms. To do this, create logic_relay entities, name them in a sequence such as
relay_spawn_1,relay_spawn_2, etc and disable all of them but the first one. Add these outputs to theteam_round_timer:
And so on for all of them.
- On each relay, add these outputs:
Extending time
- The specified time seems a little short to win 3 rounds, that's why the control points need to be set up for this. For each trigger_capture_area add an output:
This will add more time once the capture point is taken.
Step 5 - Team victory
Moving on to address the issue of the teams not being able to win.
Defending team
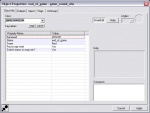
- You need to add a game_round_win entity for this. Set the properties as the following:
Property Name Value Name end_of_game Team Red Force map reset Yes Switch teams on map win? Yes
- Now, go back to the
team_round_timerand add an output:
Attacking team
- The issue of BLU not being able to win is a little bit simpler. Add another
game_round_winentity with the following properties:
Property Name Value Name blue_win Team Blue Force map reset Yes Switch teams on map win? Yes
- For the very last
trigger_capture_areaof the very last round, add an output:
