Post Import Fixup steps
For help, see the VDC Editing Help and Wikipedia cleanup process. Also, remember to check for any notes left by the tagger at this article's talk page.
Skybox
In CS:GO, 3D Skyboxes were often built within the main map, whereas in Counter-Strike 2 they are split into a separate 3D Skybox map. The map importer will try to detect skybox geometry and separate it out automatically, but this only works if the skybox geometry in the original VMF is in its own instance/prefab.
More commonly this is not the case, so if you open your freshly imported map in Hammer and don't see a 3D Skybox rendering, it's likely that the importer did not succeed and it has been merged in the main map. The process of separating it out, however, is actually quite simple;
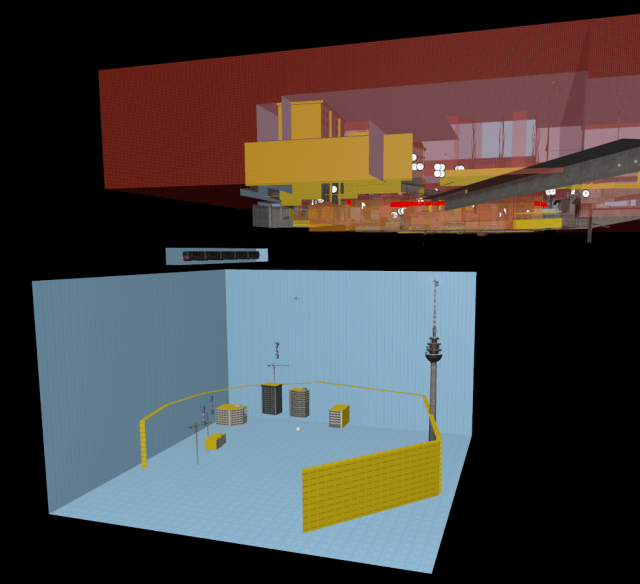
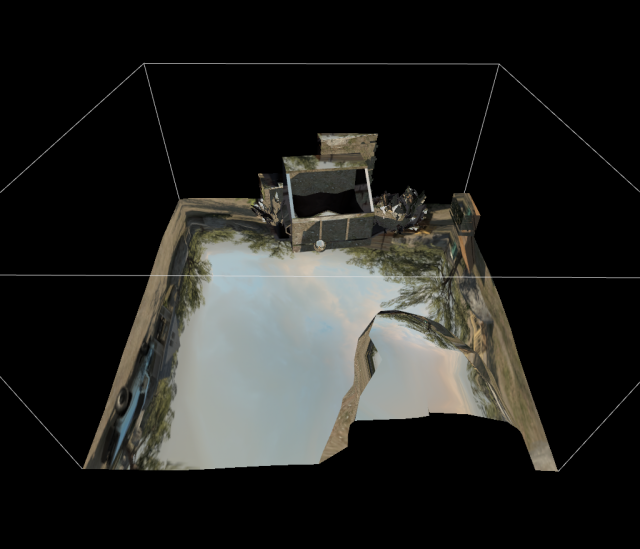
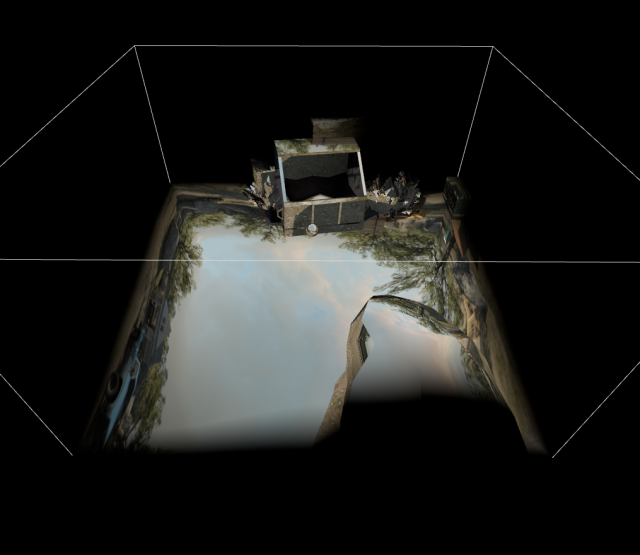
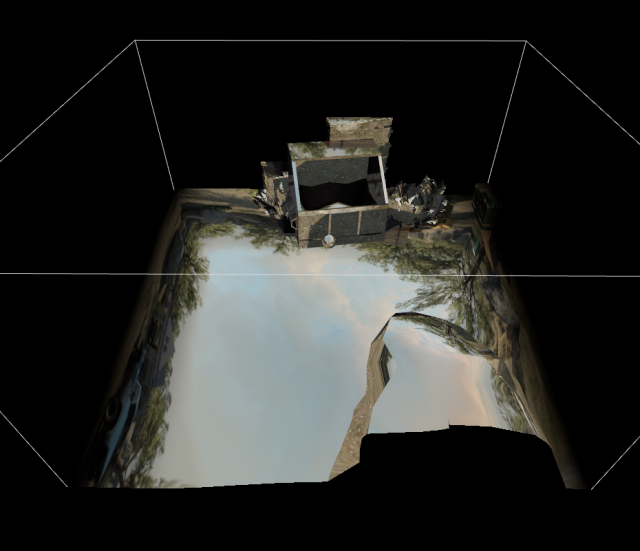
First, find your 3D Skybox, it should be in an enclosed space somewhere outside of the main map area:
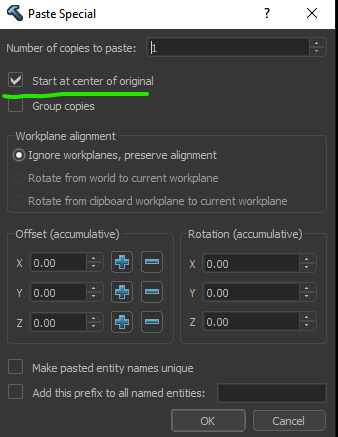
The next step is to grab the skybox geo and any entities inside of it and press Ctrl+x, then create a new map using File>New and save it under an appropriate name i.e. de_mymap_skybox and when the new map is saved, press Ctrl+⇧ Shift+V to do a paste special, making sure Start at center of original is selected before pressing OK
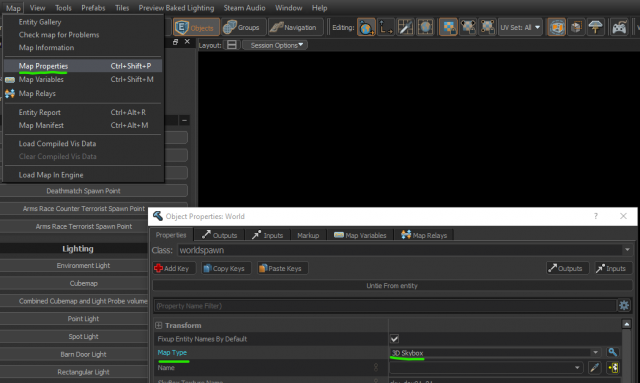
Once the geo is inside your new map, we just need to tell Hammer that this is a 3D Skybox map. To do this simply go to Map>Map Properties and in the Map Type dropdown, select 3D Skybox:
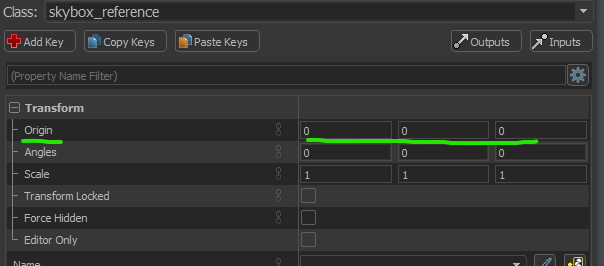
Once this is done, switch back to your main map and add a skybox_reference entity that references your skybox .vmap. Finally, set the skybox_reference positioned to 0,0,0 under the Transform section of it's properties:
If everything has gone smoothly, you should see your skybox rendering in Hammer's viewport!
The last remaining thing to do is to copy (not move) the light_environment and env_sky entities into your 3D Skybox map, to ensure there is lighting and sky.
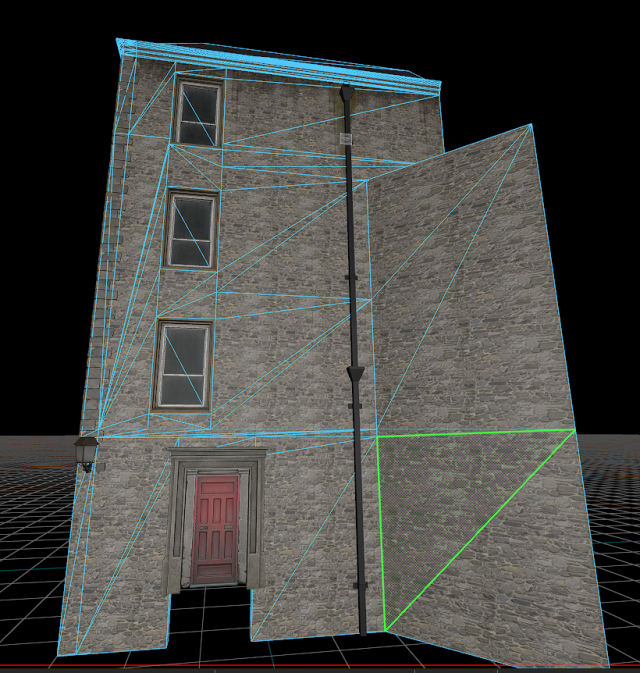
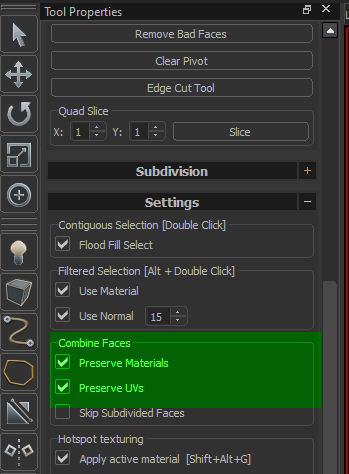
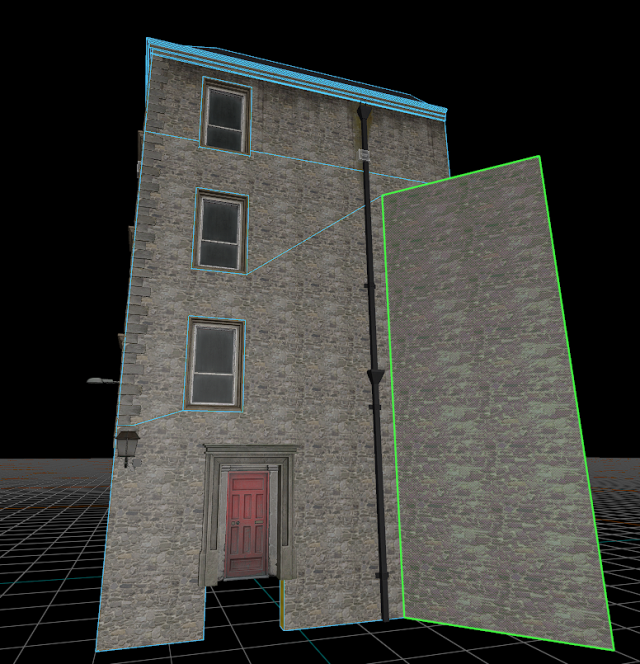
Mesh Clean Up
Cubemaps/Lightprobes
The importer will try to convert old csgo-style cubemaps to Counter-Strike 2's new combined box-projected cubemap/lightprobe volumes, however, this step is often hit or miss and it's recommended that you take some time to fix these up manually. Below are some tips for this pass:
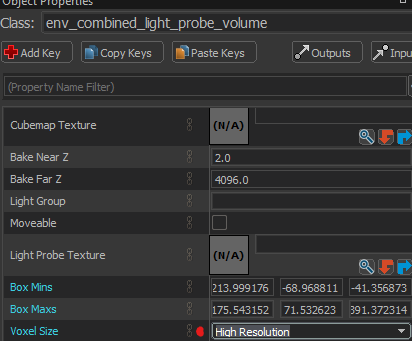
Light probe resolution
For gameplay areas, it's recommended to use a high-resolution voxel size for the best lighting quality on dynamic objects/players. Other areas can use lower resolutions as you see fit.
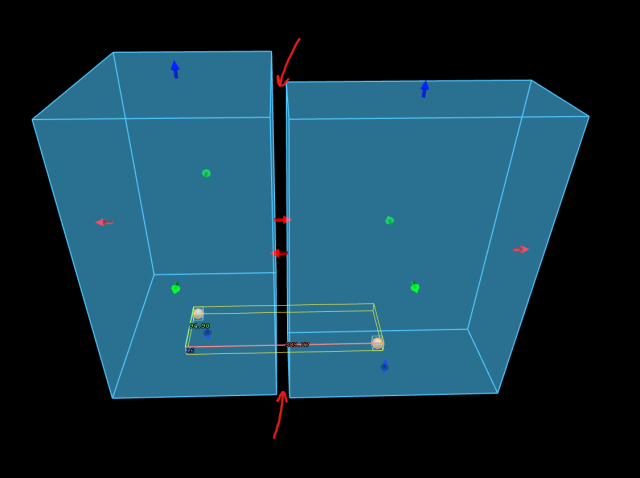
Avoid Gaps between volumes!
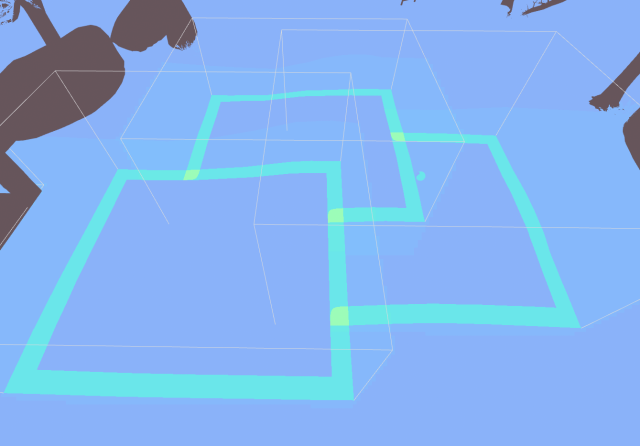
If you have any gaps between volumes this will likely result in players, or dynamic props to light incorrectly (sometimes black or fullbright). For example:
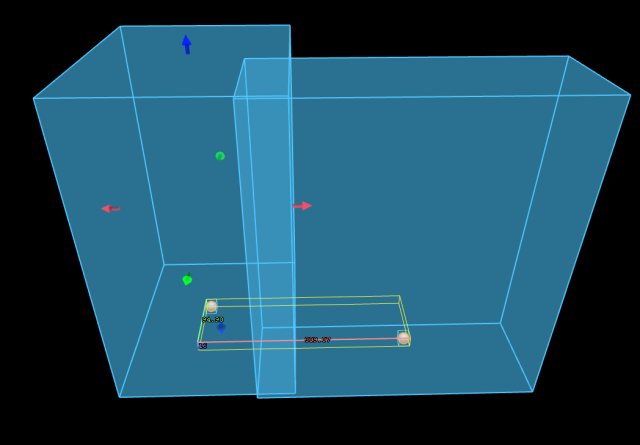
This can be fixed by closing the gap - It is totally fine for volumes to overlap and is necessary if using the Edge Blend feature.
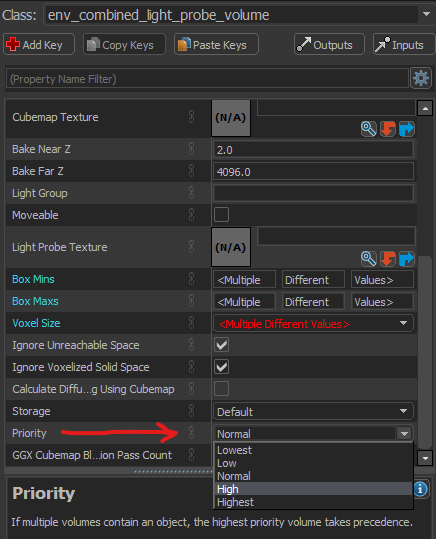
You can use the priority system to fix any issues if you have a volume within a volume.
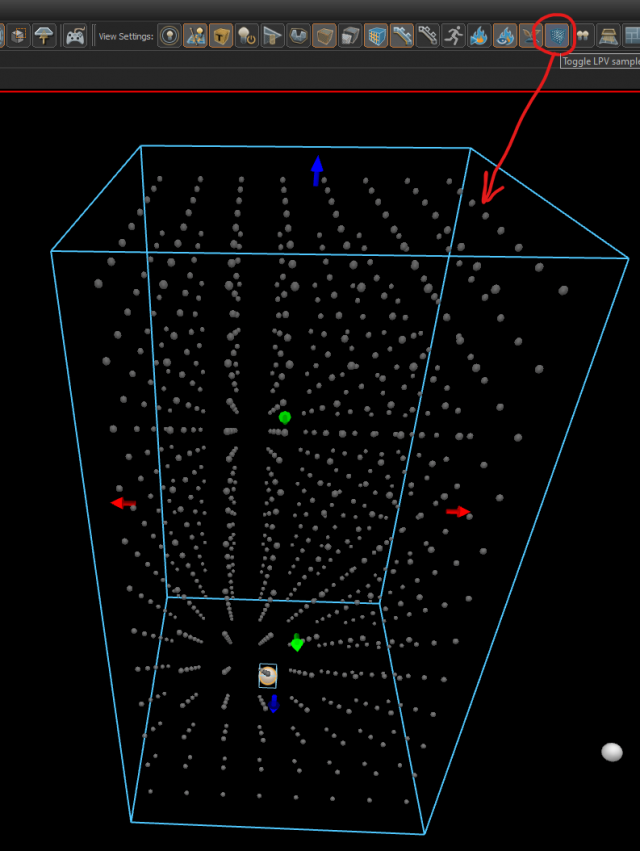
Debugging Lightprobes
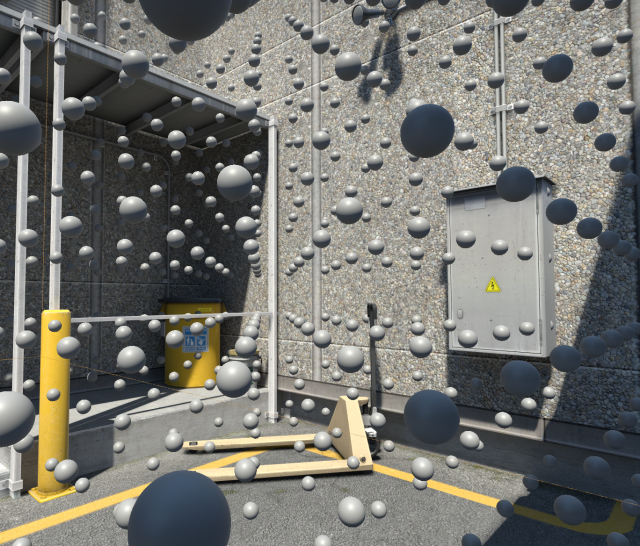
To visualize the light probes within your volumes, you can simply click this button which visualizes the currently selected light probe volume's density and baked lighting:
To view this in-game, simply type r_light_probe_volume_debug_grid 1 into VConsole, useful if you see unusual lighting happening on dynamic objects:
mat_fullbright 2 in-game.
Debugging cubemaps
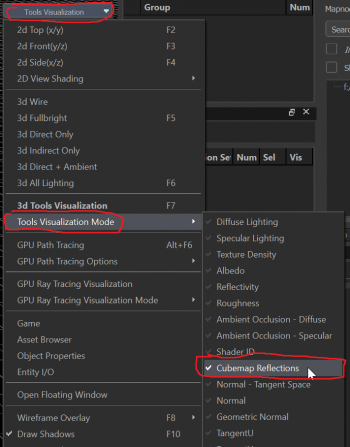
If you want to see what's going on with cubemaps, there's a view in Hammer for that here:
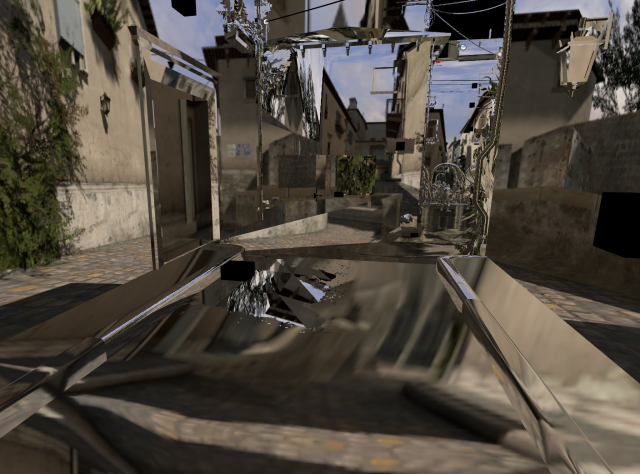
This visualizes cubemaps on surfaces:
This is useful for checking to see if cubemaps are correct/have gaps and for checking the blend settings between cubemap volumes.
Cubemap Blending
This feature allows for smooth transitions between cubemap volumes, and can be adjusted with Edge Fade Dist setting:
These values control the amount of edge blending along X,Y,Z in inches.
Here we see X,Y,Z set to 0. Notice the hard border where the cubemap volume ends.
Here X,Y,Z is set to 32, notice the edges of the cubemap volume fading out
And with X at 32, and YZ at 0. Note the blending on one axis
A good way to diagnose this is to use the Reflection Complexity view mode in Hammer, or mat_fullbright 8 in-game via vconsole.
In this example, there are three overlapping cubemap volumes with an edge fade of 32 in X & Y.
You can see that as more volumes overlap at the edge fade regions, the color changes from Blue>Green>Yellow based on how costly those pixels are (yellow being most costly).
Additional Considerations
Imported lights from S1 may have their range set to obscenely high values, sometimes in the tens of thousands. Source 2 uses the Range value during compiling to determine what objects should be tested for each light. Having a large range on lights where it isn't needed drastically increases compile times. Additionally lights set to the stationary Direct Lighting type can only have 4 lights emitting on a face before lighting artifacts start to occur.
