Creation
Remember to check for any notes left by the tagger at this article's talk page.
Overview
Parallax Corrected Cubemaps are normal Cubemaps with a reflection that moves, or parallaxes, with the player's view to give a slightly more accurate reflection. These work through the use of a custom brush entity which defines the boundaries of the reflection. Essentially, the cubemap will be projected onto the the boundaries set by the parallax_obb and will move and modulate and move with the camera, instead of staying static and not moving.
Tutorial
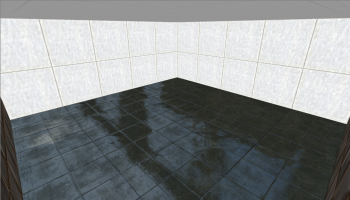
Creating a parallax cubemap is fairly easy, and can be done with relative swiftness. To start, create a room with 1 or more reflective surfaces. Floors work very well with parallaxed cubemaps.
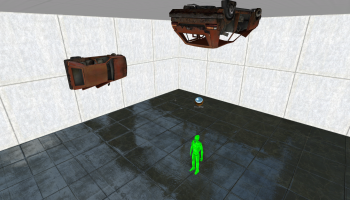
Next, place an env_cubemap either in the exact center of the room—Halfway up, equadistant between each wall--. You can set the resolution to anything you want, but higher values are recommended for reflective surfaces.

(Car props added for demonstration)
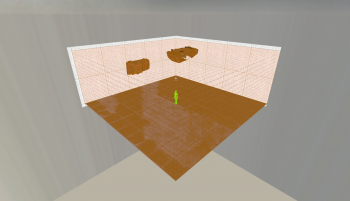
After this, create a brush the size of the room and tie it to a parallax_obb. Name it something similar to "parallax_room1". Finally, go into the env_cubemap's properties and, in the "Cubemap bounds" keyvalue, specify the targetname that you gave your parallax_obb.
Now, compile and load up the map in your game. Open the Developer Console and build the cubemaps using the buildcubemaps command. The game should flash an image on screen and then reload the map. After this, you will see that your surfaces now reflect your room somewhat more accurately compared to a non-parallaxed cubemap!
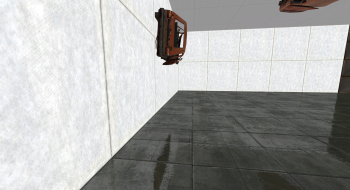
Now, you may notice that when viewed from certain angles, objects may appear to be 2D, similar to what is shown here:
Notice how the reflection in the tile is a flat image and not 3D. This is because cubemaps are actually similar to skybox textures, being that they are multiple orientations of the same place, combined to give the illusion of one continuous space. Cubemaps cannot accurately give 3D images from all angles. Props can be shown flat and/or smeared.
Keep this in mind when developing your map, and if the smearing is too much of an issue, you can always lower the cubemap resolution to 128x128 or 64x64 to make this less noticable, or you can decrease the intensity of the reflection by lowering the $envmaptint parameter in the material to something like [.1 .1 .1]
- Props are not affected by parallaxed cubemaps. The way they render cubemaps is different to that of brushes, and therefore do not support parallaxed reflections. If you absolutely need an accurate reflection, try baking the reflection of the scene into the material itself instead of relying on cubemaps
- This entity may only be tied to a rectangular brush. [confirm]
- Multiple cubemaps can be tied to the same obb entity. Remember that in order to have many cubemaps on the same surface, you must split the surface into different brushes.
- Objects in the middle of rooms will be seemingly pasted onto the wall in the cubemap, leading to a very distractingly inaccurate reflection. If all else fails, lower the
$envmaptintparameter in the material's vmt, or simply untie the cubemap from the obb and lower the resolution. This will remove the parallax effect, but it will look less distracting.


