Custom Character Basics
Source 2's tools provide all the functionality necessary to create completely new characters for your mods, all without the need to modify the underlying C++ code. ModelDoc lets you import your own models, textures, and animations. AnimGraph lets you define how they move and react to the world. Entity Scripting allows you create custom AI. And the Hammer level editor has hooks to allow for level-specific behaviors.
The custom_character addon has an example of a simple character. It includes all source content so it can be used as a reference to examine how it was set up.
Creating a new model
To get started, place the files for your model in a folder called "models" in the content folder of your custom addon. For example: "Half-Life Alyx\content\hlvr_addons\<add-on name>\models". Source 2 tools support the FBX file format, which is compatible with many 3D content creation tools.
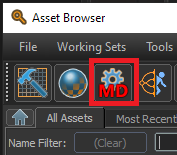
Open ModelDoc from the Asset Browser:
Importing a mesh
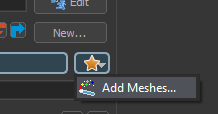
Click the star button and select Add Meshes... to import your character mesh
At this point the new model will need to be compiled because a settings have changed.
Click the Needs Compiling button to compile the model. You'll be prompted to save the new model file; save it in the same models folder under the content folder. The compiled version of the file will be created under the game folder but otherwise with the same sub-folder hierarchy. Eg: "Half-Life Alyx\game\hlvr_addons\<add-on name>\models".
Setting up materials
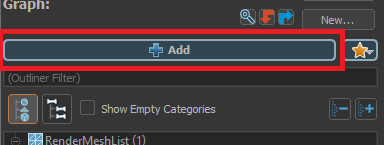
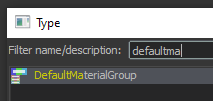
Next we need to import any textures the model needs. Click the big Add button, and select the DefaultMaterialGroup to add the material node to the model.
The DefaultMaterialGroup node will have an entry for each material that the imported model requires. Use the Material Editor to create the materials for the model, then assign them using the DefaultMaterialGroup in ModelDoc.
Importing animations
Click on the Star button and now that a model has been imported, additional options will show up. Select the Add Simple Animations... option and select one or more animations to import from your models folder.
Animations often require additional ModelDoc nodes to properly configure them for use in game. The importer will attempt to set some of them up for you, but its best to double-check that those settings are the right ones. Right-clicking in the animation will bring up a menu of nodes you can add to the animation that will process it in different ways when it is compiled. Some of the most important ones are:
Extract Motion
Most animations don't actually move the character when imported; the pelvis bone will simply translate as part of the animation, then snap back to its starting position when the animation loops. The Extract Motion node removes this motion from the bones of the animation and stores it as information that the game can use to move the character in the world. The Extract Motion node lets you specify which bone to use a reference for the character's motion, as well as which directions and rotations to extract. For example, walk animations would have the TX and TY (Translation in X and Translation in Y) options enabled, while stationary turn animations would only have the RZ (Rotation about the Z axis) option enabled.
AnimSmoothLoop
If you have a looping animation, but the first and last frames don't match exactly it can look like your animation pops. This node cleans that up by adjusting the animation so the first and last frames match.
Looping
This is just a checkbox on the animation itself and not a sub-node. It doesn't change the animation, but lets other nodes in the compile know that this animation loops so they can configure themselves differently.
Set up the AnimGraph
See this page for detail on creating a new animation graph for your character.
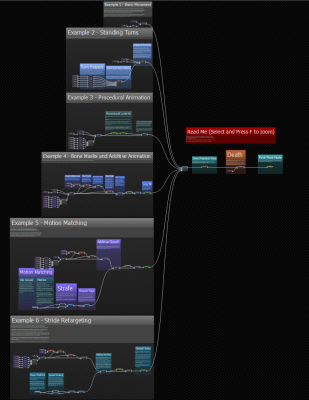
In addition, the AnimGraph for the example character (biped_standard.vanmgrph) is fully commented, and walks through how the final graph was set up. Zoom in on the large red comment node labeled "Read Me" to get started.
Custom AI with scripting
Source 2 supports scripts written in Lua to control the actions of characters.
There's an overview of getting started with Lua scripting in Source 2 here, and a list of all the functions that are exposed to scripts by the engine here.
The custom_character addon includes an example entity script (follow_player.lua) that implements some simple AI logic to make the character look at the player and follow them around the map. This script controls the character by communicating with the character's AnimGraph and navigation system.
Adding the character to a map
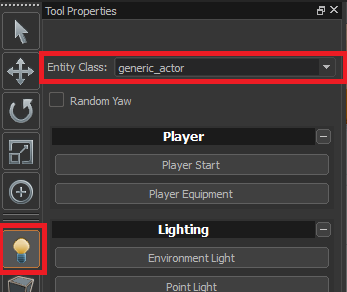
To add you custom character to a map, load the map in Hammer, select the Entity Tool and place a Generic Actor in the scene
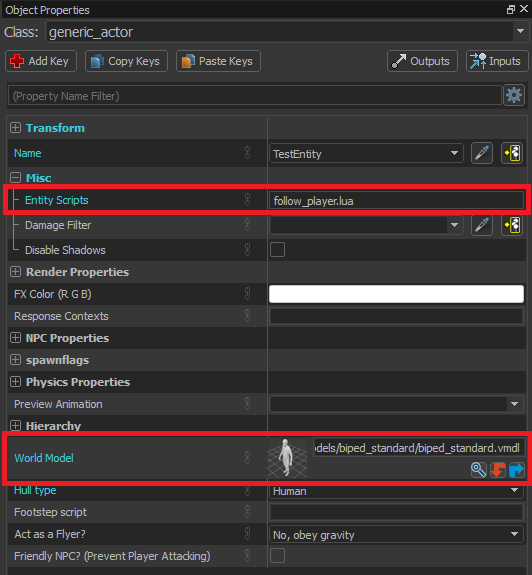
In the properties for the new entity, set the model you created in the World Model field, and the Lua script you want to drive its AI in the Misc/Entity Scripts field
That's it! Your character is now in the level, thinking and animating.
The custom_character addon includes an example level with a custom character already set up, as well as some common obstacles for the character to navigate. To use the map, load the tools with the addon enabled, press ~ to bring up the console, and enter this:
addon_tools_map custom_character
Map-specific control
You can use Entity I/O to control the character from the map, allowing for map-specific behaviors and contextual awareness.
One example if this is to use a trigger volume to set a parameter on the character's AnimGraph. The AnimGraph can then use this value to change the animations of the character.
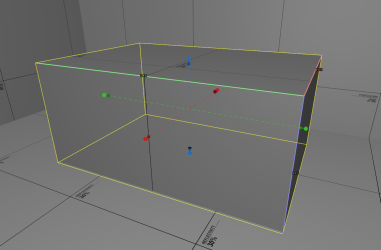
Start by creating out a mesh that will be the trigger volume using the Block tool in Hammer.
Now tie the mesh to a trigger_multiple entity.
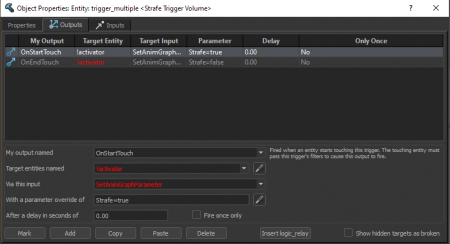
Click on the Outputs button to bring up the Entity I/O dialog for the box. From here we can set up actions to trigger when the entity emits events.
For this example, set an AnimGraph parameter to true when the character enters the box, and set it back to false when it leaves.
- Add two outputs, and set the first one to OnStartTouch and the second to OnEndTouch
- Set the Target Entities on both to !activator. This is a special name that refers to the entity that triggered the output.
- In the Via this input field select SetAnimGraphParameter. This is telling the output that the action it should perform when it is triggered is to set a parameter on the graph
- Finally, in With a parameter override of enter a string that describes the parameter and value to set. The format is <parameter name>=<parameter value>. In this example we're setting the Strafe parameter to true in the OnStartTouch event, and to false in the OnEndTouch event.
Now compile the map and the trigger should control the character behaviors when it is touched by the player.
