Mesh Editing 3
Geometry in the new tools is constructed in a much more flexible collection of arbitrary polygons. Previously there was a distinct difference in a static prop piece of architecture versus a BSP based piece of architecture. That difference no longer exists. Essentially everything is more or less the same in regards to how it is rendered. Static props still have their uses, such as high detail replicated objects, but they can be used in a larger variety of ways without the limitations of previous iterations of the tools.
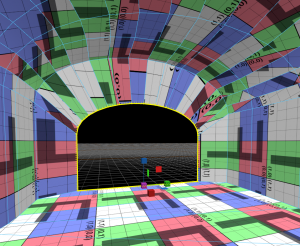
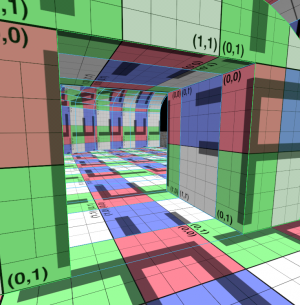
A tunnel is another example of architecture that would be very difficult to create in previous versions of Hammer and serves as a method to further explore the various tools in Hammer.
Creating a Basic "Template"
Start by closing any existing map file you have and then create a new empty one (Ctrl+N).
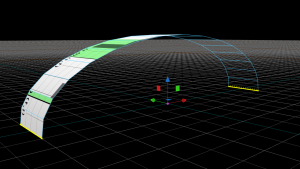
Create another 32-sided cylinder and rotate and translate it until the central axis is along the grid (see image). The top of this will form the arch of the tunnel.
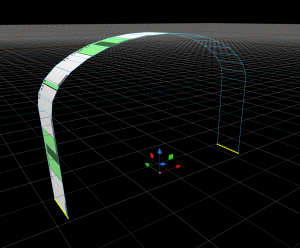
Delete all the faces except those needed for the arch, then switch to Edges mode and select the two edges at the base of the arch.
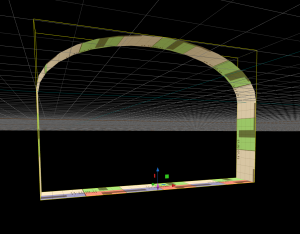
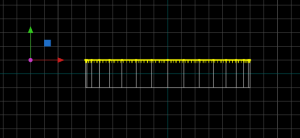
Extrusion also works on edges (⇧ Shift+Translate) and using this it is possible to extend the edges down. Select the lower edges and extend them downwards to form the sides of the tunnel. When down far enough as needed, use Bridge B to connect them together to form the floor of the tunnel.
Introducing Pivot Points
While Hammer allows significantly more freedom than in the past it is still useful to work on the grid. Similar to static props, meshes have origin points in which translation, rotation, and scaling operate. It is possible to relocate that origin with the use of the Pivot tool.
In Meshes mode, select the chunk of tunnel then start a Translate T. The translation gizmo will start at the current position of the mesh's origin. Right now this is likely up near the top of the arch. The position isn't important, just that it is somewhere nearby.
To move the pivot, use Insert or click the Pivot Tool button from the left toolbar. The translation gizmo changes to show a small, purple diamond at its center. That's the pivot. Move it downwards until it is flush with the tunnel floor.
Switch to Faces mode, double-click on the mesh to select all faces, then Flip Normals F to turn it into an inward-facing segment of tunnel.
In the Tool Properties tab, in Object Editing, there should be a Set Origin To Pivot button. Click that, and return to translation mode by pressing T again. Now drag the mesh upwards so that the floor is flush with the grid.
Geometry Creation Using Pivot Points
Translation, rotation, and scaling all operate around the pivot point. This also works inside meshes.
As an example of this it is possible to extrude edges with a relocated pivot to create interesting shapes.
- Switch to Edges mode and double-click on an edge on one end of the tunnel segment to select a loop.
- Using a Top 2D view (It is often helpful to have two panes in Hammer -- one 3D and the other 2D).
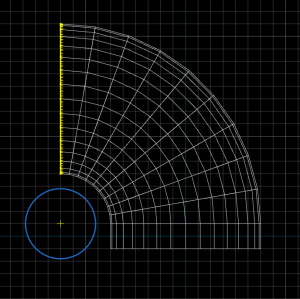
- Enter the Pivot Tool Insert and move the pivot out to one side. This will be the center of a curve in the tunnel.
- To create the curve, switch to Rotate R and use ⇧ Shift+
 to extend the edges out by fifteen degrees.
 - Repeat this until there's a full right-angle of curve segments. See the screenshot for details.
The tunnel can be modified further:
- At the end of the curve, extend the tunnel out in a straight line for a distance, then again for 32 units or so.
- With the ending loop selected, move the pivot down to floor level, then enter the Scale E tool. Scale down the loop so that you create a pinch in the tunnel. Since it's scaling around the pivot at the bottom, the floor level doesn't change, but the walls and ceiling are pulled in and out as the scale value changes.
- With the tunnel edge still selected, extend the edge a little further.
- Press P to create a new polygon face to plug the end.
- Then use the Cut tool C to make a rectangular doorway in the end.
- Extrude the rectangle face out a little to make a hollow.
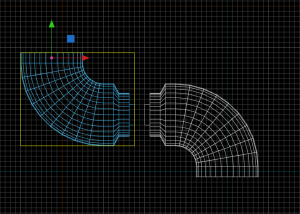
Duplication can be a quick way to add some more to the tunnel. Switch to Meshes mode and a Top 2D view. Select the chunk of tunnel you've already created, then use ⇧ Shift + Translate T to make a copy. It's important to do this in Meshes mode instead of Faces. If you did this in any other mode you'll notice it starts to extrude the elements instead of make a copy. Rotate the new mesh so that the two 'doorway' sections are close to each other. Note how these operations take place around the origin which you previously moved.
Workflow Notes
It is technically possible to create everything from one mesh or even sew it all together into a single, likely rather complex mesh. This has the consequence then of becoming awkward to work with. Duplication can become difficult and even selection is unwieldy if the mesh is overly complex.
By limiting meshes to reasonably detailed, reusable chunks, this will help duplicating sections to extend the world. Otherwise there's a risk of spending too much time selecting, re-selecting, or maneuvering around areas of the world.
To wrap up this tutorial connect the two segments of the tunnel together. This may not be desirable all the time, but for now, it will work. Select the edges for both door sections created earlier and Bridge B them.
Next: Mesh Editing 4
