Emancipation Grid
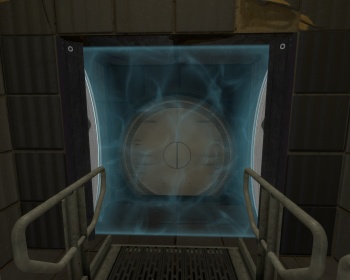
An Emancipation Grid (also Emancipation Grill or, more commonly, Fizzler), is a special energy field in ![]() Portal and
Portal and ![]() Portal 2 that resets the portal gun of any player (destroying both portals) and vaporizes other objects that touch it. It also blocks portals.
Portal 2 that resets the portal gun of any player (destroying both portals) and vaporizes other objects that touch it. It also blocks portals.
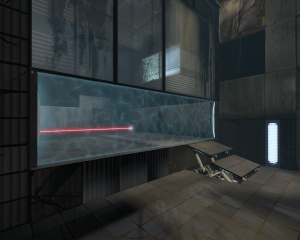
These should be used wherever you don't want the player shooting one portal in one area and another in a second and when you don't want the player to bring objects into another area. These destroy portals and objects.
In Portal, the Emancipation Grid is composed of two models, a trigger-textured invisible trigger_portal_cleanser and a particle system emitter (info_particle_system).
In Portal 2, however, it is composed of an entity (also trigger_portal_cleanser) and a pair of models (fizzler.mdl). The brush used for the trigger should be Nodraw except for the two visible faces, which should have a fizzler texture on them.
Contents
Instance
As with most of Portal 2's testing elements, there's a number of instances for emancipation grids. These are static and are only 128x128 units, and they were specifically designed to work in conjunction with the turbine elevator, so their use is very limited. They come in three designs: decayed black, decayed white, and clean black.
- instances/gameplay/fizzler_black_clean_128x128.vmf
- instances/gameplay/fizzler_black_dirty_128x128.vmf
- instances/gameplay/fizzler_white_dirty_128x128.vmf
This tutorial aims to be easy to understand even for users with little or no knowledge of Hammer.
Step 1
Create a prop_dynamic and, for this tutorial, use the world model "models/props/fizzler.mdl". There are a few more "fizzler" models for use in the Old Aperture-themed maps, and for dynamic 'open-close' sequences. Change the skin on the modern models to choose between Clean, Rusty, and Laserfield skins.
models/props/fizzler.mdl: Static model that is always open.models/props/fizzler_dynamic.mdl: Dynamic model with open/close animations.models/props_underground/underground_fizzler.mdl: A 128*128 model used for corridors and entrances. Use the "fizzler_underground" texture.models/props_underground/underground_fizzler_wall.mdl: A model for larger fizzlers.
These are the main four, although there are more models, some more detailed and some less.
Step 2
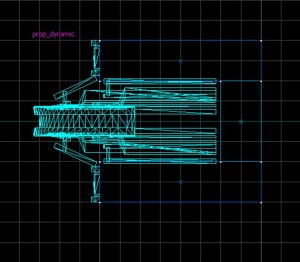
Now you would like to place one model at each end of the area you would like things would get 'fizzled' in a way they both face each other. The fizzler model, as you might have noticed, sinks in the wall to let the closing animation be played if necessary; even though we are using the "static" model, the socket is still there.
To solve this we would make three brushes that surround the fizzler from the back, sides, and part of the front (note that the side brushes would be the front side too). Don't forget to tie these brushes to a func_detail.
We would now make two brushes, each 32x8 units, and 128 units tall, and we would place them on each side of the fizzler's model. Make sure the fizzler's attachment panels sit each on a brush as seen in the picture.
Add one more brush behind the model to seal off the void (if there's another wall there already, there's no need for it).
All these brushes can be textured with toolsnodraw, although the brushes on the top and bottom should be textured with the floor/ceiling texture.
Step 3
Create a brush using the Nodraw texture (tools/toolsnodraw), extending from one fizzler model to the other. This will act as the emancipation area. It should be one unit thick and 128 units high. Tie the brush (pressing Ctrl+T) to a "trigger_portal_cleanser" entity. Set "Visible?" to yes and hit apply.
Make sure you checkmark, in the flags tab, the "Physics Objects" if you want things other than your portals to be removed when touching it, like cubes and turrets.
Step 4
Open the Texture Application tool and select only the front and back faces of the fizzler, the parts that will be seen. Click "Browse" and filter "fizzler" select "effects/fizzler" and change the texture scale to 0.125 on both the X and the Y axis, now click "Apply".
You should now have a working fizzler! If you name it you can open and close it through the I/O system, in this case, don't forget to choose a "models/props/fizzler_dynamic.mdl" and to add proper animations when it's closed and opened.
Dynamic Fizzler
Sometimes, when the fizzler is a test element in a chamber, it must be enabled/disabled or opened/closed. This following tutorial teaches you how to make a dynamic fizzler.
Step 1
1. Create 2 prop_dynamic entities with the following settings:
Property Name Value World Model models/props/fizzler_dynamic.mdl Name fizzlers HoldAnimation true Collision Not Solid
2. Create a block trigger_portal_cleanser, 128 units high. Give it the following settings:
Property Name Value Name fizzler_brush Visible yes
Select Flags :
- Clients
- NPCs
- Physics Objects
Step 2
3. Create a logic_relay entity with the following settings:
Property Name Value Name relay_fizzler_enable
and following Outputs:
4. Create a logic_relay entity with following settings:
Property Name Value Name relay_fizzler_disable
and following Outputs:
Step 3
A trigger is necessary to open and close the fizzler. In this tutorial, we'll use a simple prop_floor_button. When the player, or a cube, presses the button, the fizzler will be disabled. And when the button is unpressed, the fizzler becomes enabled.
5. Create a prop_floor_button entity with the following Outputs:
Your dynamic fizzler is now operational! You can also change the trigger, for example a prop_button, a trigger_multiple, etc.…
Larger Fizzlers
Sometimes a fizzler should be higher or wider than 128 units, but as the fizzler model is only 128 units tall a set of another two fizzler models and brushes on top of the ones you just created are required. To do this, simply copy-drag everything you just created 128 units high, and repeat as many times as necessary.
Do not stretch the brushes to the height you need, as you want only a part of the field to flash in white when a portal shot hits it; For consistency, official maps use this approach.
To make the fizzler wider, we would need to split the brush into three parts. Just use the Clipping Tool (⇧ Shift+X) on the sides closest to the models, make sure both sides of the clip remain (both are highlighted in white). These two new brushes should be 64 units long. The middle brush should stretch between these two brushes - its length doesn't matter. Again, open the Texture Application tool and color both front and back sides of the middle brush with "effects/fizzler_center", one of the other brushes with "effects/fizzler_l" and the one left with "effects/fizzler_r". Then 'Fit' the texture to the face. Due to the way texture wrapping works, a small seam can be seen on the edge of the l/r brushes. To fix this, use the Vertex Tool (⇧ Shift+V) to widen the center brush by about 4 units, shrinking the others to match. This ensures the textures don't resize in any way.
"fizzler_l" and "fizzler_r" are the direction of the glow emitted by the device, an effect the middle part does not have.Notes
For Old Aperture, there are similar textures:
- Center:
effects/fizzler_underground_wide_center - Left:
effects/fizzler_underground_wide_side_l - Right:
effects/fizzler_underground_wide_side_r - Short:
effects/fizzler_underground_side_emitters
trigger_portal_cleanser, especially if using a dynamic fizzler, or else your Models WILL get emancipated!

