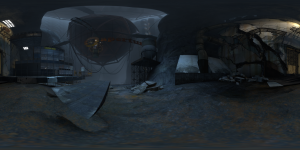
Panorama Creation

What is a panorama?
A Panorama is a type of picture that is created by combining together multiple pictures to create one single wide-angle picture which can be used to create an unbroken view of the whole region surrounding an observer..
This can give the viewer the illusion of being "inside" the image.
The process of combining the images together is called "stitching".
Prerequisites
In this tutorial Hugin was used to create a 360° view of the map "sp_a3_transition01" from ![]() Portal 2.
Portal 2.
However, there are plenty of other programs on the internet that can be used for creating panoramas, even ![]() Adobe Photoshop has the functionality integrated. Tutorial for stitching images in photoshop
Adobe Photoshop has the functionality integrated. Tutorial for stitching images in photoshop
Optionally, if the images are in the standard .tga format, ffmpeg can be used to quickly convert all of them to .png format. Below is a windows command line command for batch image conversion with ffmpeg.
for %f in (*.tga) do ffmpeg -i "%f" "%~nf.png"
Creating the panorama
To create the panorama we first need some images of the scene we want to turn into our panorama.
- Choose the location.
- Activate cheats with
sv_cheats 1 - Hide the gun viewmodel and hud with this chained command:
r_drawviewmodel 0;crosshair 0;cl_drawhud 0 - Set the FOV (field of view) to 90° with
fov 90 - Disable developer mode if it is active to avoid capturing the console output in the screenshot.
developer 0. - Stand still in the chosen location and enter the following commands one by one.
mat_vignette_enable is a hidden cvar so mat_postprocess_enable 0 has to be used| Perfectly horizontal | Angled 45° down | Angled 45° up | Up / Down |
|---|---|---|---|
| setang 0 0 0 | setang 45 0 0 | setang -45 0 0 | setang 90 0 0 |
| setang 0 45 0 | setang 45 45 0 | setang -45 45 0 | setang -90 0 0 |
| setang 0 90 0 | setang 45 90 0 | setang -45 90 0 | -=/=- |
| setang 0 135 0 | setang 45 135 0 | setang -45 135 0 | -=/=- |
| setang 0 180 0 | setang 45 180 0 | setang -45 180 0 | -=/=- |
| setang 0 225 0 | setang 45 225 0 | setang -45 225 0 | -=/=- |
| setang 0 270 0 | setang 45 270 0 | setang -45 270 0 | -=/=- |
| setang 0 315 0 | setang 45 315 0 | setang -45 315 0 | -=/=- |
screenshot command. To make the process quicker bind the screenshot command to a key with bind key_you_want screenshotStitching the images
Once the images have been acquired and converted into png format, Hugin can be started.
- Under the "Assistant" tab press the "Load images" button and select all of the images that are part of the panorama.
- When prompted set the "HFOV (v)" setting to 90 (as seen in the image).
 Note:In the iterations step, the process will show what appear to be errors but they're not actual errors.
 - Next, press the "Align" button to start the automatic alignment process. This can take a while.
- Enter the "Move/Drag" tab and apply a roll of 180 if the panorama appears upside down.
- Go back into the "Assistant" tab and press the "Create panorama" button and set the output image format which is labeled as "LDR Format".
 Note:If you have not yet saved your project it will prompt you to save it and then prompt you where you want to save the panorama it is about to output.
 - You're done!
External links
- Panorama to Cubemap: Useful tool for turning panoramas into cubemaps
- Official Hugin download link
- cubemap
- env_cubemap
