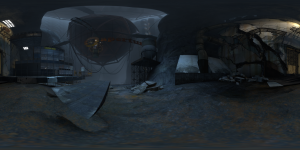
Panorama Creation

From Valve Developer Community
Jump to navigation Jump to search

In this tutorial you will learn how to create your own panoramic views using screenshots taken within the Source engine. It will assume that you know how to use the console and the Source engine in general.

What is a Panorama Image?

A panorama image typically refers to a very wide-angle image created by combining multiple photos together, to create an image with a wider perspective than could be obtained by a single photo. The process of combining the images together is called "stitching".

That image after being transformed can sometimes be viewed using a viewer that creates the illusion that we are inside the image. There are several viewers to view panoramas (and several formats).

With this tutorial you will learn how to create a static image panorama, as well as panoramas that use the QTVR "Virtual Reality" format (QuickTime Virtual Reality).

You need QuickTime (unsupported) to view the QVTR samples.

Creating Panoramic Views

Creating a panorama using the Source engine is very similar to creating them in real life. But, instead of taking pictures using a real camera, you take screenshots using the engine.

There are a lot of panorama creation tools so feel free to find one to your taste and use this tutorial as a base only.

Recent versions of Adobe Photoshop include an "Auto-Align Layers" function which can automatically stitch together several images to make a static panoramic image, including distorting images to make them align better. This takes very little time to set up and seconds to process, however, the end result is a single normal image, rather than format for a panorama viewer plugin.

This tutorial also shows two ways of creating panoramic views to be used in the QVTR virtual reality format. The GoCubic way is simple but the results are not so good while the Realviz Stitcher way requires more work but the results are a lot better.

Preparing to make the panoramic view

Before you start taking the screenshots that will be used to make the panoramic view you should choose the location from which you are going to make the panoramic view. It should be a interesting area with good lighting (no one will want to see a boring area or a area that is too dark to see).

Creating panoramic views using Adobe Photoshop or Realviz Stitcher

By Davide 'DAV' Cintrão

Briefly it requires a lot of screenshots, a lot of stitching, and Realviz Stitcher. I used Realviz Stitcher 3.5, it is not the latest version but the newer version should be similar. Realviz Stitcher Express should work also.

Pros:

  • Higher quality Panoramic Views
  • Water shown correctly
  • Textures shown as in game (with reflections)

Cons:

  • a lot of work to take the screenshots
  • Requires a lot of work to stitch the screenshots

Preparing the Source engine to take the screenshots

Since the only goal is to take screenshots, you should raise all Video settings to the maximum allowed by your system, including the game resolution. Source may turn into a slide show but don't worry about that because you are only going to take screenshots, not to play.

You need to hide the gun model and the hud:

  • r_drawviewmodel 0 - hides the gun model (0: hide; 1: show, impulse 200 also works)
  • cl_drawhud 0 - hides the hud (0: hide; 1: show)

And change the fov (field of view) to 90 degrees:

  • fov 90 - game default: 75

Also, if the area where the screenshots are going to be taken has enemies, water or some moving parts, you will need to freeze Source (if you don't freeze it the moving content will appear blurred in the created panorama). For the moving parts simply change the map to make them stop.

For the rest, the normal pause doesn't work (at least, I failed to make it work as needed) but, there are some console commands that can help:

  • host_timescale - slows down the host (1: normal speed; 0.1 - 10% of normal speed; 0.01 - 1% of normal speed; 0 - doesn't work)
  • phys_timescale - stops the physics where they are (1: normal speed; 0 - freezes physics)
  • ai_disable - should be used with npc_freeze, disable the ai of all npc (1: disabled; 0: enabled)
  • npc_freeze - should be used with ai_disable, freezes the npc (it will freeze/unfreeze the npc in the crosshair, check npc_select to change targeted npc)

Use the console commands above as you need, for example, if you want to make a panoramic view where you will see a lot of barrels in the air enter phys_timescale 0 when the barrels are in the air and they will stay there.

Also, you may need to disable a darkening vignette (common in games since Left 4 Dead) that otherwise will appear duplicated across your panorama pieces.

  • mat_vignette_enable 0 - disables the vignette. If it's still on your screen it might need to be turned off in Postprocess controller, a point entity that controls screen effects like vignettes and film grain that are undesirable for panorama creation. In Counter-Strike: Global Offensive, mat_vignette_enable is a hidden cvar. As a last resort, there is mat_postprocess_enable 0.

Taking the screenshots

You need to take a lot of screenshots in different angles to make the panoramic view.

There are two ways to take the screenshots in the Source Engine:

  • jpeg - jpeg console command (jpeg_quality changes the quality)
  • tga - screenshot console command

Bind a key to the way you want to take the screenshot (later, you will need just to press that key to take the screenshot). Realviz Stitcher opens both jpeg and tga file formats.

The screenshots will have to be made using the same origin using different angles (you cant move the player while taking the screenshots).

Using Precise Angles

Note.pngNote:This part is not necessary if stitching using Photoshop, as Photoshop's auto-alignment allows freehand screenshots to be taken. The screenshots will work provided the player only rotates the camera view using the mouse and doesn't move the camera's origin

Instead of moving the players view in different angles by hand, a good way to make sure you got all the needed screenshots is to use the setang command to set the players view angle.

The setang command will change the players view to the entered angle:

  • setang X Y Z - X: look left-right (horizontal); Y: look up-down (vertical); Z: pitch (not needed, always 0)

You should take a screenshot every 30 degrees, both in the X and Y axis. But, in the 60/-60 Y degrees a screenshot every 45 degree is enough for the X axis and, in the 90/-90 Y degrees one single screenshot is enough.

And so, you need to keep setting the angle (using the console) and take the screenshot (ESC will close the console):

setang 0 0 0
screenshot
setang 0 30 0
screenshot
(...)
setang 0 300 0
screenshot
setang 0 330 0
screenshot
setang -30 0 0
screenshot
setang -30 30 0
screenshot
(...)
setang -30 300 0
screenshot
setang -30 330 0
screenshot
setang -60 0 0
screenshot
setang -60 45 0
screenshot
(...)
setang -30 270 0
screenshot
setang -30 315 0
screenshot
setang -90 0 0
screenshot
(...)
setang 30 0 0
screenshot
setang 30 30 0
screenshot
(...)
setang 30 300 0
screenshot
setang 30 330 0
screenshot
setang 60 0 0
screenshot
setang 60 45 0
screenshot
(...)
setang 30 270 0
screenshot
setang 30 315 0
screenshot
setang 90 0 0
screenshot

You will probably take more screenshots then needed (specially on the higher/lower Y axis) but no problem there since you are not forced to use all the screenshots to make the panorama.

If you still have moving parts that you didn't manage to stop/freeze, take a screenshot of those moving parts and then use them in the stitching (it helps to reduce the blurring).


Some screenshots samples from above: Realviz Stitcher screenshots sample.

Stitching using Photoshop CS-series

Note.pngNote:This tutorial used CS4, but CS3 and CS5, and possibly newer versions (including CC) have similar image-alignment tools. The tutorial assumes you have basic knowledge of layers and the crop tool.
  • Create a new document, with dimensions large enough to hold your screenshots. You might want to start off with something as large as 4000x4000, as you can always crop it.
  • Drag each screenshot you will be using into the document as a new layer. Roughly arrange the layers in the right positions (this can be very rough as Photoshop will realign them anyway) and in the right order. When one image overlaps another, the higher image will be preferred, but they may be blended during the final step.

Panorama Part 1.jpg

  • Select each layer and go to Edit>Auto-Align Layers. Use these settings and accept.

Panorama Part 2.jpg

  • The images will be automatically distorted and positioned to make a rough panorama. The edges won't be perfect, but that's okay, the next step will seamlessly blend them.

Panorama Part 3.jpg

  • With each layer still selected, go to Edit>Auto-Blend Layers. Use these settings.

Panorama Part 4.jpg

  • This will give you a seamlessly blended panorama

Panorama Part 5.jpg

  • The last step is simply to crop the image to remove the empty space around the edges. Enjoy your panorama.

Complete Panorama.jpg

Stitching using Realviz

To do the stitching you need to do this:

  • Start Realviz Stitcher 3.5
  • It will open the default new project, you can keep it or go to the File Menu and select the New Item

Realviz Stitcher screenshots sample.

  • Load all the screenshots you have taken before using the toolbar button or going to the File Menu and selecting the Load Images Item

Realviz Stitcher screenshots sample.

  • Drag the first screenshot to the main area. This will be the screenshot that all other screenshots will use to be stitch, so pick the screenshot that was taken from the angle 0 0 0 (should be the first).

Realviz Stitcher screenshots sample.

  • Now keep dragging the screenshots until you get a 360 angle image and a closed panorama. To do this, you need to drag the screenshots near the already dragged ones and press enter. Realviz Stitcher will then stitch the screenshots or ask you to readjust (or force it).

Realviz Stitcher screenshots sample.

If you are having problems using Realviz Stitcher check the Realviz Tutorials.

When you end the stitching you will have something like this:

Realviz Stitcher screenshots sample.

Finishing the Panoramic View

With all the screenshots stitched and with a closed panorama you can now make the panoramic view.

Go to the Render Menu and select the Render Item and set the settings you want for the panoramic view. Try different values as you want/need.


Recommended settings when making panoramas:

  • For low quality panoramic views but smaller files: type QTVR (JPEG, High Quality, Motion 75%, Static 75%, default for the rest); Image Quality Method 1; Sharpen normal; Resolution 768x768. Sample here.
  • For high quality panoramic views but bigger files: type QTVR (JPEG, High Quality, Motion 75%, Static 75%, default for the rest); Image Quality Method 1; Sharpen normal; Resolution 3072x3072. Sample here (FilePlanet download).


It'll take some time to create the panorama but at the end you will have your QTVR panorama created.

Samples

Creating panoramic views using GoCubic

By David Johnson: original posted here. Used with the authors permission.

Briefly it requires the console commands mat_envmaptgasize 512, envmap and the GoCubic tool.

Pros:

  • very easy to use

Cons:

  • Water doesn't show up correctly (no reflections)
  • Low resolution (512x512 maximum)
  • Shiny textures appear not so shiny


Preparing the Source engine to take the screenshots

You need to increase the envmap tga size to the max supported using the console command:

  • mat_envmaptgasize 512


Taking the screenshots

Simply type the following command using the console:

  • envmap


This will create 6 screenshots in the cubemap_screenshots directory that will be named 'XX.tga', where XX is coded as ft (front), lf (left), rt (right), bk (back/behind), up (up) and dn (down).

For example: GoCubic screenshots sample.


Setting the screenshots

GoCubic expects to be given 6 images named in sequence, i.e. 'shot1.tga', 'shot2.tga', 'shot3.tga', 'shot4.tga', 'shot5.tga' and 'shot6.tga'. These map to the front, right, back, left, up and down images.


Naturally, Source naming differs. So, we need to rename the images we've already got to match, for example:

d1_trainstation_01rt.tga » d1_trainstation_1.tga
d1_trainstation_01ft.tga » d1_trainstation_2.tga
d1_trainstation_01lf.tga » d1_trainstation_3.tga
d1_trainstation_01bk.tga » d1_trainstation_4.tga
d1_trainstation_01up.tga » d1_trainstation_5.tga
d1_trainstation_01dn.tga » d1_trainstation_6.tga


All the screenshots are now ready to make the panoramic view.

Making the Panoramic View

Converting to a GoCubic supported format (Episode 1 Mods and latter):

  • Download and install Photoshop from here
  • Download the DirectX 9 D3DXTextureFormat.8bi plug in from here or direct here.
  • Install the plug in as per the readme
  • Open the 6 PFM Files in photoshop. When asked convert the color pallet, say no, and then save the PFM file as Tiff

To do the panorama you need to do this:

  • Load up GoCubic
  • Go to the Make Pano menu and select the Make Pano Movie... item
  • Browse to the location where you renamed the files, and select the first one (e.g. d1_trainstation_1.tga), and hit Open
  • Another window will pop up asking where you want to save the generated panorama, so specify a filename or accept the default default.mov


It'll do a little crunching and within seconds you have your QTVR panorama.

See also

External links