Zh/Source 2/Docs/Level Design/Hammer Overview
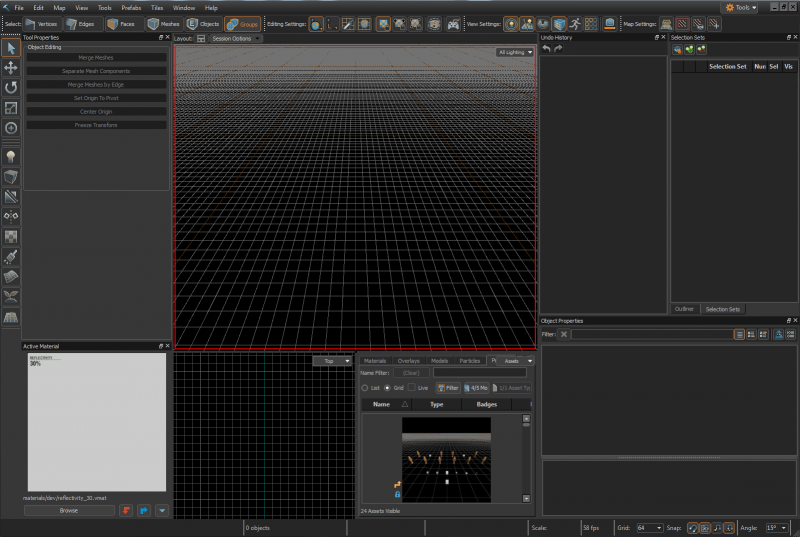
Hammer(地形编辑器)除了主要编辑窗口,大部分界面窗口都可以移动和改变大小,以适应每个人的习惯。主要编辑窗口虽然不能移动,但是有各种不同的布局选项。
3D视图
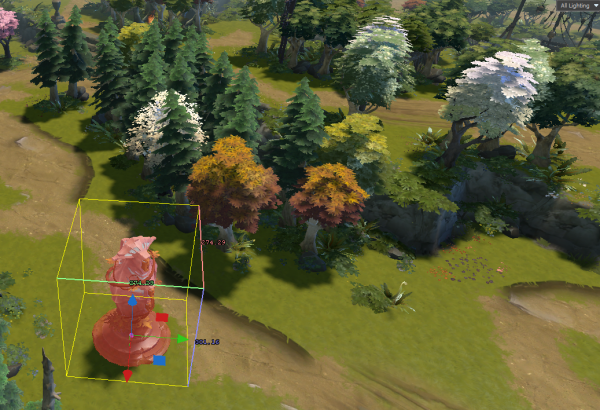
你可以在这3D视图中浏览你的地图,操作参考导航操作教程。你的大部分工作将在这视图中完成。
这个视图里你可以在 F6光照模式(All Lighting) 和 F5全亮(Fullbright) 中来回切换。
2D视图
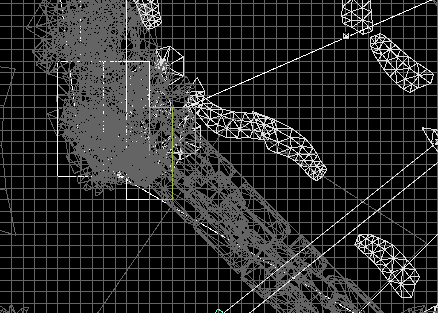
2D视图提供了顶视图,前视图和侧视图 查看你的地图,当你想从特定角度查看某个物体或者几何模型被遮挡,三视图将派上用场。
- Ctrl+空格键(Spacebar) 在顶视图,前视图和侧视图来回切换。
- Ctrl+A+空格键(Spacebar) 围绕着选择的物体中心,在顶视图,前视图和侧视图来回切换。
自定义窗口面板
几乎所有的面板右上方都有弹出面板或者关闭面板的按钮。 那个画着重叠窗口的小图标,可以使面板弹出。面板弹出时,界面布局会重新调整大小和补充留下的空间。面板也可以用小"X"关闭。
入门指南全文展现都是Hammer的默认界面布局。
工具栏
在Hammer中有各种帮助完成任务的工具。当一个工具激活时,右方的 工具属性(Tool Properties) 面板会出现工具的属性和命令。
工具是全局可访问的。这意味着你可以随时按下工具快捷键去使用它。举个例子:选择工具(Selection Tool)的快捷键是⇧ Shift+S,你在任何地方按下时将会切换到这个选择工具。
选择工具(Selection Tool)
Hammer打开时默认就是选择工具(Selection Tool)。它可以选择几何元素(顶点、边、面、网格),对象和群组。选择之后利用其它工具进行操作。
- ⇧ Shift+S - 切换到 选择工具(Selection Tool)
移动工具(Translate Tool)
移动工具(Translate Tool)可以让选中的物体沿着X,Y,Z轴移动。拖动那个红色小箭头可以往X轴移动,绿色小箭头可以往Y轴移动,蓝色小箭头可以往Z轴移动。你也可以拖动彩色方块,一次性沿着两个轴移动。移动的距离取决于地图网格的大小,但你也可以按住 Ctrl 来自由移动。
- T - 切换到 移动工具(Translate Tool)
- Ctrl+
 - 移动选中物时,暂时禁用网格吸附
 - [ 和 ] - 以二的倍数改变(减少/增加)网格大小
旋转工具(Rotate Tool)
旋转工具(Rotate Tool) 可以让模型沿轴旋转。你可以拖动红色,绿色和蓝色的圆圈,让物体沿着希望的轴旋转。在中心里,有个黄色的原点,你可以拖动它沿多轴旋转(隐藏在其他轴之下)。 旋转的角度吸附值是固定的,你可以在Hammer的右下角找到角度(Angle)值去修改它。
- R - 切换到 旋转工具(Rotate Tool)
- Ctrl+
 - 旋转时,暂时禁用角度吸附设置
 - 角度(Angle) - 在Hammer右下角设置角度吸附值
缩放工具(Scale Tool)
缩放工具(Scale Tool) 可以缩放 几何(geometry) 和 模型(models)。控制轴为红色,绿色和蓝色的方块。拖动红色方块可以沿着X轴缩放,绿色方块可以沿着Y轴缩放,蓝色方块可以沿着Z轴缩放。如同 移动工具(Translate),你可以拖动恰当的正方形沿着两个轴方向缩放。而拖动位于原点的紫色方块,可以同时沿着三个轴缩放。
- E - 切换到 缩放工具(Scale Tool)
轴心工具(Pivot Tool)
轴心工具(Pivot Tool)可以改变选中物的轴心。其他工具都是利用选中物的轴心来决定如何处理的。举个例子,如果旋转一个轴心位于精准中心的方块,那么这个方块将完美旋转。再将方块的轴心移动到方块的角落,这时候旋转将会偏移。移动元素的轴心是临时设置的,除非你使用 设置原点为轴心(Set Origin To Pivot) 。取消选择和再次选择会重置轴心。
- Insert - 进入/退出 轴心编辑工具
- End - 复位轴心
- 设置原点为轴心(Set Origin To Pivot) - 可以用来保存轴心,但只适用于网格(Mesh)
实体工具(Entity Tool)
实体工具(Entity Tool) 可以在你的地图中放置任何类型的实体。这些包括诸如 灯,玩家出现的地点,AI出现的地点,道具等。
- ⇧ Shift+E - 切换到 实体工具(Entity Tool)
- Alt+↵ Enter - 打开放置实体的属性窗口
模块工具(Block Tool)
模块工具(Block Tool) 可以创建基础网格(meshes)。最常用的网格通常是'块(block)',该工具因此得名。 世上常见的工作流程,是将基础的几何形状通过更精确的几何编辑工具(平移,旋转,缩放)来磨练出所期望的几何形状。
还有一些不需要修改的预设形状。例如,圆柱状物(the cylinder) 可快速制作出圆柱,拱形(arch) 可以创建拱形门廊或螺旋形的楼梯,等等。
- ⇧ Shift+B - 切换到 模块工具(Block Tool)
- Esc - 取消创建
- ↵ Enter 或者 Space - 确认创建
凸面工具(Convex Tool)
暂不支持(Not supported.)
裁剪工具(Clipping Tool)
裁剪工具(Clipping Tool) 可以将几何形状以不同方式进行裁剪。裁剪只能在2D视图中进行,而且一定要按↵ Enter来确认,否则裁剪改动将不会保存。裁剪工具(Clipping Tool)有三种不同的裁剪模式,保存裁剪的一边,或是另一边,或者两边都保存。你可以重复按⇧ Shift+X快捷键来切换模式。
- ⇧ Shift+X - 切换到 裁剪工具(Clipping Tool) / 切换 裁剪模式
- ↵ Enter - 确认裁剪
镜像工具(Mirror Tool)
镜像工具(Mirror Tool)可以根据用户自定义的轴线镜像选中的物体。在2D视图中,单击后拖动一条轴线,根据这条轴线镜像选中的物体。按↵ Enter确认。
- ⇧ Shift+F - 切换到 镜像工具(Mirror Tool)
- ↵ Enter - 确认镜像
纹理投射工具(Texture Projection Tool)
纹理投射工具(Texture Projection Tool) 是用来做基本的UV贴图。 可以作用于复杂的几何形状,但是需要微调。还有更加自动化制作UV贴图的方法,包含在文档的其它部分里。
- ⇧ Shift+P - 切换到 纹理投射工具(Texture Projection Tool)
油漆工具(Paint Tool)
油漆工具(Paint Tool)可对几何形状的材质进行混合(通常作用于地形 但不限于地形材质)。
- ⇧ Shift+V - 切换到 油漆工具(Paint Tool)
位移工具(Displacement Tool)
位移工具(Displacement Tool) 是Hammer使用位移(displacements) 为基础,雕刻几何形状的方法。一般只有需要建立连绵起伏的丘陵的地形为基础的地图才会使用到这个工具。
- ⇧ Shift+D - 切换到 位移工具(Displacement Tool)
Asset Spray Tool
The Asset Spray Tool is a work-in-progress, unsupported tool that allows any asset to be "painted" onto surfaces in the world.
Tile Editor
The Tile Editor allows the easy creation of custom maps using a set of predefined tiles that link together to form a playable gameplay space. In Tile Editor, you can paint terrain, water, paths, trees, plants, and even place shops, barracks and other gameplay objects. See the Tile Editor introduction for details.
Selection Modes
Your active Selection Mode defines the element that can be selected. Vertices, edges, faces, meshes, objects, groups, bones, and navigation are all valid selection modes.
Selection modes are covered in more detail in Basic Construction.
- 1 Vertices
- 2 Edges
- 3 Faces
- 4 Meshes
- 5 Objects
- 6 Groups
Undo History
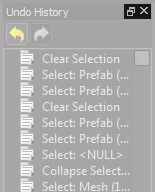
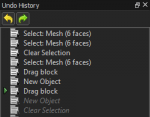
Each action taken in Hammer will appear in the Undo History. Clicking on a previous change which will change the state of the map to that point in time. There are cases where this is a much clearer and faster way of undoing changes than using Ctrl+Z a large number of times to get to your desired map state.
- Ctrl+Z - Undo
Command History
Any action performed in Hammer gets tracked as a command in the Command History pane. The Repeat Commands can be used in conjunction with the selected command (or multiple selected commands) to repeat the desired action.
For more on this see Command History.
- ⇧ Shift+G - Repeat single command
Outliner
The Outliner pane provides a view of all the objects in a map. Objects can be selected here much like in the 2D or 3D view. Basic searches can be run via the Mapnode name filter field. Advanced filtering options are located under the Entity filter options checkbox, which allows searching of entities by various class and/or any key/value combinations.
Selection Sets
The Selection Sets pane displays all the objects in the map. The Auto selection set is generated automatically and contains all the objects in a map. Custom selection sets can be defined via the New Selection Set button. You can use the buttons to the left of a category to hide or show objects en masse.
It may be desirable to place an entire region of a map in a selection set to easily toggle on/off. This would be accomplished via a new custom selection set to help keep the map more organized. This is especially useful in very complex or large maps.
Object Properties
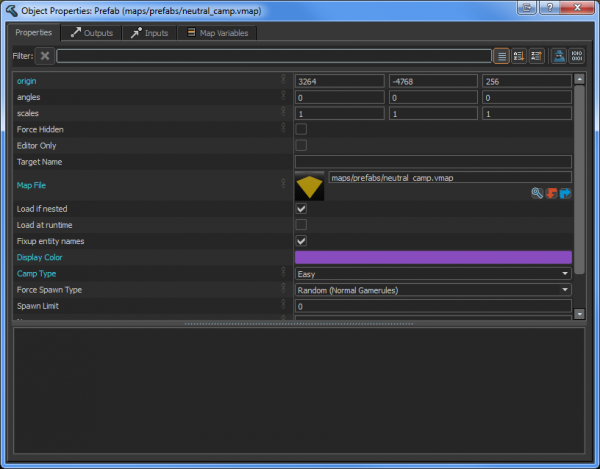
The Object Properties pane displays the various properties that can be changed on any given object. Object Properties contains everything that defines a particular entity, and also includes the Input and Output tabs of the logic system.
- Alt+↵ Enter - Object Properties
Active Material
Displays the currently active material. Any geometry created will have this material applied to it. Click the Browse button to set it to a different material. When in Faces selection mode, right-clicking a face and choosing Lift Material Under Cursor from the drop-down menu will make it the active material.
- Ctrl+M - Lift material under the cursor and make it the new active material
- ⇧ Shift+T - Apply active material to the currently selected face or mesh
Assets Tabs
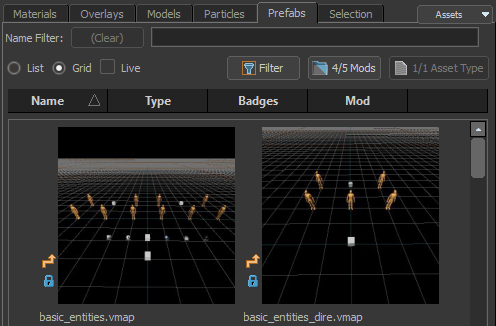
Similar in setup to the Asset Browser, this contains tabs for each of the various types of pieces of content used to create a map: Materials, Decals, Models, Particles, Prefabs, and Selection.
Useful Settings
- Tools -> Options -> View 3D
- Backplane Distance: Change this value to adjust how far map geometry renders in the 3D viewport. This can help with rendering performance in large complex maps.
- Forward Speed Max: Adjusts how quickly the camera moves through the 3D viewport.
- Toggle Grid Navigation Preview: Displays Dota 2's navigation grid inside of Hammer highlighting pathable and unpathable regions.
- Tools -> Options -> Key Bindings can be used to see a list of all Hammer commands
- Note: This only shows commands that have hotkeys associated with them.
- Use the filter field to search for a particular context (e.g. "ToolSelection") or a particular command (e.g. "merge").
- F1 will open a help menu that shows all the command categories.
 -> All Commands does the same as above.
- Either search through the categories or use the filter field to search for a command.
Next: Basic Construction
