Ru/HDR Skybox Creation
As a courtesy, please do not edit this while this message is displayed.
If this page has not been edited for at least several hours to a few days, please remove this template. This message is intended to help reduce edit conflicts; please remove it between editing sessions to allow others to edit the page.
The user who added this notice, should you wish to contact them, is: Sodiet 07:05, 14 August 2012 (PDT) tr = idir.
В отличие от большинства текстур в игре, Skybox представляет собой коллекцию больших и ярких объектов. Это делает HDR более актуальным.
VTF текстуры используются HDR-Skybox для хранения цветов либо в слегка сжатых 16-битных значения с плавающей точкой с плавающей точкой (RGBA16161616f), либо в сильно сжатых 8-битных целых (BGRA8888). В любом случае, они будут созданы VTEX из несжатых 32-битных с плавающей точкой Portable Float Map (.pfm) файлов.
Создание PFM
clamps 1
clampt 1
И добавьте её в материалы:
$basetexturetransform "center 0 0 scale 1 2 rotate 0 translate 0 0"
Поподробнее об использовании команд можно прочитать ниже, в подпункте "Создание материалов".
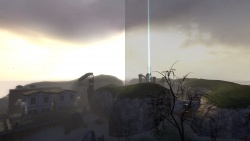
Небо с различной экспозицией
Перед созданием HDR-Skybox Вы должны запомнить, что небо выглядит в разных экспозициях:
Как вы видите, захваченные изображения меняются в зависимости от экспозиции. As you can see, the captured image changes as the exposure is altered. A single 8-bit image could never be used to create those effects: at 8-bit white is white, and the sun would only stand out if it was literally a different colour from the rest of the sky.
Create a base skybox
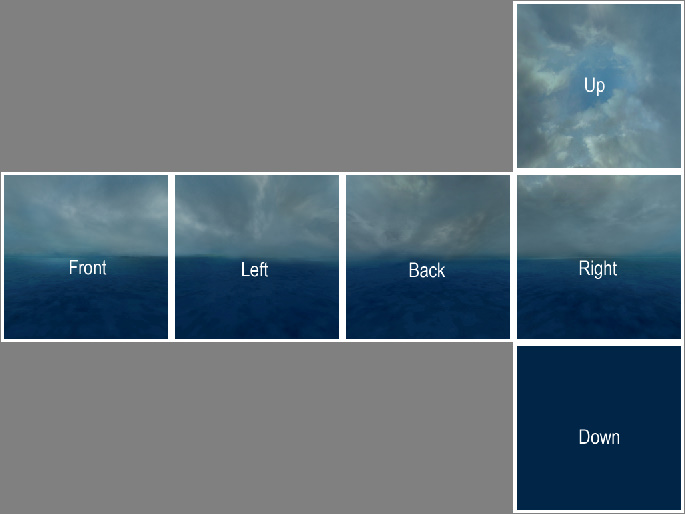
First you need to create a basic skybox cube, as you would for an LDR skybox. See Skybox (2D):ru.
With your images ready, arrange them in one large file as seen below. This step is required only if you are using the splitskybox:ru tool. If you aren't then you are quite free to handle each texture separately.
Save this assembled image as a TGA file. If you are prompted, do not use RLE compression and do place the origin at the bottom left.
Adding HDR data
We will now paint a sun into our skybox, which will behave in the same way as the 'exposures' photographs above. A good tool to use for this step is HDR Shop.
HDR Shop works by taking files created by other image editors for different exposures and merging them together at 32-bit floating point. You can adjust the exposure you are working on with the + and - buttons on your keypad, or from the menu with View > Exposure. The current value is displayed in the lower-right corner of the screen.
When you've reached the exposure you are looking for, choose File -> Edit in image editor and you will get an image to edit. HDR Shop will open the image in your default BMP editor at this point, but you can use whatever tool you want so long as you're saving the right file.
There is a more detailed tutorial available on HDR Shop's website.
When you are finished, OK away the HDR Shop's dialogue and choose File -> Save as... and select the 'Portable Floatmap' format. Name and save this PFM file as you would a 2D skybox source image.
sdk_sky_exampleup
Let's do this with sourcesdk_content\dod\materialsrc\skybox\sdk_sky_exampleup.tga. Open it up and adjust the exposure to -3 stops, then edit the image externally. Now paint in a sun.
After returning to HDR Shop and OKing the dialogue, the current exposure level will be updated with the image that you just painted.
Try adjusting the exposure up and down and you'll see that the sun is now integrated into the other exposures as well. Continue editing the different exposures until the desired result is achieved. It will be a good idea to spend some time emulating the blown-out effects around the sun and the highlights on the clouds as seen in the photographic reference.
Split the skybox
If you created your skyboxes in a single file as in the above image, you will need to use splitskybox.exe to split it into six. Just drag the PFM onto it.
Creating the materials
At this stage you should have six files:
<skyname>_hdrft.pfm<skyname>_hdrlf.pfm<skyname>_hdrbk.pfm<skyname>_hdrrt.pfm<skyname>_hdrup.pfm<skyname>_hdrdn.pfm
Make sure they are under your_mod\materialsrc\skybox\. You now need to create six corresponding TXT files (e.g. <skyname>_hdrft.txt) alongside them, in order to compile to VTF. Each must contain:
pfm 1 // Flag as HDR texture
pfmscale 1 // brightness multiplier
nonice 1 // prevent seams appearing at low texture detail
nocompress 1 // optional; removing halves filesize, but causes color banding under close inspection
Drag these text files onto VTEX and it will compile them (unfortunately VTFEdit:ru doesn't import PFMs). The VTFs will appear in the corresponding materials subfolder (e.g. your_mod\materials\skybox\).
Now you just need to create six VMTs named <skyname>_hdr<face>.vmt. These should read:
Sky
{
	// if you compiled with nocompress:
	$hdrbasetexture		"skybox/sdk_sky_example_hdrft"

	// if you didn't:
	$hdrcompressedtexture	"skybox/sdk_sky_example_hdrft"

	$basetexture		"skybox/sdk_sky_exampleft"
}
Creating LDR fallbacks
You must also create standard low dynamic range VTFs for users who do not play in HDR. Compile with these settings:
nonice 1
dxt5 1 // or nocompress
These are ordinary textures, so you can use VTFEdit:ru if you prefer. There is no need to create new materials for LDR users; they will load the _hdr ones.
Usage
In Hammer, go to Main Menu > Map > Map Properties > Skybox Texture Name and type the name of your skybox, relative to materials\skybox\ and without any of the face suffixes. (e.g. just MySky.)
See also
Sky- HDR Lighting Basics:ru - How to add basic HDR lighting effects.
- HDR Lighting Settings:ru - Information on customizing HDR lighting settings.
- Skybox (2D)
- Material:ru
- Sky Writer:ru - 3ds Max tool that renders your scene into PFM and compiles to VTF.
| Статьи об окружающей среде | |
|---|---|
| Текстуры неба и создание неба | |
| Создание рельефа местности и деформация поверхностей | Деформированные поверхности • Создание отверстий в деформированных поверхностях • Цифровые модели местности • Создание рельефа в Worldmachine |


