Zh/Basic Construction
笔刷
笔刷是在起源引擎的所有地图中创建固体的基本工具。地板、墙面、天花板,等等这些非模型的几何体都由是笔刷构成的。
创建笔刷
- 选择方块工具
 。
。 - 创造一只盒子,先在二维顶视图(默认情况下是右上角的窗口)中点击并拖拽鼠标设置笔刷大小,如图二。
- 按下回车键创建这个物体。另外也可以在笔刷内点击右键然后选择Create Object。
注:如果在你的东西没有任何纹理,要显示纹理的话,到相机视图中查看 > 3D Textured Polygons 。
Selecting brushes
Click on the Selection Tool ![]() . It is used to isolate an object or group of objects you wish to manipulate. With the Selection Tool active, highlight your brush by clicking on it in one of the windows. (In a 2D window click on the edges or center of the brush. In the Camera view, click anywhere on the object.)
. It is used to isolate an object or group of objects you wish to manipulate. With the Selection Tool active, highlight your brush by clicking on it in one of the windows. (In a 2D window click on the edges or center of the brush. In the Camera view, click anywhere on the object.)
You will notice that the selected brush will be highlighted with red, and get eight little white square handles in the 2D views. These handles allow you to rotate and transform the selection (see Resize, Rotate , & Skew, below).
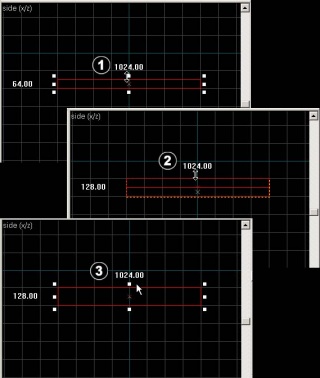
Note that the brush looks like a 3D wireframe box. Flatten the box so that it looks like a thin slab and move it so that the camera is above it. Think of the brush as a 3D chunk of ceiling or floor or wall, not a room all by itself. It takes 6 brushes to make a room.
The grid
A grid is displayed in all the 2D views. By default, all objects snap to the grid. Although you can turn this off, it is considered good practice to leave it on because it prevents leaks and other errors in your map.
The default grid size is 64 units, which means that each lin is 64 units apart. You can change the grid size by pressing the [ and ] keys.
- Clicking the Smaller Grid icon
 will make the grid half as big, for finer adjustments.
 - Clicking the Larger Grid icon
 ] will make the grid twice as big, for larger adjustments.
To help determine the appropriate scales needed for a playable map, please see the article on Dimensions.
Resize, Rotate, & Skew
Resize
Select a brush using the Selection Tool ![]() and mouse over one of its eight white handles. The cursor should change to arrows, indicating along which axis you can move that handle.
and mouse over one of its eight white handles. The cursor should change to arrows, indicating along which axis you can move that handle.
To resize, simply click and drag one of these handles.
Rotate
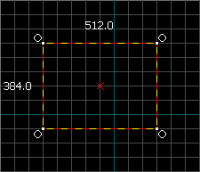
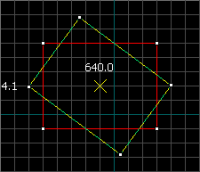
Select the object you wish to rotate using the Selection Tool ![]() , then click once on the object. You should see the object surrounded at the corners with circles.
, then click once on the object. You should see the object surrounded at the corners with circles.
Mouse over a circle in any 2D view, then click and drag to rotate the object.
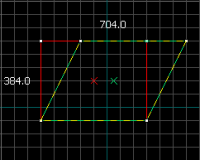
Skew
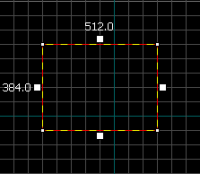
Select the object you wish to skew using the Selection Tool ![]() , then click twice on the object. You should see small white squares at the center of each edge of the object.
, then click twice on the object. You should see small white squares at the center of each edge of the object.
Mouse over a white square in any 2D view, then click and drag to skew the object along that axis.


