Ru/Intermediate Lighting
Этот учебник охватывает более продвинутые способы освещения, используемого на картах Source. Если вы новичок в работе с Hammer, прочтите сначала добавление света. Здесь будут раскрыты все возможные способы создания освещения, а также все параметры, связанные с игрой света. Это будет сопровождаться серией углублённых мини-статей.
Энтити освещения
Это - список сущностей физического освещения в той или иной форме. Заголовок каждого раздела ссылается на страницу данной сущности.
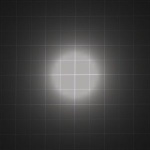
light
Статичный, невидимый, всенаправленный источник света. Может включаться и выключаться через систему ввода-вывода (обратите внимание, что это усложнит вашу карту освещенности, и при компилировании будут сохраняться значения для всех комбинаций вкл/выкл, что скажется на загрузке памяти). Можно делать шаблоны с эффектами, но нельзя перемещать с места на место. Свет отбрасывается во все направления из точки энтити. Яркость зависит от установленного значения рассеивания. Данная сущность является самой простой из освещения и широко используется на картах.
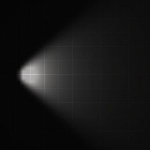
light_spot
Статичный, направленный свет. Может светить в любом направлении и содержит элементы управления свойствами формы и конуса. Также может быть включен и выключен с помощью системы ввода/вывода, однако, переключаемый light_spot может вызвать ошибки карты освещенности. Легко имитирует реальные источники света и рекомендуется для широкого применения.
light_environment
Изображает солнечный свет, направленный в одну сторону. Направление задаётся числами внутри энтити. Ключевым является то, что свет исходит из текстуры tools/toolsskybox. Первое значение - Brightness (яркость), задаёт направление освещения. Это приблизительно прямые солнечные лучи. Второе значение - Ambient (окружение), задает рассеянный свет с неба. Он падает на каждую открытую небу поверхность. В основном, цвет и яркость теней на листьях.
Если вы не хотите придумывать свои значения для этой сущности, то вот список официальных значений, используемых для каждого скайбокса в играх Valve.
Обычно, на карте требуется только одна сущность light_environment. Если вы разместите несколько таких сущностей, Vrad будет брать значения из первой найденной.
point_spotlight, npc_spotlight
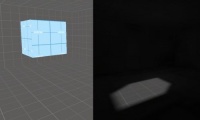
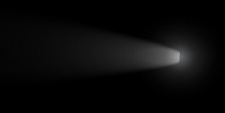
Прямой луч света для эффекта прожектора. Визуальные эффекты включают блики вокруг источника света, направленный яркий луч, и динамическое освещение земли. Не перемещается самостоятельно, но свет и его цель могут быть привязаны к двигающейся сущности. Также, npc_spotlight может использоваться для создания визуального эффекта, когда светом управляет интеллект NPC. Этот источник динамического света весьма нагружает графику, и должен использоваться бережно.
Связанные элементы
Это - список всех тем, связанных с энтитями, которые не испускают свет. Несмотря на это, они нужны для эффектов, связанных с освещением. Если они управляются освещением энтить или теней antlion's, то обязательно попадают под эффекты освещения.
env_sun
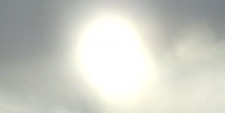
Зачастую неправильно трактуется как солнечный свет, по сути являясь эффектом наложения бликов на небе, который выглядит и действует как солнце. Он вообще не излучает свет, но часто используется вместе с light_environment для создания эффекта освещения.
env_sprite
Еще одна сущность, которая не излучает свет. Env_sprite в основном используется для лёгкого свечения и различных ярких засветов. В Episode 1, в конце карты используется env_sprite, изображающий большую залитую светом площадку. Это пример того, как env_sprite может быть использован в качестве яркой заливки светом из-за пределов тёмного пространства, и вместе с тем может задействовать технологию HDR. Эта карта находится в конце Ep1 и называется ep1_c17_06_d.
shadow_control
Управляет всеми динамическими тенями в игре. В эту категорию попадают тени от всех движущиеся объектов (NPC и физических энтить). Выравнивает тени согласно с освещением. Однонаправленный характер теней может стать проблемой, но триггеры помогут это исправить. В Left 4 Dead, Portal 2 и Alien Swarm, направление тени рассчитывается на уровне каждой энтити, и диктуется ближайшим от неё освещением. Но не в модах Source2006/2007, если для вашего мода не применяются Dynamic RTT shadow angles in Source 2007.
Shadow_control предназначен для использования вместе с light_environment; и поэтому имеет ограничение в использовании с light, light_spot или light_dynamic.
- Shadow_control рассчитывает тени только от одного источника света, и работать будет только один shadow_control, так что объект сможет отбрасывать только одну динамическую тень.
- Shadow_control рассчитывает тени только от 'параллельных' солнечных лучей (например, солнце / луна); игнорирует лучи от точечных источников света (например, лампы).
- Shadow_control не влияет на Lightmap (и наоборот).
Динамические тени не сочетаются с тонкими тенями Lightmap.
- Подвижные объекты (большинство моделей: NPC, prop_phys, weapon_, prop_vehicle, prop_dynamic, и т.д.) никогда не отбрасывают теней карты освещенности; но отбрасывают динамические (когда включено shadow_control). Только браши и объекты prop_static не отбрасывают динамических теней; но отбрасывают тени карты освещенности.
- Величина Lightmap не влияет на резкость/рассеивание динамических теней (шкала карты освещения примерно равна 1 luxel/unit).
- Динамические тени и тени карты освещения от одного источника света не сливаются, но пересекаются или "удваиваются".
- См. также Info_no_dynamic_shadow.
- Динамические тени падают только на браши.
Vrad
Является частью компиляции, создаёт все световые эффекты на карте. Будучи самым длинным процессом компиляции, он должен запускаться первым. Невозможность оценить световые эффекты опытным путём заставляет прибегать к такой утомительной процедуре, которая одна даёт правильное освещение. Статья компиляции в Rad будет размещена позже. Сейчас же приоритетом должно стать ознакомление с его возможностями и настройками.
Методы
Они раскрывают, как использовать указанные элементы для создания эффективного освещения. Ранее было преподано много практических знаний. Но знание бесполезно, если оно используется ненадлежащим образом. Следующие разделы покажут вам, как использовать всю полноту информации, чтобы создавать лучшее освещение на ваших картах.
Цветовая температура
Обычно, яркость цвета RGB ставится на 255 255 255, но в реальной жизни ярко белое освещение встречается редко. В зависимости от "температуры чёрного тела", оно будет излучать цвета где-то между оранжевым "красным" (именуется "тёплым", хотя его температура на самом деле ниже) и ультрафиолетовым "синим" (именуемым "холодным"), как точно показано на этой шкале. Вы можете взять эту статью в качестве ссылки на ваш способ создания света, или использовать стандартные карты Valve, где уже выставлены значения RGB для "теплого" света лампы накаливания 254 216 146, "холодного" света флюоресцентной лампы 159 237 215, и обычного сочетания ледяного света 147 226 240.
Психология освещения
Было доказано, что спектр холодного освещения "температуры чёрного тела" (см. выше) угнетает игроков, заставляя чувствовать себя неловко, а иногда и болезненно, даже если и присутствует тёплый цвет.
Эта подсознательная эмоциональная реакция может быть использована для создания определённого настроения игрока. Например, комнаты с люминесцентными лампами будут изображать ужасы, а яркие глоу-лампы - спокойную обстановку.
Например, на первой карте Half-Life 2 есть коридор, где охранник ведёт игрока на допрос (или нет). Исследование освещения покажет, что Valve постоянно сохраняет психологический эффект. Коридор начинается с обычной лампы накаливания (тёплое свечение), за которым идёт лампа дневного света (с неприятным свечением). Такая комбинация довольно редко встречается в реальной жизни, потому что это означает, что архитектор передумал строить коридор, или у электрика закончились нормальные лампы. Вероятнее всего, Valve (или Комбайны) хотели добиться эффекта перехода между опасной и безопасной зонами.
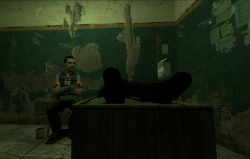
Перед тем, как зайти в одну из камер, игрок видит тревожную сцену с участием гражданина, объясняющего своё затруднительное положение. Здесь на потолке светит лампа накаливания. Скорее всего это потому, что дневной свет будет некомфортен для такого объёма. (Флуоресцентный свет используется в основном для коридоров и больших пространств.) Тем не менее, чуть в стороне расположен бестелесный light_spot, который придаёт определённое настроение сцене.
Помимо вышеперечисленных прямых эффектов, в создании определённого настроения также может помочь теория цвета. Принимаемые в качестве примера лампы дневного света, тем не менее имеют неприятное холодное ощущение, поскольку неестественное мягкое синее свечение вызывает чувство холодной пустоты и изоляции.
Хотя, цвет - не единственный эффект. Расстояние и освещённость также вносят свою лепту. Освещённые комнаты кажутся более безопасными, потому что хорошо просматриваются, а комнаты с постоянно мерцающим светом вызывают неприятные чувства, поскольку большая часть пространства скрыта от игрока. Также, если в комнате хорошо видны все углы, кроме одного, то именно этот угол станет потенциальной угрозой, и будет находиться под пристальным вниманием игроков.
Используйте эту информацию, чтобы стать дизайнером уровня. Она поможет создавать как карты ужасов, так и карты для детей, но не старайтесь испугать детей до икоты, не надо. Освещение не просто делает мир видимым, оно определяет его.
Creating a believable light source
Creating a believable light source can often be a challenge. Simply placing a light entity in a map does nothing to explain where that light came from or why it's there. A believable light source is one that appears like it should be there and sits comfortably within the environment. Often a good light is made up of multiple entities. Commonly there are two: One for the light and one for its source, often a lamp (made from a prop_static or a func_detail with an appropriate texture).
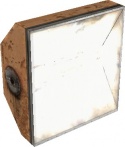
The first step is to determine what light sources are available. Look for textures or models that would be emitting light. Filtering by the word "light" or "lamp" in either the model or texture browser, works well. Now pick one that fits the feel of the room (i.e. industrial lights for an industrial scene) and place that model or texture in the room. For this example pick the light shown on the right and place it with a prop_static.
Now that there's something that looks like it would emit light, the next step is to create the light it's emitting. Look at the source that has been chosen and ask yourself if the light emitted is going to be colored by tinted glass, and if the source is focusing/shading the light into a directed light source. Use the assorted light entities and set its properties accordingly to create the effect. With the given example the light is going to be focused in one direction, so pick a light_spot. Next, this is an intense light, so give it a brightness of 1000. Now look at its color. The glass is not tinted, and while the light emitted is intense, a flood light in the real world will gain its intensity through using very reflective surfaces on its inside to focus the light, so the temperature is also close enough to justify leaving the values at 255 255 255. Now line it up compared to the prop_static, and alter the angles and focus of the light so that it appears to come from the prop_static.
Now there’s a light lined up to its source, there may be a problem though. If the aligned light source has ended up inside the boundaries of the model/brush used for the source, it is going to block the light emitted (only lighting up props). To prevent this, go into the properties of the prop_static, and make sure that it has "Disable shadows" set to "Yes". (If the light source is a brush, tie it to a func_brush and alter its properties in the same way. This prevent the light from being blocked by the light source itself.
Now that you have a working setup, a good idea is to group them (and perhaps also turn this group into a prefab for insertion into other maps) so that they always stay together. Now if you need more lights, you can copy this group.
Another way to create a high quality light source that portrays real life better but doesn't compromise on performance, is combination of a light and light_spot. Position the light_spot as described above, but position the light around 50 units away from the model that is the light's source. Make this light have a brightness of approximately 50, and be the same color as the light_spot. This will often create a more correct form of glow on surfaces that the light_spot often lacks.
Static versus dynamic
There are many advantages, performance wise, of using static light sources over dynamic ones. Static lights carry no additional processing weight so their use is essential to fast rendering maps. Dynamic lights can carry a lot of rendering weight and can be expensive to use in your map. Its important to know where and when to use each type of light and avoid using the wrong type.
Firstly static lights are calculated during the VRAD compile process; therefore, there is next to no calculations done in game it merely needs to render the light calculated which is a fast process. The common static lights are light, light_spot and light_environment but there are conditions that can change this. The problem which comes with static lights is the fact that it is static. While they allow very precise and detailed lighting no special effects can be given with static lighting because it’s not going to change.
Dynamic lighting on the other hand comes in two flavors. There are the switchable lights and the true dynamically calculated lights. Each has its own processing weight but both are expensive to render and should be used sparingly.
Switchable lights are the same as static lights in that they use lightmap information compiled during RAD. A light is set as being switchable by one of three things such as giving it a name, giving it a style, or giving it a pattern. Regular lights that don't support dynamic effects are the lights generally used as switchable lights, this includes lights like light, and light_spot but not light_environment. Switchable lights use a set of two lightmaps on and off. Switchable lights alternate or blend between the two lightmaps, this allows partial brightness while keeping it to just two lightmaps. This gives all the benefits of the static lighting but allows it to change and be partially dynamic. Say you have two switchable lights shining on the same face, how many lightmaps are needed?
- Light 1 & 2 ON
- Light 1 ON, 2 OFF
- Light 1 OFF, 2 ON
- Light 1 & 2 OFF
That's four states in total. You add a third switchable light and it goes up to eight lightmaps. Here becomes the problem with switchable lights, it becomes expensive in lightmaps to create all the possible states. So expensive in fact that there is a hard-coded limit that means you can only have two switchable lights affecting the same face. There is a slight solution though, the lights with identical names will all be given the same lightmap, so you can have 50 switchable lights with the same name shining on the same face; however, you cannot have more than 32 light source names. . Because of the extra lightmaps switchable lights use it increases the amount of time it takes RAD to run, increases file size, and also uses up system resources when it alternates between them; however, a switchable light sat in one state or the other, has little or no more effect than a static light.
True dynamic lighting is something that has to be built into the entity itself, its most often recognized by the Parent property within the entity. The entities with the built in dynamic effect are light_dynamic and point_spot. Point_spot is special in the unique fact that is has a flag that can enable it as dynamic or static, its set to dynamic by default and can often catch you off guard. The dynamic process done for dynamic lights is run entirely within the game, this means it has little to no effect on the RAD compile or file size but it will slow down your map. The system slowdown caused by dynamic lights is generally consistent as the light needs to be rendered continuously. Such entities should only be used when the source of the light is moving, if the light itself is not meant to move then it shouldn't be a true dynamic light. If it’s merely meant to turn on and off it should be switchable. No movement should be static. If used improperly the costs of using dynamic lighting will outweigh the benefits of doing so. Dynamic lights should be used even more sparingly than switchable lights. Another down side to the dynamic light is that to simplify the calculations it doesn’t run process like reflection and diffusion, this results in harsher simpler looking lights.
Static lights are easy on the engine and give great detail, but dynamic lights represent the possibility for movement and change, but cost a greater amount to render and lose detail. The easiest way to tell what effect the dynamic lights are having is to test your map with the +Showbudget command. This allows you to figure out when an effect is too much and lighting effects are slowing down your map. Good use of dynamic lights can only improve your map, but they can be a costly effect.
Quick and effective RAD
The RAD compile process can be quite long, so frequently compiling can easily slow development progress to a crawl. There are a number of strategies you can employ to tackle this:
- Turn off RAD for the majority of your compiles, and only turn it on specifically when you want to tweak and test your lighting.
- Use the Cordon tool, so you are never compiling more of the level than you need to. (If you are using a light_environment, make sure that you copy it so that there is one within the cordon boundary.)
- Make multiple changes at once. Rather than tweaking just one section of lights in the map, can you tweak multiple sets in different parts of the level, and then compile all your changes at once?
- Standardize your lighting. Choose RGB and brightness values for each type of light in your level (e.g. fluorescents, or spotlights, etc), and make each instance of that type of light have the same values to start with. Then instead of coming up with light values for each light in your level, you need only slightly tweak the light values to get the effect you need (e.g. a larger room might need a larger light of a particular type).
- Make use of any spare computer you have in your house. Install the SDK on those computers and use them to do your lighting compiles. Then you can continue doing other edits to the level, while you wait for the results of the lighting compile.
- Using a program like Dropbox or SparkleShare can automate synchronizing your map files, and make this easier.
Conclusion
This covers the base of all lighting effects that can be found in standard Source games. New lighting effects may be added with the release of Episode Two.

