Floor button: Difference between revisions
Rustyfence (talk | contribs) m (emphasized instruction) |
Rustyfence (talk | contribs) m (emphasized instruction) |
||
| Line 214: | Line 214: | ||
===Carving the hole=== | ===Carving the hole=== | ||
Ok, now select the cylinder, (not the wall) and use the [[Carve Tool]]. You can, like many other commands, use the keyboard shortcut (Ctrl+Shift+C) or right click in the 2D view and select Carve. This will slice the wall (and anything else touching the selected object) into a group of triangles that form a hole where the selected object was, in this case, the wall. From here you may grab your door (remember, both sides, with the nodraw brushes and the frame) and move it into the hole. Congratulations! You have just make a hole in the wall! | Ok, now '''select the cylinder, (not the wall) and use the [[Carve Tool]].''' You can, like many other commands, use the keyboard shortcut (Ctrl+Shift+C) or right click in the 2D view and select Carve. This will slice the wall (and anything else touching the selected object) into a group of triangles that form a hole where the selected object was, in this case, the wall. From here you may grab your door (remember, both sides, with the nodraw brushes and the frame) and move it into the hole. Congratulations! You have just make a hole in the wall! | ||
== The theory == | == The theory == | ||
Revision as of 13:07, 13 August 2008
Introduction
In this tutorial you will learn how to create a 1500-Megawatt Aperture Science Heavy-Duty Supercolliding Superbutton which when stepped on or weighted down with a box will open a specified door.
The door setup
First thing is to make the door which will open on activation of the button.
Door frame
Create a prop_static in your door way. The World Model should be set to "models/props/door_01_frame_reference.mdl" or "models/props/door_01_frame_wide_reference.mdl" (either one works).
Doors
1. Create a prop_dynamic with the following settings:
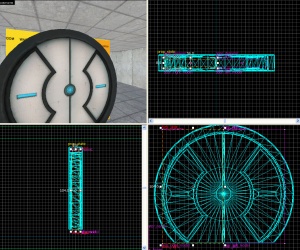
Property Name Value World Model models/props/door_01_lftdoor_reference.mdl Name door_left_model
Align it to the left, inside of the door frame.
2. Create a 56Lx8Wx104H block brush with texture nodraw centered and inside the door model. Tie it to a func_door entity with the following settings:
Property Name Value Name door_left Speed 250 Stop Sound Doors.FullClose8 Delay before Reset -1 Lip 12 Move Direction (This will be different for which way your door is facing)
Also make sure that you un-check Touch opens under Flags.
The best way to ensure you have the correct Move Direction is to first mark the direction on the circular indicator, then round to the nearest 90 degrees (so long as your doors are intended to be square with the Hammer coordinate system).
3. Repeat steps 1-3 but change the following:
For the prop_dynamic:
Property Name Value World Model models/props/door_01_rtdoor_reference.mdl Name door_right_model
And for the func_door:
Property Name Value Name door_right Move Direction (The opposite of the move direction for the left door)
4. Set the parent of door_left_model (the prop_dynamic) to "door_left". Also set the parent of door_right_model to "door_right".
The button
Models
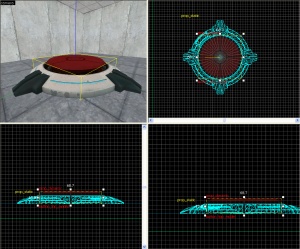
1. Create a prop_static with a World Model of "models/props/button_base_reference.mdl".
2. Create a prop_dynamic aligned on top of the prop_static with the following settings:
Property Name Value World Model models/props/button_top_reference.mdl Name button_top_model
Movement
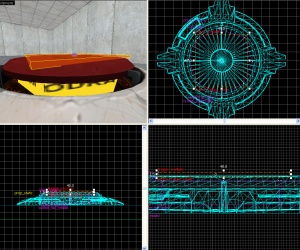
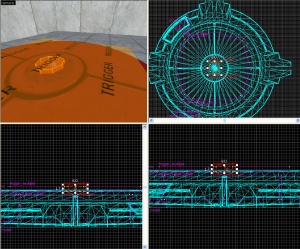
1. Next create a 58Wx59Lx9H cylinder brush with 8 sides and textured with nodraw. Move this brush right underneath your prop_dynamic. Tie the cylinder to a func_door with the following settings:
Property Name Value Name button_top_door Speed 25 Delay before Reset -1 Move Direction 90 0 0 (or Down)
Also make sure nothing is checked under Flags.
2. Set the Parent of button_top_model to be "button_top_door".
Triggers
1. Create a 48Wx48Lx1H block brush with trigger texture applied. Place it right on top of the button_top_model. Tie this brush to a trigger_multiple with the following settings:
Property Name Value Name button_trigger_player
We will set up the Output later. Also make sure to only have the flag: Client set.
2. Next create a 7Wx7Lx1H cylinder brush with 8 sides and textured with trigger texture applied. Put this brush directly on top and in the center of the button_top_model and tie it to a trigger_multiple with the following settings:
Property Name Value Name button_trigger_box
And only the following Flags are checked:
- Physics Objects
We will set up the Output later.
3. Create a filter_activator_name nearby your button with the following settings:
Property Name Value Name button_filter_boxes Filter Name (The name your box entity has)
4. Select your button_trigger_box trigger and set the Filter Name to "button_filter_boxes".
5. Create two ambient_generic entities and give one the following settings:
Property Name Value Name button_down Sound Name Portal.button_down Source Entity Name button_top_model
and the other with
Property Name Value Name button_up Sound Name Portal.button_up Source Entity Name button_top_model
6. Now go back and select the cylinder func_door brush under the button, "button_top_door" and setup the Outputs as below:
7. Select the larger trigger_multiple, "button_trigger_player" and setup the Output as below:
8. Select the smaller, cylinder trigger_multiple, "button_trigger_box" and setup the Output as below:
9. Finally, create a light entity underneath the top of the button but still inside the base. Give it the following properties:
Property Name Value Brightness 251 159 57 30 BrightnessHDR 251 159 57 20
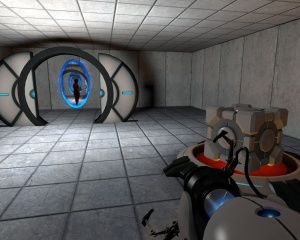
You have now created a button which will open a door by a player standing on the button or a box weighing it down. Only those two things will work on it.
Making a hole in the wall
While this step is optional, and your door may be fully functional without it, your map will look especially awkward if you just have a door in the middle of a space, and even more so if you have walls around it to block the player before opening the door. This step is simple enough, so it is recommended that you try it out.
Create a cylinder
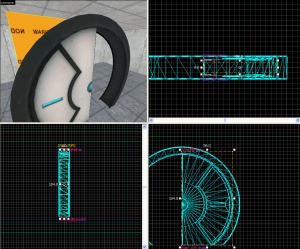
First, you will need the Block Tool to make a cylinder the same dimensions as your door. It will be 108x108, but since you are carving open a wall, make it much thicker than your door. 32 or larger will do.
Once you've done that, put it where you want your door to be when finished. Note that it will go below the ground and into the floor. In the next step you will need to move or resize the floor temporarily.
Create the space for your door
Next, you will need to place a wall where you want your door to be. This will get a giant hole blown through it in the next step, so you will be able to place your door in it. Make SURE that when you have the cylinder in the wall, nothing else is touching it.
Carving the hole
Ok, now select the cylinder, (not the wall) and use the Carve Tool. You can, like many other commands, use the keyboard shortcut (Ctrl+Shift+C) or right click in the 2D view and select Carve. This will slice the wall (and anything else touching the selected object) into a group of triangles that form a hole where the selected object was, in this case, the wall. From here you may grab your door (remember, both sides, with the nodraw brushes and the frame) and move it into the hole. Congratulations! You have just make a hole in the wall!
The theory
This is the most basic button and door setup. You can also have the triggers turn off or on other things in the map, have them trigger a logic_choreographed_scene or just about anything. For the Portal feel you can have them trigger Indicator Lights based on the button up or down status.
If you do decide to use Indicator Lights, then make sure to have the func_door (The Nodraw cylinder) Set Outputs when it closes, and opens. When it opens, set the texture Index to 1, and when it closes, set the texture index to 0, via a env_texturetoggle that controls the lights.
See also
External links
- The tutorial map - includes the source (VMF) and BSP.
