Fr/Creating a button and door: Difference between revisions
m (Nesciuse moved page Creating a button and door:fr to Fr/Creating a button and door over redirect: -Language prefixes) |
m (Using L template for links) |
||
| Line 11: | Line 11: | ||
=== Choisir la porte === | === Choisir la porte === | ||
On va poser le cadre de la porte: créer une entité | On va poser le cadre de la porte: créer une entité {{L|prop_static}} dans votre couloir. Allez dans ''World Model'' et choisissez le ''model'' "<code>models/props/door_01_frame_reference.mdl</code>" ou "<code>models/props/door_01_frame_wide_reference.mdl</code>" (les deux fonctionnent). | ||
=== Les portes === | === Les portes === | ||
| Line 17: | Line 17: | ||
A l'intérieur, on va placer la partie mouvante. Elle est composée de deux parties : la partie gauche et la droite. On commence par la partie gauche : | A l'intérieur, on va placer la partie mouvante. Elle est composée de deux parties : la partie gauche et la droite. On commence par la partie gauche : | ||
1. Créer une entité | 1. Créer une entité {{L|prop_dynamic}} avec les paramètres suivants: | ||
::{| class=standard-table | ::{| class=standard-table | ||
! Property Name || Value | ! Property Name || Value | ||
| Line 27: | Line 27: | ||
L'aligner sur la gauche, dans la ''frame'' de la porte statique. | L'aligner sur la gauche, dans la ''frame'' de la porte statique. | ||
2. Créer un ''block brush'' de <code>56Lx8Wx104H</code> avec la texture | 2. Créer un ''block brush'' de <code>56Lx8Wx104H</code> avec la texture {{L|nodraw}}. Appliquez-y (''Option>Tie to entity'') la class {{L|func_door}}. Les paramètres de l'entité ''func_door'' doivent être réglés ainsi : | ||
::{| class=standard-table | ::{| class=standard-table | ||
! Property Name || Value | ! Property Name || Value | ||
| Line 88: | Line 88: | ||
Pour rendre le bouton 'vivant', il nous faut un peu de script : | Pour rendre le bouton 'vivant', il nous faut un peu de script : | ||
1. Créer un cylindre de <code>58Wx58Lx9H</code> avec une ''brush'' à 8 côtés (''8 sides'') et avec la texture | 1. Créer un cylindre de <code>58Wx58Lx9H</code> avec une ''brush'' à 8 côtés (''8 sides'') et avec la texture {{L|Tool textures|nodraw}}. Placez cette ''brush'' dans votre support de bouton statique, et sous le bouton rouge. Appliquez la fonction {{L|func_door}} sur ce cylindre (''option > tie to entity'') avec les paramètres suivants : | ||
::{| class=standard-table | ::{| class=standard-table | ||
! Property Name || Value | ! Property Name || Value | ||
| Line 108: | Line 108: | ||
Cette partie va nous permettre de définir qu'est-ce qui pourra appuyer sur le bouton. Ici, ça sera le joueur et les boites. | Cette partie va nous permettre de définir qu'est-ce qui pourra appuyer sur le bouton. Ici, ça sera le joueur et les boites. | ||
1. Créer un ''block'' de <code>48Wx48Lx1H</code> avec la texture | 1. Créer un ''block'' de <code>48Wx48Lx1H</code> avec la texture {{L|Tool textures|trigger texture}}. Placez-le au-dessus du bouton rouge '''button_top_model'''. Appliquez la fonction {{L|trigger_multiple}} sur ce block (''option > tie to entity'') avec les paramètres suivants : | ||
::{| class=standard-table | ::{| class=standard-table | ||
! Property Name || Value | ! Property Name || Value | ||
| Line 127: | Line 127: | ||
On appliquera plus tard les paramètres ''Output'' | On appliquera plus tard les paramètres ''Output'' | ||
3. Créer une entité | 3. Créer une entité {{L|filter_activator_name}} à côté de votre bouton avec les paramètres suivants : | ||
::{| class=standard-table | ::{| class=standard-table | ||
! Property Name || Value | ! Property Name || Value | ||
| Line 138: | Line 138: | ||
4. Allez dans les paramètres de '''button_01_box_trigger''' et choisir pour ''Filter Name'' le paramètre "filter_boxes". | 4. Allez dans les paramètres de '''button_01_box_trigger''' et choisir pour ''Filter Name'' le paramètre "filter_boxes". | ||
5. Créer deux entités | 5. Créer deux entités {{L|ambient_generic}} avec les paramètres suivants : | ||
::{| class=standard-table | ::{| class=standard-table | ||
! Property Name || Value | ! Property Name || Value | ||
| Line 202: | Line 202: | ||
[[File:Buttonanddoor6.jpg|right|thumb|The final product.]] | [[File:Buttonanddoor6.jpg|right|thumb|The final product.]] | ||
9. Enfin, créer une entité | 9. Enfin, créer une entité {{L|light}} que vous allez placer dans le bouton (sous le couvercle rouge et centrée). Réglez l'entité comme ceci : | ||
::{| class=standard-table | ::{| class=standard-table | ||
! Property Name || Value | ! Property Name || Value | ||
| Line 211: | Line 211: | ||
|} | |} | ||
10. Créez un cube en choisissant un | 10. Créez un cube en choisissant un {{L|prop_physics}} avec le ''model'' '''models/props/metal_box.mdl'''. Dans les propriétés, nommez-le '''Box''' (Name : box) | ||
Voila, vous avez un bouton qui ouvre une porte, quand le joueur, ou un cube, est dessus. | Voila, vous avez un bouton qui ouvre une porte, quand le joueur, ou un cube, est dessus. | ||
| Line 222: | Line 222: | ||
===Clipping the hole=== | ===Clipping the hole=== | ||
Do not | Do not {{L|carve}} the hole for the door. Always use the {{L|clipping tool}}. | ||
Make a 128 by 128 block around the door. | Make a 128 by 128 block around the door. | ||
| Line 229: | Line 229: | ||
Once you have cut around the door frame, delete the part that is blocking the door. | Once you have cut around the door frame, delete the part that is blocking the door. | ||
Select the rest of the brush left behind, and click the "to entity" button to turn it into a | Select the rest of the brush left behind, and click the "to entity" button to turn it into a {{L|func_detail}}. | ||
You now have a hole that the door can fit into, and can be easily placed into any map. | You now have a hole that the door can fit into, and can be easily placed into any map. | ||
== The theory == | == The theory == | ||
This is the most basic button and door setup. You can also have the triggers turn off or on other things in the map, have them trigger a | This is the most basic button and door setup. You can also have the triggers turn off or on other things in the map, have them trigger a {{L|logic_choreographed_scene}} or just about anything. For the Portal feel you can have them trigger {{L|Creating indicator lights|Indicator Lights}} based on the button up or down status. | ||
If you do decide to use | If you do decide to use {{L|Creating indicator lights|Indicator Lights}}, then make sure to have the {{L|func_door}} (The Nodraw cylinder) Set Outputs when it closes, and opens. When it opens, set the texture Index to 1, and when it closes, set the texture index to 0, via a {{L|env_texturetoggle}} that controls the lights. | ||
== See also == | == See also == | ||
* | * {{LCategory|Portal level design}} | ||
Revision as of 06:15, 11 July 2024
This page either contains information that is only partially or incorrectly translated, or there isn't a translation yet.
If this page cannot be translated for some reason, or is left untranslated for an extended period of time after this notice is posted, the page should be requested to be deleted.
Also, please make sure the article complies with the alternate languages guide.
Introduction
Ce guide vous permettra de comprendre comment créer un bouton ouvrant une porte spécifique.
Les paramètres de la porte
La première chose à faire est de créer la porte qui s'ouvrira quand on activera le bouton.
Choisir la porte
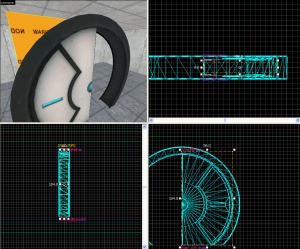
On va poser le cadre de la porte: créer une entité prop_static dans votre couloir. Allez dans World Model et choisissez le model "models/props/door_01_frame_reference.mdl" ou "models/props/door_01_frame_wide_reference.mdl" (les deux fonctionnent).
Les portes
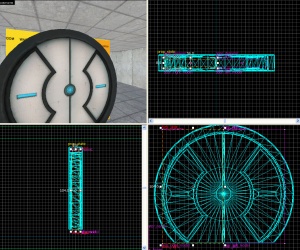
A l'intérieur, on va placer la partie mouvante. Elle est composée de deux parties : la partie gauche et la droite. On commence par la partie gauche :
1. Créer une entité prop_dynamic avec les paramètres suivants:
Property Name Value World Model models/props/door_01_lftdoor_reference.mdl Name door_left_model
L'aligner sur la gauche, dans la frame de la porte statique.
2. Créer un block brush de 56Lx8Wx104H avec la texture nodraw. Appliquez-y (Option>Tie to entity) la class func_door. Les paramètres de l'entité func_door doivent être réglés ainsi :
Property Name Value Name door_left Speed 250 Stop Sound Doors.FullClose8 Delay before Reset -1 Lip 12 Move Direction (selon de quel côté on se trouve, ca ressemblera à 0 90 0 ou 0 -90 0)
Aussi, s'assurer que dans l'onglet Flags, la fonction Touch opens soit décochée.
Centrez ce bloc dans celui de door_left_model.
3. Répéter les étapes 1 à 3, mais en changeant ces paramètres :
Sur le prop_dynamic:
Property Name Value World Model models/props/door_01_rtdoor_reference.mdl Name door_right_model
And for the func_door:
Property Name Value Name door_right Move Direction (Soit 0 -90 0, soit 0 90 0)
4. Rajoutez dans l'entité dynamique door_left_model qu'elle doit être parent de door_left (Parent : door_left). Et l'entité door_right_model doit être parent de door_right (Parent : door_right).
Le bouton
Models
On va placer maintenant les éléments du bouton :
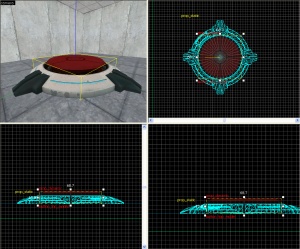
1. La base du bouton : créer une entité prop_static en choisissant dans World Model le model models/props/button_base_reference.mdl.
2. Le dessus du bouton (le 'couvercle rouge') : créer une entité prop_dynamic avec les paramètres suivants :
Property Name Value World Model models/props/button_top_reference.mdl Name button_top_model
Mouvement
Pour rendre le bouton 'vivant', il nous faut un peu de script :
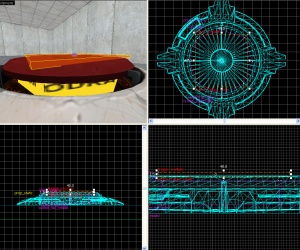
1. Créer un cylindre de 58Wx58Lx9H avec une brush à 8 côtés (8 sides) et avec la texture nodraw. Placez cette brush dans votre support de bouton statique, et sous le bouton rouge. Appliquez la fonction func_door sur ce cylindre (option > tie to entity) avec les paramètres suivants :
Property Name Value Name button_01_door Speed 25 Delay before Reset -1 Move Direction 90 0 0 (ou Down)
Assurez-vous que rien n'est coché dans l'onglet Flags.
2. Sélectionnez button_top_model et ajouter le paramètre Parent : button_01_model.
Triggers
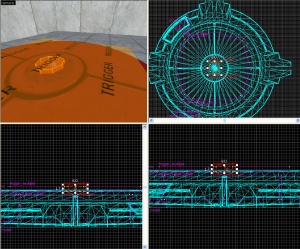
Cette partie va nous permettre de définir qu'est-ce qui pourra appuyer sur le bouton. Ici, ça sera le joueur et les boites.
1. Créer un block de 48Wx48Lx1H avec la texture trigger texture. Placez-le au-dessus du bouton rouge button_top_model. Appliquez la fonction trigger_multiple sur ce block (option > tie to entity) avec les paramètres suivants :
Property Name Value Name button_01_player_trigger
On appliquera plus tard les paramètres Output. Dans l'onglet flag, assurez-vous de cocher Client.
2. Ensuite, créer un cylindre de 7Wx7Lx1H avec une brush à 8 côtés (8 sides) et une texture Trigger. Posez cette brush centrée et au-dessus du button_top_model et appliquez la fonction trigger_multiple (option > tie to entity) avec les paramètres suivants :
Property Name Value Name button_01_box_trigger
Et dans 'Flags, cochez uniquement Everythings
On appliquera plus tard les paramètres Output
3. Créer une entité filter_activator_name à côté de votre bouton avec les paramètres suivants :
Property Name Value Name filter_boxes Filter Name Box
4. Allez dans les paramètres de button_01_box_trigger et choisir pour Filter Name le paramètre "filter_boxes".
5. Créer deux entités ambient_generic avec les paramètres suivants :
Property Name Value Name button_01_down Sound Name Portal.button_down Source Entity Name button_01_door
Et l'autre avec :
Property Name Value Name button_01_up Sound Name Portal.button_up Source Entity Name button_01_door
6. Maintenant, sélectionnez le cylindre "button_01_door" (sous le bouton rouge) et réglez l'onglet Outputs comme ceci:
7. Sélectionnez le plus gros Trigger button_trigger_player et réglez l'onglet Outputs comme ceci:
8. Sélectionnez le plus petit Trigger button_trigger_box et réglez l'onglet Outputs comme ceci:
9. Enfin, créer une entité light que vous allez placer dans le bouton (sous le couvercle rouge et centrée). Réglez l'entité comme ceci :
Property Name Value Brightness 251 159 57 30 BrightnessHDR 251 159 57 20
10. Créez un cube en choisissant un prop_physics avec le model models/props/metal_box.mdl. Dans les propriétés, nommez-le Box (Name : box)
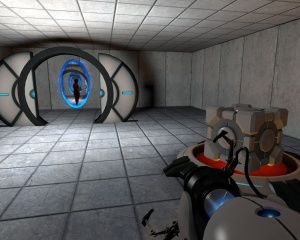
Voila, vous avez un bouton qui ouvre une porte, quand le joueur, ou un cube, est dessus.
Making a hole in the wall
While this step is optional, and your door may be fully functional without it, your map will look especially awkward if you just have a door in the middle of a space, and even more so if you have walls around it to block the player before opening the door. This step is simple enough, so it is recommended that you try it out.
Clipping the hole
Do not carve the hole for the door. Always use the clipping tool. Make a 128 by 128 block around the door.
Using the clip tool, trace the outline of the door frame. Make sure not to leave gaps that aren't covered up by the door frame.
Once you have cut around the door frame, delete the part that is blocking the door. Select the rest of the brush left behind, and click the "to entity" button to turn it into a func_detail.
You now have a hole that the door can fit into, and can be easily placed into any map.
The theory
This is the most basic button and door setup. You can also have the triggers turn off or on other things in the map, have them trigger a logic_choreographed_scene or just about anything. For the Portal feel you can have them trigger Indicator Lights based on the button up or down status.
If you do decide to use Indicator Lights, then make sure to have the func_door (The Nodraw cylinder) Set Outputs when it closes, and opens. When it opens, set the texture Index to 1, and when it closes, set the texture index to 0, via a env_texturetoggle that controls the lights.
See also
|}
