Ru/Advanced Lighting: Difference between revisions
| Line 63: | Line 63: | ||
[[image:intlight_lmap64.jpg|thumb|135px|left|Масштаб карты освещённости 64]]{{clr}} | [[image:intlight_lmap64.jpg|thumb|135px|left|Масштаб карты освещённости 64]]{{clr}} | ||
== | == Опции компилирования == | ||
Движок Orange Box (Source 2007) добавил три новых опции, которые повышают реализм во время компиляции. Чтобы получить к ним доступ, в диалоговом окне Run Map выберите режим Expert, и затем "HDR Full compile -final (slow!)"; далее, в списке ниже, выберите строку "$light_exe". В поле Parameters введите необходимые параметры, описанные ниже. | |||
''' | '''ПРИМЕЧАНИЕ:''' Это значительно увеличит время компиляции, так что рекомендуется использовать на последних стадиях создания карты! | ||
=== -staticproppolys === | === -staticproppolys === | ||
Как правило, VRAD создаёт тени под статичными пропами на основе сетки столкновений, потому что это проще, поскольку сетка столкновений близка к форме пропов. Обычно этого достаточно, но некоторые пропы могут иметь упрощенную сетку — или вообще её не иметь — вынуждая VRAD создавать неестественные тени. Данная опция позволяет обходить это для некоторых пропов, заставляя VRAD использовать полигональную сетку. Также, это необходимо, если вы используете -textureshadows (см. ниже). | |||
Просто добавьте ''-staticproppolys'' в список параметров $light_exe (см. ниже). | |||
=== -textureshadows === | === -textureshadows === | ||
Revision as of 21:36, 26 February 2016
Энтити света
light_dynamic
Невидимый источник света, который может постоянно меняться и перемещаться. Его местоположение может определяться скриптованными двигающимися объектами. Динамическое освещение существенно нагружает процессор, потому что рассчитывается в реальном времени, и при этом оно гораздо гибче статического освещения. Используйте данный тип освещения редко, потому что он сильно нагружает графический движок.
Светящиеся текстуры
В определённых случаях можно создавать свои светящиеся или освещающие текстуры, но для этого нужно использовать файл .vmt или .rad, что выходит за рамки нашей статьи. Это поможет дизайнеру уровня сберечь усилия, когда он будет создавать световые эффекты для своей карты.
env_particlelight
Обычный свет, который освещает только частицы из env_smokestack, и больше ничего. Полезно для улучшения освещения помещений с паром и подобных, но редко используется из-за своей специфики.
env_projectedtexture
Аналогично light_dynamic - это невидимый прожектор, который может изменяться и двигаться. Он может менять свою позицию, поле зрения и диапазон, будучи привязан к двигающимся объектам. Env_projectedtextures уникальна тем, что отбрасывает динамические тени от любой геометрии (браша или модели) на все браши и модели (даже на себя), в отличие от теней RenderToTexture. Данная система используется для фонариков игроков в Half-life 2 и L4D.
Env_projectedtexture - самый тяжелый источник света, он не компилируется, и все расчёты происходят в реальном времени. Более одной или двух таких энтить резко снизят производительность на старых видеокартах. Также обратите внимание, что на Source2007 и более ранних версиях движка без исправлений тени будут сильно "зернистыми", иметь низкое разрешение и без родителя. Эти проблемы были исправлены в новых итерациях движка Source2009, тем не менее вы ограничены только одной текстурой-прожектором (ВКЛЮЧАЯ фонарики игроков).
Связанные энтити
info_lighting
Эта энтитя используется в качестве источника, от которого светится другая сущность. Иногда, при резких перепадах света на коротких расстояниях или сложных теней, модель может неправильно отсвечивать. С помощью этой энтити модель будет светить так, будто она на своём месте.
Одним из распространённых примеров являются статичные модели лестниц в HL2; в тёмных зонах они будут светиться, если в их свойствах правильно прописать info_lighting, задав последнему имя.
env_lightglow
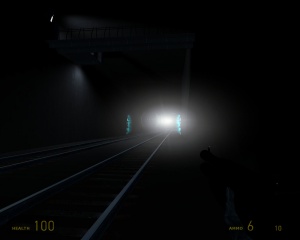
Используется для создания ярких огней, похожих на вспышку, и затухающих на определённом расстоянии. Как правило, ставится в конце тёмных тоннелей. Является предшественником HDR-эффекта, подделывая экспозицию света. Некоторые карты Team Fortress 2 используют этот эффект, чтобы имитировать пушок от обычных источников света, но лучше использовать env_sprite.
info_no_dynamic_shadow
Заставляет конкретную брашевую поверхность не создавать динамические тени, отбрасываемые физическими сущностями или NPC. Используется редко, но может потребоваться, чтобы скрыть неправильные или кривые тени, выглядящие искусственно.
env_tonemap_controller
Управляет экспозицией световых HDR-эффектов. Если нет полностью реализованного HDR, то не оказывает влияния.
Группы сглаживания
Сглаживают освещение между гранями. Параметр находится в диалоге редактирования поверхности, сглаживает освещение группы граней, создавая эффект закруглённого света. Классическим примером является цилиндр: если сглаживание группы не задано, каждая грань браша будет получать свет и освещаться отдельно. Это создаст эффект раздельных граней. Если все они будут помещены в одну группу сглаживания, свет станет рассеиваться между гранями, создавая вид округлой колонны.
Карты освещенности
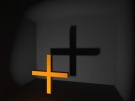
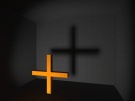
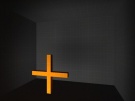
Карта освещённости - это данные освещённости каждой грани. Сохранённый свет впоследствии добавляется к грани, заставляя её отсвечивать. Шкала карты освещённости относится к числу пикселей текстуры на пиксель света (люксел). Чем больше значение люксел, тем выше качество, но больше размер BSP и время компиляции.
Опции компилирования
Движок Orange Box (Source 2007) добавил три новых опции, которые повышают реализм во время компиляции. Чтобы получить к ним доступ, в диалоговом окне Run Map выберите режим Expert, и затем "HDR Full compile -final (slow!)"; далее, в списке ниже, выберите строку "$light_exe". В поле Parameters введите необходимые параметры, описанные ниже.
ПРИМЕЧАНИЕ: Это значительно увеличит время компиляции, так что рекомендуется использовать на последних стадиях создания карты!
-staticproppolys
Как правило, VRAD создаёт тени под статичными пропами на основе сетки столкновений, потому что это проще, поскольку сетка столкновений близка к форме пропов. Обычно этого достаточно, но некоторые пропы могут иметь упрощенную сетку — или вообще её не иметь — вынуждая VRAD создавать неестественные тени. Данная опция позволяет обходить это для некоторых пропов, заставляя VRAD использовать полигональную сетку. Также, это необходимо, если вы используете -textureshadows (см. ниже).
Просто добавьте -staticproppolys в список параметров $light_exe (см. ниже).
-textureshadows
Not all props have their "holes" defined solely by geometry. Mesh fences, for example, use textures with alpha channels. These are not normally recognized by VRAD, so if you use them you will have to either disable shadows from them (which sometimes produces decent results) or add this option, which forces VRAD to take alpha channels into account as well, just like with brushes.
To make -textureshadows work, you need to create a custom RAD file for your map listing which props you want this option to affect. Extract the lights.rad file from the game in question using GCFScape or Crafty, place it in the game folder, and give it a new name. Then, open it in any text editor and append the line forcetextureshadow [full path of prop] to the file for each model you want this to affect. You will also need to have 'staticproppolys enabled for this to work. Finally, append -lights [name of your custom RAD file] -textureshadows to the $light_exe Parameters list (see above).
-staticproplighting
Unlike the other two, this option affects the lighting received by props. Props are generally lit based on the lighting levels at their origin (see info_lighting above), which can lead to unnatural lighting if a light source is aimed at only one side of the prop or if the prop is half in shadow and halfway in light. This option forces VRAD to calculate the lighting level at each vertex instead. Of these three options, this one will probably affect compile time the most, but is usually a necessary step in making the map's props look convincing.
Simply append -staticproplighting to the $light_exe Parameters list (see above).
Techniques
Lightmap optimization
Lightmaps store nearly all the lighting information in Source BSPs, and their efficient use equates directly to efficient lighting. They are the key contributor to BSP file size: efficient usage is a must for anyone wanting their map to be downloaded off the cuff, and preferable for everybody.
Lightmap scale is the basic component of optimization. It determines how detailed lighting information will be for a given face (you can see the effects above). The more information stored, the bigger the file size. Small lightmap scales allow for fine details but come at the cost of a bigger file (performance is unchanged). Large lightmap scales create fuzzier lighting but lead to smaller files. Determining when a face needs a detailed lightmap and when it doesn't is therefore the task.
This can mostly be done by eye from a compiled map. Look for the faces that receive high contrast shadows or specific details, as they are often the best candidates for low (i.e. detailed) lightmap scales. Faces with slow blends or lighting that only slightly differs across them on the other hand can safely have their scale raised.
Example
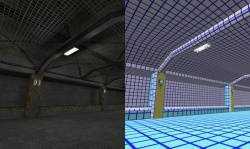
For a working example look to the hallway shown on the right. One side shows the in-game compiled version and the other side shows the lightmaps as displayed in Hammer. The lightmap view is easy to access: left click on the word Camera in the top left of your 3D view, and from the drop down select 3D Lightmap Grid. In this view, yellow faces have smaller than default scales, white faces are at the default, and blue are larger.
The hallway we are looking at has wall mounted lights and a few ceiling lights as well. In the picture it's clear to see where the lightmap scale has been increased and decreased. The front of the pillar has an increased lightmap because of the light source on its face, to catch all the detail. This is not such a major problem as the pillar is a small thin face and the only area with a lower scale. The floor and a few of the walls along the edge have been scaled up, as looking at the in-game rendering little to no detail or change is seen in the lightmap; they are excellent candidates, the floor especially so with its large size. The other faces have been left at the default resolution as they all have some play of shadows or changes in brightness. While not detailed or essential enough to warrant a smaller scale, increasing the scale would only serve to create poor looking lighting as the lack of detail would show.
While technically possible to decrease the entire scales across the entire map for crisp shadows, the compile time and filesize expense almost always outweighs the benefit. Finding the balance between increasing and decreasing the lightmaps may take a few lighting compiles and some guesswork, but performed correctly can both enhance your map and reduce its file size.
Shadow creation
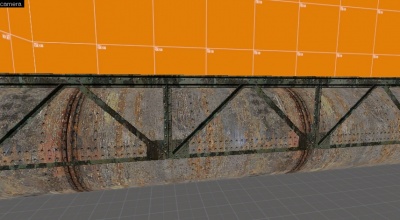
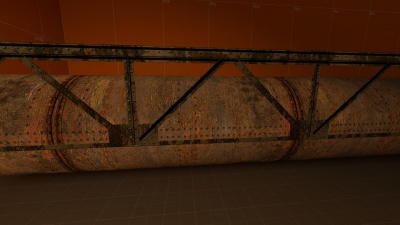
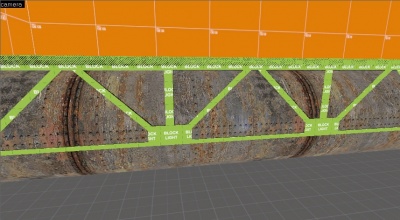
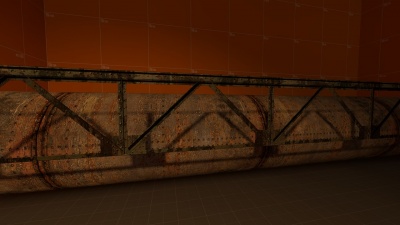
Some props appear to allow static light to pass through it, but have a collision mesh that swallows the prop whole (most, if not all[подтвердить], fence props in the Half-Life 2 series is a good example of this.) This results in a large, unrealistic shadow. A workaround for this is to create a func_brush from the material, disable the shadows, and utilize the block_light tool texture. This can be easy or difficult, depending on the size of the prop. Basically you must draw brushes of block_light where light would normally be blocked on the brush/prop.
Upon creating the trusses out of block_light material, you can 'fake' the shadows.
Shadow creation: Alternative method
Creating Shadows with -TextureShadows (External Link)
