Elevator (Portal 2): Difference between revisions
(Cleaned up a bit) |
|||
| Line 7: | Line 7: | ||
{{note|This tutorial will create an elevator spawn in your level, and the player will spawn with a potato on her gun. As of now there is no tutorial on making an elevator spawn without a potato on the gun. Enjoy the potato.}} | {{note|This tutorial will create an elevator spawn in your level, and the player will spawn with a potato on her gun. As of now there is no tutorial on making an elevator spawn without a potato on the gun. Enjoy the potato.}} | ||
===Entrance elevator=== | ===Entrance elevator=== | ||
1 | 1. Select the entity tool, create a [[func_instance]], and give it the fixup name "Arrival_Elevator" and the VMF file name "instances/turbine_elevator/arrival_elevator_a4_base.vmf" | ||
{{note|If the elevator does not load, save hammer and re-open it.}} | {{note|If the elevator does not load, save hammer and re-open it.}} | ||
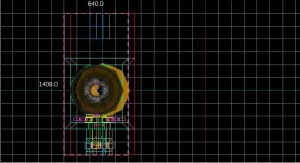
[[Image:Elevatortutorial1.jpg|thumb|right|Both instances just after copying]] | [[Image:Elevatortutorial1.jpg|thumb|right|Both instances just after copying]] | ||
2 | 2. To make things simpler, and to not have to create two func_instances and find the second one through all this mess, simply Shift+drag the "Arrival_Elevator" one unit in any direction to copy the first func_instance, and quickly put the copy exactly back on top of the original. | ||
{{ | {{tip|If the elevator does not load, save the map and re-open it.}} | ||
{{note|If you look at the tall blue "skip"-textured column, you can easily align the two items. Simply ensure that the columns line up in all three 2d windows. Also make sure the bottom of the columns are aligned. If you need to select one of the two parts, ie the elevator or the logic, you can click one of the cubes attached to the column.}} | {{note|If you look at the tall blue "skip"-textured column, you can easily align the two items. Simply ensure that the columns line up in all three 2d windows. Also make sure the bottom of the columns are aligned. If you need to select one of the two parts, ie the elevator or the logic, you can click one of the cubes attached to the column.}} | ||
3 | 3. Double-click either one and change the name to "Arrival_Logic" with the VMF file name "instances/turbine_elevator/arrival_elevator_a4_logic.vmf" | ||
You can use one of the other elevators to use a different theme; just make sure you have both the elevator and the logic instances. | You can use one of the other elevators to use a different theme; just make sure you have both the elevator and the logic instances. | ||
| Line 26: | Line 24: | ||
===Transition manager=== | ===Transition manager=== | ||
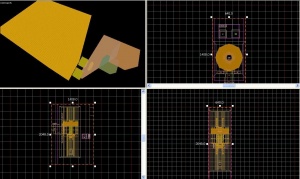
[[Image:Elevatortutorial2.jpg|thumb|right|Transition manager is the little boxes behind the elevator]] | [[Image:Elevatortutorial2.jpg|thumb|right|Transition manager is the little boxes behind the elevator]] | ||
4 | 4. Create one more func_instance entity anywhere; a convenient place is right behind the elevator model (but not inside the arrival elevator!). Name this one "Arrival_Departure_Trans" with the VMF file name "[[Arrival departure transition ents.vmf (Portal 2)|instances/transitions/arrival_departure_transition_ents.vmf]]". This instance covers the transition for both the Arrival AND Departure elevators, but does not cover the vmf's for the departure elevator(read below) | ||
You can set the videos on the elevators by setting the variables in this instance; e.g. try setting $arrival_video to media/animalking.bik. For a complete list of available videos, see [[List_of_Portal_2_Movies|this page.]] | You can set the videos on the elevators by setting the variables in this instance; e.g. try setting $arrival_video to media/animalking.bik. For a complete list of available videos, see [[List_of_Portal_2_Movies|this page.]] | ||
===Exit elevator=== | ===Exit elevator=== | ||
5 | 5. To create the exit elevator, simply repeat steps 1-3 but instead of "arrival_elevator" you will choose "instances/turbine_elevator/departure_elevator_a4_logic.vmf" and "instances/turbine_elevator/departure_elevator_a4_base.vmf" both of which are located in the same folder. Name these "Departure_Elevator" and "Departure_Logic" respectively. | ||
===Connection to map=== | ===Connection to the map=== | ||
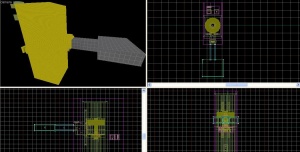
[[Image:Elevatortutorial3.jpg|thumb|right|Elevator connected to a room]] | [[Image:Elevatortutorial3.jpg|thumb|right|Elevator connected to a room]] | ||
6 | 6. You will notice that sticking out of the middle of the elevators on one side is an extension that looks like a hallway. You must connect this passage to your map. A [[Test Door (Portal 2)|door]] would look good here. | ||
{{note|The map will leak at the passageway exit if it's not sealed off with your own construction. You do not have to box the entire elevator, just take care of the exit.}} | {{note|The map will leak at the passageway exit if it's not sealed off with your own construction. You do not have to box the entire elevator, just take care of the exit.}} | ||
| Line 43: | Line 41: | ||
Now your elevator is complete, congratulations! | Now your elevator is complete, congratulations! | ||
== | ==Spawning without a potato (advanced)== | ||
1 | 1. Repeat steps 1 and 2 above. | ||
2 | 2. At step 3, replace the instance "instances/turbine_elevator/arrival_elevator_a4_base.vmf" with "instances/turbine_elevator/arrival_elevator_base.vmf". | ||
3 | 3. Double click on the instance and click on Edit Instance. Immediatly, save it under a new name ("my_arrival_elevator_base.vmf", for example) because we'll be doing some changes in it. Also, don't forget to modify the Vmf Filename of the instance in the main map. | ||
4 | 4. Double click on the trigger_once named "elevator_1_interior_start_trigger" that cover the elevator model. | ||
5 | 5. Go to the Outputs, and Copy the line with: | ||
::{| class=standard-table | ::{| class=standard-table | ||
| Line 61: | Line 59: | ||
|} | |} | ||
6 | 6. Delete that output line, and place a func_instance_io_proxy entity named "proxy" near the elevator model. | ||
7 | 7. Go to the Outputs, and Paste the line copied before. | ||
8 | 8. Change the "OnStartTouch" output to "OnProxyRelay". Save your instance. | ||
9 | 9. Go back to your main map and create a info_player_start and a weapon_portalgun in the elevator (make sure that the player is not stuck in the elevator). | ||
10 | 10. Create a trigger_once entity that covers the whole elevator model and info_player_start. | ||
11 | 11. Add this Output: | ||
::{| class=standard-table | ::{| class=standard-table | ||
| Line 79: | Line 77: | ||
|} | |} | ||
12 | 12. Finally, save your map, compile it and it should works, if you did it correctly. | ||
== | ==Spawning without a potato (simple)== | ||
1 | 1. Place a logic_auto somewhere in your map. | ||
2 | 2. On the Output tab of logic_auto, add this output: | ||
::{| class=standard-table | ::{| class=standard-table | ||
| Line 92: | Line 90: | ||
|} | |} | ||
3 | 3. Create a logic_playerproxy named player_settings. Put it next to the logic_auto so that you can find them both. | ||
4. Finally, save your map, compile it and it should works, if you did it correctly. | |||
==Spawning without a potato (simple #2)== | |||
1. Create a trigger_weaponstrip at the bottom of the arrival elevator. | |||
2. Place a portal gun above the trigger. | |||
3. In the settings of the portal gun, adjust it to your preference (no potatoes or single portal only). | |||
3 | |||
== See also == | ==See also== | ||
*[[Underground Elevator]] | *[[Underground Elevator]] | ||
*[[Instance]] | *[[Instance]] | ||
[[Category:Portal 2 Level Design]] | [[Category:Portal 2 Level Design]] | ||
[[Category:Portal 2 Tutorials]] | [[Category:Portal 2 Tutorials]] | ||
Revision as of 10:04, 9 January 2012
Template:Otherlang2 Elevators are used in Portal 2 to transition the player from level to level. They are not to be confused with the Disassembler, which took the players from level to level in coop.
Adding elevators to a map
Entrance elevator
1. Select the entity tool, create a func_instance, and give it the fixup name "Arrival_Elevator" and the VMF file name "instances/turbine_elevator/arrival_elevator_a4_base.vmf"
2. To make things simpler, and to not have to create two func_instances and find the second one through all this mess, simply Shift+drag the "Arrival_Elevator" one unit in any direction to copy the first func_instance, and quickly put the copy exactly back on top of the original.
3. Double-click either one and change the name to "Arrival_Logic" with the VMF file name "instances/turbine_elevator/arrival_elevator_a4_logic.vmf"
You can use one of the other elevators to use a different theme; just make sure you have both the elevator and the logic instances.
Transition manager
4. Create one more func_instance entity anywhere; a convenient place is right behind the elevator model (but not inside the arrival elevator!). Name this one "Arrival_Departure_Trans" with the VMF file name "instances/transitions/arrival_departure_transition_ents.vmf". This instance covers the transition for both the Arrival AND Departure elevators, but does not cover the vmf's for the departure elevator(read below)
You can set the videos on the elevators by setting the variables in this instance; e.g. try setting $arrival_video to media/animalking.bik. For a complete list of available videos, see this page.
Exit elevator
5. To create the exit elevator, simply repeat steps 1-3 but instead of "arrival_elevator" you will choose "instances/turbine_elevator/departure_elevator_a4_logic.vmf" and "instances/turbine_elevator/departure_elevator_a4_base.vmf" both of which are located in the same folder. Name these "Departure_Elevator" and "Departure_Logic" respectively.
Connection to the map
6. You will notice that sticking out of the middle of the elevators on one side is an extension that looks like a hallway. You must connect this passage to your map. A door would look good here.
Now your elevator is complete, congratulations!
Spawning without a potato (advanced)
1. Repeat steps 1 and 2 above.
2. At step 3, replace the instance "instances/turbine_elevator/arrival_elevator_a4_base.vmf" with "instances/turbine_elevator/arrival_elevator_base.vmf".
3. Double click on the instance and click on Edit Instance. Immediatly, save it under a new name ("my_arrival_elevator_base.vmf", for example) because we'll be doing some changes in it. Also, don't forget to modify the Vmf Filename of the instance in the main map.
4. Double click on the trigger_once named "elevator_1_interior_start_trigger" that cover the elevator model.
5. Go to the Outputs, and Copy the line with:
6. Delete that output line, and place a func_instance_io_proxy entity named "proxy" near the elevator model.
7. Go to the Outputs, and Paste the line copied before.
8. Change the "OnStartTouch" output to "OnProxyRelay". Save your instance.
9. Go back to your main map and create a info_player_start and a weapon_portalgun in the elevator (make sure that the player is not stuck in the elevator).
10. Create a trigger_once entity that covers the whole elevator model and info_player_start.
11. Add this Output:
12. Finally, save your map, compile it and it should works, if you did it correctly.
Spawning without a potato (simple)
1. Place a logic_auto somewhere in your map.
2. On the Output tab of logic_auto, add this output:
3. Create a logic_playerproxy named player_settings. Put it next to the logic_auto so that you can find them both.
4. Finally, save your map, compile it and it should works, if you did it correctly.
Spawning without a potato (simple #2)
1. Create a trigger_weaponstrip at the bottom of the arrival elevator.
2. Place a portal gun above the trigger.
3. In the settings of the portal gun, adjust it to your preference (no potatoes or single portal only).


