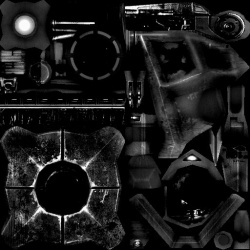
$envmapmask: Difference between revisions
(Flagged EnvMapMaskTransform as non-functional on LightMappedGeneric in Source SDK 2013SP) Tag: Reverted |
(Removed bug written as part of user error) Tag: Manual revert |
||
| Line 30: | Line 30: | ||
{{MatParam|$envmapmasktransform|matrix| | {{MatParam|$envmapmasktransform|matrix| | ||
: Transforms the specular mask texture. | : Transforms the specular mask texture. | ||
{{bug|Does not work on {{ent|VertexLitGeneric}}.}} | {{bug|Does not work on {{ent|VertexLitGeneric}}.}} | ||
{{VMT UVtransform}}|dx9=1}} | {{VMT UVtransform}}|dx9=1}} | ||
Revision as of 00:17, 7 January 2025
$envmapmask is a Shader parameter available in all ![]() Source games. It defines a specular mask which affects how strongly each pixel of a material reflects light from the $envmap. The mask should be a grayscale image in which entirely reflective areas are white and entirely matte areas are black. For diffuse type specularity which does not rely on
Source games. It defines a specular mask which affects how strongly each pixel of a material reflects light from the $envmap. The mask should be a grayscale image in which entirely reflective areas are white and entirely matte areas are black. For diffuse type specularity which does not rely on $envmap, see $phong.
$envmapmask which is not stored in a subfolder will cause the texture to fail loading in-game. [todo tested in ?]$envmapmask will not work with materials using $bumpmap/ in most situations; see #Alternative_methods.
- LightmappedReflective (uses $normalmap)
- (only in
 ) VertexLitGeneric
 - (only in
 )LightmappedGeneric
$envmapmask will not work with materials using $phong, at all. By default it will use the $basetexture's alpha channel for masking the envmap.VMT syntax example
$envmapmask <texture>
VertexLitGeneric
{
	$envmap			env_cubemap
	$envmapmask		"props/tvscreen_test"
}
Additional parameters

$envmapmasktransform
$envmapmaskscale
$envmapmaskframe
CS:GO WorldVertexTransition Parameters
$envmapmask2
$envmapmasktransform2
$envmapframe2
Alternative methods
Rather than creating a whole new texture for a specular mask, you can embed one into the alpha channel of the $basetexture or $bumpmap. Model materials with $bumpmap must do this. Unfortunately, it won't reduce memory usage.
If you do use these commands, transformations and other such parameters applied to $basetexture / $bumpmap will also apply to the specular mask.
- Alpha channels embedded in
$basetexturework in reverse. Transparent areas are reflective, opaque areas are matte. This is because, say, a window texture's alpha mask would be mostly black to allow for transparency -- yet that black part of the mask would also be the most reflective part. To avoid having to duplicate a texture file simply to invert the alpha mask, you can use this material parameter instead. - The alpha channel is not inverted in
 Source 2007 and
  Counter-Strike: Global Offensive for models, but the alpha channel is inverted for brushes!
  auto enables if $envmap is present. Opaque areas are reflective while transparent are matte. Set as true to invert
 $basetexturealpha channel behaviour. This allow$bumpmaphave a dedicated$phongmask, when material transparency is not needed.
- In CSGO, this parameter breaks materials using $translucent. Use
$envmapmaskor$normalmapalphaenvmapmaskinstead.
- In all of:


 on VertexLitGeneric (Without $phong), WorldVertexTransition and LightmappedGeneric,
 $basealphaenvmapmaskcannot be used with $bumpmap.
- In all of:


 on LightmappedGeneric and WorldVertexTransition,
 $basealphaenvmapmaskcannot be used with $selfillum, $seamless_detail or $distancealpha.
- In
 , on LightmappedGeneric and WorldVertexTransition,
 $basealphaenvmapmaskcannot be used with $detailblendmode "9" or $envmapanisotropy.
- In
 , on Lightmapped_4WayBlend,
 $basealphaenvmapmaskcannot be used with $selfillum. - This cannot be used with $bumpmap on LightmappedGeneric
- In all of:


 on VertexLitGeneric (Without $phong),
 $normalmapalphaenvmapmaskcannot be used with $selfillumfresnel.
 Note: Using
 $normalmapalphaenvmapmaskwith $phong and $selfillumfresnel has special caveats that should be considered. Check $phong for for more information.
- In
 , on LightmappedGeneric and WorldVertexTransition,
 $normalmapalphaenvmapmaskcannot be used with $detailblendmode "9" or $envmapanisotropy. [todo tested in ?]
$selfillum_envmapmask_alpha
$envmapmaskintintmasktexture
Merging Specular Level into Normal Alpha in 3ds Max
To merge a Specular Level map into the Normal Map alpha, you can create a Composite Map node with the normal map in Layer 1 and the specular map in Mask 1. Then right-click the composite map, click Render Map and save this new image to file (remembering to keep the Gamma at 1.0 and using 32 bits per pixel in the save options).
These steps are automated in the Alpha Spec tool in Wall Worm 2.72+.
See also
- $basetexture
- $envmap (environment map)
- $phong (diffuse reflection)
- $selfillum