Zh/Fog tutorial: Difference between revisions
< Zh
Jump to navigation
Jump to search
No edit summary |
No edit summary |
||
| Line 1: | Line 1: | ||
{{lang|Fog_tutorial}} | {{lang|Fog_tutorial}} | ||
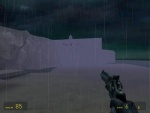
[[Image:Fogtute01.jpg|thumb|150px|right| | [[Image:Fogtute01.jpg|thumb|150px|right|注意,雾不影响天空。]] | ||
当你的地图设置创建雾的时候,你极有可能遇到这样的问题, 虽然固体和模型受到雾气影响但 [[Skybox (2D)|skybox]] 并不会受到影响。所以这里有几种修复方式。 | |||
{{ | {{提示|[[sky_camera]] 实体与您的[[env_fog_controller]] 设置最好一致(相关属性)}} | ||
== | ==匹配雾设置与天空盒子设置。== | ||
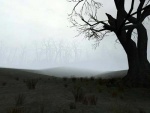
[[Image:Fogtute02.jpg|thumb|150px|right| | [[Image:Fogtute02.jpg|thumb|150px|right|这个雾气非常好,因为它匹配了天空盒。]] | ||
为了让雾看起来更好, 你需要让地图雾气颜色与天空盒子雾气颜色相匹配.Valve的一些官方地图可以作为一些参考。 | |||
譬如, 我们使用这个天空贴图<code>sky_day02_10</code>.则我们的 [[env_fog_controller]]需要设置成以下这样: | |||
Primary fog color: <code>176 192 202</code><br/> | Primary fog color: <code>176 192 202</code><br/> | ||
Secondary fog color: <code>206 216 222</code> | Secondary fog color: <code>206 216 222</code> | ||
这个设置被运用到了地图 [[Highway 17|17号高速公路]]. | |||
== | ==备用方案,使用贴图tools/toolsblack== | ||
[[Image:3-D Sky Fog Example.jpg|thumb|150px|right| | [[Image:3-D Sky Fog Example.jpg|thumb|150px|right|使用贴图tools/toolsblack 也可以获得有效的效果。]] | ||
备用方案,你可以改变天空盒子固体为[[Tool texture|tools/toolsblack]] 材质,那么天空将不可见, 这样就好设置多了。 | |||
== | ==自定义天空贴图== | ||
了解2D天空盒子贴图很重要,这里提供了教材:[[2D_skybox#Creating_a_Custom_2D_Skybox_Texture|点我!]]. | |||
常规创建方法。 但是,不要使用$ nofog参数。这允许雾覆盖天空盒,而无需将其融合。 | |||
== | ==参见== | ||
* [[Dust, Fog, & Smoke]] | * [[Dust, Fog, & Smoke]] | ||
Revision as of 21:26, 13 October 2019
当你的地图设置创建雾的时候,你极有可能遇到这样的问题, 虽然固体和模型受到雾气影响但 skybox 并不会受到影响。所以这里有几种修复方式。
匹配雾设置与天空盒子设置。
为了让雾看起来更好, 你需要让地图雾气颜色与天空盒子雾气颜色相匹配.Valve的一些官方地图可以作为一些参考。
譬如, 我们使用这个天空贴图sky_day02_10.则我们的 env_fog_controller需要设置成以下这样:
Primary fog color: 176 192 202
Secondary fog color: 206 216 222
这个设置被运用到了地图 17号高速公路.
备用方案,使用贴图tools/toolsblack
备用方案,你可以改变天空盒子固体为tools/toolsblack 材质,那么天空将不可见, 这样就好设置多了。
自定义天空贴图
了解2D天空盒子贴图很重要,这里提供了教材:点我!.
常规创建方法。 但是,不要使用$ nofog参数。这允许雾覆盖天空盒,而无需将其融合。


