Floor button: Difference between revisions
Rustyfence (talk | contribs) (added recomendation) |
(Rewrite Template:Lang to Template:LanguageBar. This action was performed by a bot.) |
||
| (48 intermediate revisions by 19 users not shown) | |||
| Line 1: | Line 1: | ||
{{LanguageBar|Creating a button and door}} | |||
{{Back | Portal Level Creation}} | |||
{{DISPLAYTITLE: Portal - Tutorial - Floor Button}} | |||
{{toc-right}} | |||
This tutorial will show step-by-step how to create the '''floor button''', a test element commonly seen throughout the [[Portal]] test chambers. The floor button is activated by a [[Box dropper|weighted storage cube]] being placed on it, or when a player stands on it, and it can be used to trigger other test elements such as doors, platforms and elevators. | |||
{{clr}} | |||
=== | == Construction == | ||
[[ | === Base Brush === | ||
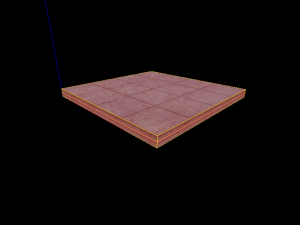
[[File:Floor button base.png|300px|thumb|right|Base Brush]] | |||
: | Create a <code>128L*128W*8H</code> [[brush]] and tie it to a <code>[[func_detail]]</code>. Texture the sides of the brush with ''signage/hazard_orange_03b'' texture the top with <code>concrete/concrete_modular_floor001a</code>, and texture the bottom with <code>[[Tool_textures#nodraw|tools/toolsnodraw]]</code>. | ||
{{clr}} | |||
| | |||
=== Corner Overlays === | |||
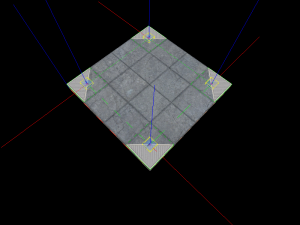
[[File:Floor button overlays.png|300px|thumb|right|Corner Overlays]] | |||
Place four [[Hammer Overlay Tool|overlays]] with the texture <code>signage/overlay_button_accent</code> on top of the brush. Position them in the corners and rotate them so they look like in the picture on the right. | |||
{{clr}} | |||
=== Button Model Bottom === | |||
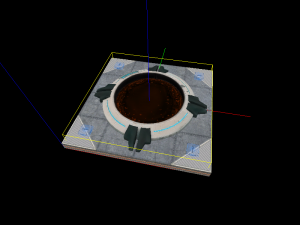
[[File:Floor button prop base.png|300px|thumb|right|Button Model Bottom]] | |||
Create a <code>[[prop_static]]</code> entity and set its ''World Model'' to <code>models/props/button_base_reference.mdl</code>. Position it in the middle on top of the base brush. Rotate it so that the sign with a box and an arrow on the rim of the button faces the way the player will enter the room. | |||
{{clr}} | |||
=== Brush Door === | |||
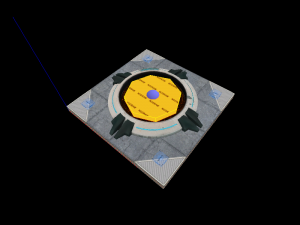
[[File:Floor button door.png|300px|thumb|right|Brush Door]] | |||
Create a <code>60L*60W*8H</code> eight-sided [[Primitive#Cylinder | cylinder]] textured with <code>tools/toolsnodraw</code> above the base brush, in the same place as the button base prop. Tie this brush to a <code>[[func_door]]</code> entity, go to the flags tab to make sure that all flags are unchecked and then set the following keyvalues: | |||
{| class="standard-table sortable" | |||
|- | |- | ||
! Property Name !! Value | |||
|- | |- | ||
| | | Name || floor_button_door | ||
|- | |- | ||
| | | Speed || 25 | ||
|- | |- | ||
| | | Delay Before Reset || -1 | ||
|- | |- | ||
| Move Direction || | | Move Direction || {{vec3|90|0|0}} | ||
|} | |} | ||
{{clr}} | |||
{{ | |||
[[ | === Button Model Top === | ||
[[File:Floor button origins.png|300px|thumb|right|Button Model Top]] | |||
Create a <code>[[prop_dynamic]]</code> entity. Set its ''World Model'' to <code>models/props/button_top_reference.mdl</code>, set its ''Pitch Yaw Roll (Y Z X)'' to the same as the button base prop's and set its ''Parent'' to <code>floor_button_door</code>. Finally, position it in the same place as the base prop, except the origin of the button prop should be 2 units above the origin of the base prop. | |||
{{clr}} | |||
=== Pressed Trigger === | |||
[[File:Floor button triggers.png|300px|thumb|right|Pressed Trigger]] | |||
Create a <code>48L*48W*2H</code> brush textured with <code>[[Tool textures#trigger|tools/toolstrigger]]</code>. Tie this brush to a <code>[[trigger_multiple]]</code> entity and set its ''Name'' to <code>floor_button_trigger_player</code>. Go to its flags and make sure ''Clients'' is the only flag that is checked. | |||
: | |||
| | |||
| Name | |||
Next create a <code>8L*8W*2H</code> eight-sided cylinder brush, also textured with <code>tools/toolstrigger</code> in the same place as the <code>floor_button_trigger_player</code> brush and tie it to a <code>trigger_multiple</code> entity. Set its ''Name'' to <code>floor_button_trigger_box</code> and make sure only the ''Physics Objects'' flag is checked. Next, set its ''Filter Name'' to <code>filter_boxes</code>. If you have created a [[box dropper]] in your level, you should already have this entity, but if you don't, create a new <code>[[filter_activator_name]]</code> entity with the ''Name'' <code>filter_boxes</code> and set its filter to the name of your weighted storage cube. | |||
Now add the following outputs to <code>floor_button_trigger_player</code>: | |||
{| {{OutputsTable}} | |||
|- | |- | ||
| | | [[File:Io11.png]] || OnEndTouchAll || floor_button_door || Close || || 0.00 || No | ||
|- | |- | ||
| | | [[File:Io11.png]] || OnEndTouchAll || floor_button_trigger_box || Enable || || 0.00 || No | ||
|- | |- | ||
| | | [[File:Io11.png]] || OnStartTouch || floor_button_door || Open || || 0.00 || No | ||
|- | |- | ||
| | | [[File:Io11.png]] || OnStartTouch || floor_button_trigger_box || Disable || || 0.00 || No | ||
|} | |} | ||
Next, add the following outputs to <code>floor_button_trigger_box</code>: | |||
{| {{OutputsTable}} | |||
|- | |||
| [[File:Io11.png]] || OnEndTouchAll || floor_button_door || Close || || 0.00 || No | |||
|- | |||
| [[File:Io11.png]] || OnEndTouchAll || floor_button_trigger_player || Enable || || 0.00 || No | |||
|- | |- | ||
| | | [[File:Io11.png]] || OnStartTouch || floor_button_door || Open || || 0.00 || No | ||
[[ | |||
|- | |- | ||
| | | [[File:Io11.png]] || OnStartTouch || floor_button_trigger_player || Disable || || 0.00 || No | ||
|} | |} | ||
{{clr}} | |||
=== Interaction Sounds === | |||
[[File:Floor button ambients.png|300px|thumb|right|Interaction Sounds]] | |||
Create two <code>[[ambient_generic]]</code> entities near the button. | |||
| | |||
Set the following keyvalues on the first one: | |||
{| class="standard-table sortable" | |||
! | |- | ||
! Property Name !! Value | |||
|- | |- | ||
| Name || button_down | | Name || button_down | ||
| Line 133: | Line 100: | ||
| Sound Name || Portal.button_down | | Sound Name || Portal.button_down | ||
|- | |- | ||
| | | SourceEntityName || floor_button_door | ||
|} | |} | ||
! | Set the following keyvalues on the second one: | ||
{| class="standard-table sortable" | |||
|- | |||
! Property Name !! Value | |||
|- | |- | ||
| Name || button_up | | Name || button_up | ||
| Line 143: | Line 113: | ||
| Sound Name || Portal.button_up | | Sound Name || Portal.button_up | ||
|- | |- | ||
| | | SourceEntityName || floor_button_door | ||
|} | |} | ||
Next, add the following outputs to <code>floor_button_door</code>: | |||
{| {{OutputsTable}} | |||
|- | |- | ||
| [[ | | [[File:Io11.png]] || OnClose || button_up || PlaySound || || 0.00 || No | ||
|- | |- | ||
| [[ | | [[File:Io11.png]] || OnOpen || button_down || PlaySound || || 0.00 || No | ||
|} | |} | ||
{{clr}} | |||
=== Lighting === | |||
[[File:Floor button light.png|300px|thumb|right|Lighting]] | |||
Create a <code>[[light]]</code> entity in the middle of the base prop, 8 units above the base brush. Set the following keyvalues on it and the button should now be finished, ready to be implemented in a map: | |||
{| class="standard-table sortable" | |||
|- | |- | ||
! Property Name !! Value | |||
! | |||
|- | |- | ||
| Brightness || 251 159 57 30 | | Brightness || 251 159 57 30 | ||
| Line 196: | Line 139: | ||
| BrightnessHDR || 251 159 57 20 | | BrightnessHDR || 251 159 57 20 | ||
|} | |} | ||
{{clr}} | {{clr}} | ||
== | == Implementation == | ||
[[File:Floor button ingame.png|300px|thumb|right|The floor button in-game]] | |||
Place the button where it should be in the map. Add the outputs that should fire when the button is activated. The outputs that should be fired when the button is pressed should be the ''OnOpen'' output on <code>floor_button_door</code>, and similar the ''OnClose'' output when the button is released. | |||
[[Category:Portal]] | [[Category:Portal]] | ||
[[Category:Level Design]] | |||
[[Category:Tutorials]] | |||
Latest revision as of 17:52, 18 July 2025
Warning: Display title "Portal - Tutorial - Floor Button" overrides earlier display title "Floor button".
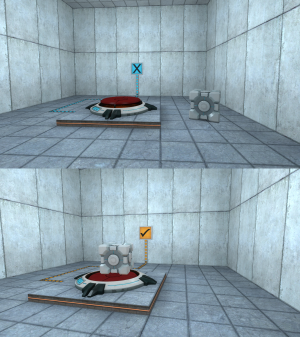
This tutorial will show step-by-step how to create the floor button, a test element commonly seen throughout the Portal test chambers. The floor button is activated by a weighted storage cube being placed on it, or when a player stands on it, and it can be used to trigger other test elements such as doors, platforms and elevators.
Construction
Base Brush
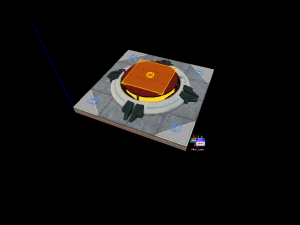
Create a 128L*128W*8H brush and tie it to a func_detail. Texture the sides of the brush with signage/hazard_orange_03b texture the top with concrete/concrete_modular_floor001a, and texture the bottom with tools/toolsnodraw.
Corner Overlays
Place four overlays with the texture signage/overlay_button_accent on top of the brush. Position them in the corners and rotate them so they look like in the picture on the right.
Button Model Bottom
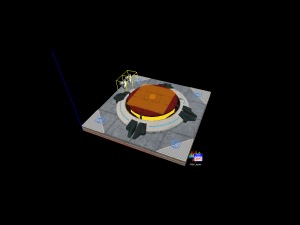
Create a prop_static entity and set its World Model to models/props/button_base_reference.mdl. Position it in the middle on top of the base brush. Rotate it so that the sign with a box and an arrow on the rim of the button faces the way the player will enter the room.
Brush Door
Create a 60L*60W*8H eight-sided cylinder textured with tools/toolsnodraw above the base brush, in the same place as the button base prop. Tie this brush to a func_door entity, go to the flags tab to make sure that all flags are unchecked and then set the following keyvalues:
| Property Name | Value |
|---|---|
| Name | floor_button_door |
| Speed | 25 |
| Delay Before Reset | -1 |
| Move Direction | 90 0 0 |
Button Model Top
Create a prop_dynamic entity. Set its World Model to models/props/button_top_reference.mdl, set its Pitch Yaw Roll (Y Z X) to the same as the button base prop's and set its Parent to floor_button_door. Finally, position it in the same place as the base prop, except the origin of the button prop should be 2 units above the origin of the base prop.
Pressed Trigger
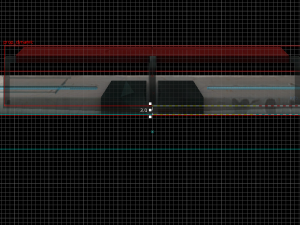
Create a 48L*48W*2H brush textured with tools/toolstrigger. Tie this brush to a trigger_multiple entity and set its Name to floor_button_trigger_player. Go to its flags and make sure Clients is the only flag that is checked.
Next create a 8L*8W*2H eight-sided cylinder brush, also textured with tools/toolstrigger in the same place as the floor_button_trigger_player brush and tie it to a trigger_multiple entity. Set its Name to floor_button_trigger_box and make sure only the Physics Objects flag is checked. Next, set its Filter Name to filter_boxes. If you have created a box dropper in your level, you should already have this entity, but if you don't, create a new filter_activator_name entity with the Name filter_boxes and set its filter to the name of your weighted storage cube.
Now add the following outputs to floor_button_trigger_player:
Next, add the following outputs to floor_button_trigger_box:
Interaction Sounds
Create two ambient_generic entities near the button.
Set the following keyvalues on the first one:
| Property Name | Value |
|---|---|
| Name | button_down |
| Sound Name | Portal.button_down |
| SourceEntityName | floor_button_door |
Set the following keyvalues on the second one:
| Property Name | Value |
|---|---|
| Name | button_up |
| Sound Name | Portal.button_up |
| SourceEntityName | floor_button_door |
Next, add the following outputs to floor_button_door:
| My Output | Target Entity | Target Input | Parameter | Delay | Only Once | |
|---|---|---|---|---|---|---|
| OnClose | button_up | PlaySound | 0.00 | No | ||
| OnOpen | button_down | PlaySound | 0.00 | No |
Lighting
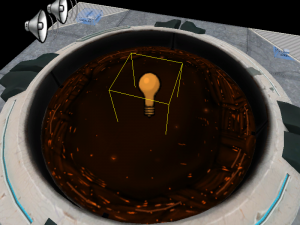
Create a light entity in the middle of the base prop, 8 units above the base brush. Set the following keyvalues on it and the button should now be finished, ready to be implemented in a map:
| Property Name | Value |
|---|---|
| Brightness | 251 159 57 30 |
| BrightnessHDR | 251 159 57 20 |
Implementation
Place the button where it should be in the map. Add the outputs that should fire when the button is activated. The outputs that should be fired when the button is pressed should be the OnOpen output on floor_button_door, and similar the OnClose output when the button is released.
