Ko/Getting Started: Difference between revisions
< Ko
Jump to navigation
Jump to search
mNo edit summary |
m (Setting bug notice hidetested=1 param on page where the bug might not need tested in param specified) |
||
| (10 intermediate revisions by 4 users not shown) | |||
| Line 1: | Line 1: | ||
{{ | {{LanguageBar|title = 시작하기..}} | ||
|title=시작하기.. | |||
{{updatetranslation}} | |||
}} | |||
{{first room menu:ko|nofloat=true}} | {{first room menu:ko|nofloat=true}} | ||
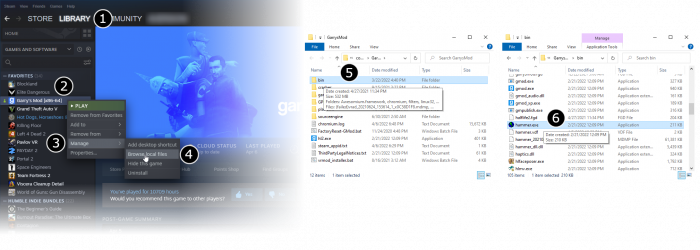
# 스팀의 '''라이브러리''' 탭에 가셔서 '''도구'''를 누르시고'''Source SDK'''를 시작하세요. | # 스팀의 '''라이브러리''' 탭에 가셔서 '''도구'''를 누르시고'''Source SDK'''를 시작하세요. | ||
# 여러분의 맵을 위해 원하는 엔진버전과 게임을 선택하세요. | # 여러분의 맵을 위해 원하는 엔진버전과 게임을 선택하세요. | ||
# '''Hammer Editor'''를 실행하십시요.:<br />[[File:Game config set.png|700px|Launching Hammer for | # '''Hammer Editor'''를 실행하십시요.:<br />[[File:Game config set.png|700px|Launching Hammer for {{L|Half-Life 2: Deathmatch}}]] | ||
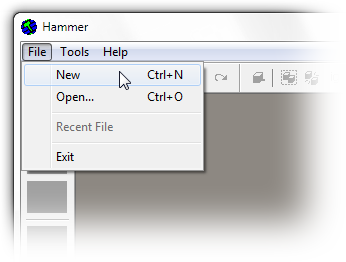
# '''File'''메뉴에서, '''New'''를 클릭하세요.:<br />[[File:Hammer newwindow.png|link=]] | # '''File'''메뉴에서, '''New'''를 클릭하세요.:<br />[[File:Hammer newwindow.png|link=]] | ||
# 비어있는 맵이 생성될것입니다..<br />[[File:Hammer emptyworkspace.png|600px]] | # 비어있는 맵이 생성될것입니다..<br />[[File:Hammer emptyworkspace.png|600px]] | ||
위 그림들은 영어 판 스팀을 위한 이미지입니다. | 위 그림들은 영어 판 스팀을 위한 이미지입니다. | ||
{{bug|You may find that Hammer's viewports are all totally black. This is because Hammer is running with a different branch of Source from the game you are working on. If you encounter this, | {{bug|hidetested=1|You may find that Hammer's viewports are all totally black. This is because Hammer is running with a different branch of Source from the game you are working on. If you encounter this, {{L|Reset the Source SDK Game Configuration}}s.}} | ||
{{Navbar|:Category:Level Design:ko|Your First Map|View_Navigation}} | |||
{{ACategory|Level Design}} | |||
{{ACategory|Tutorials}} | |||
Latest revision as of 07:15, 20 May 2025
This translated page needs to be updated.
You can help by updating the translation.
Also, please make sure the article complies with the alternate languages guide.
You can help by updating the translation.
Also, please make sure the article complies with the alternate languages guide.
- 스팀의 라이브러리 탭에 가셔서 도구를 누르시고Source SDK를 시작하세요.
- 여러분의 맵을 위해 원하는 엔진버전과 게임을 선택하세요.
- Hammer Editor를 실행하십시요.:
- File메뉴에서, New를 클릭하세요.:
- 비어있는 맵이 생성될것입니다..
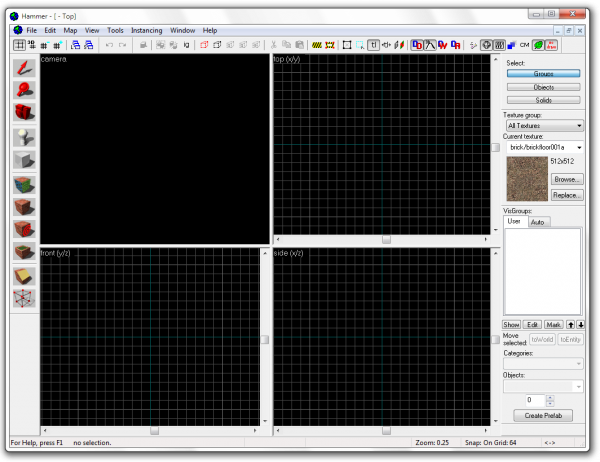


위 그림들은 영어 판 스팀을 위한 이미지입니다.