Creating an energy ball launcher and catcher: Difference between revisions
m (Removed "back" link at the top for consistency, and added example map link) |
(Removed skill level) |
||
| (28 intermediate revisions by 8 users not shown) | |||
| Line 1: | Line 1: | ||
{{DISPLAYTITLE: Portal - Tutorial - Energy Ball Launcher and Catcher}} | |||
{{lang|Portal - Tutorial - Energy Ball Launcher and Catcher}} | |||
{{back | Portal Level Creation}} | |||
== | ==Introduction== | ||
This page will show you how to create Energy Ball Launchers and Catchers. | |||
==Launcher== | |||
===Launcher Base=== | |||
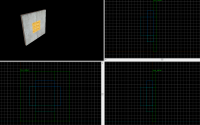
* <code> | [[File:portal_eball_launcher_base_brush.PNG|thumb|right|200px|Concrete Slab]] | ||
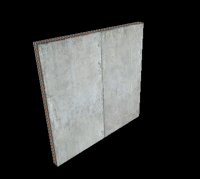
Create a 8w*128l*128h brush with the <code>[[nodraw]]</code> texture. Tie this brush to a <code>[[func_detail]]</code>. Texture the front face with <code>concrete/concrete_modular_wall001a</code> and the border faces with <code>signage/hazard_orange_03b</code>. Rotate the textures if they aren't aligned. | |||
{{note|The base isn't needed if your launcher is on a metal wall}} | |||
: | {{clr}} | ||
===Launcher Model=== | |||
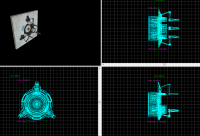
: | [[File:portal_eball_launcher_model.PNG|thumb|right|200px|Launcher Model]] | ||
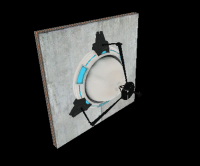
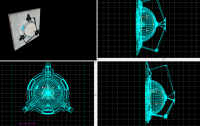
Create a <code>[[prop_dynamic]]</code> entity and enter the following properties: | |||
: | {| class=standard-table | ||
! Property Name || Value | |||
: | |- | ||
| Name || ball_spawner_prop | |||
|- | |||
! | | World Model || models/props/combine_ball_launcher.mdl | ||
|} | |||
{{clr}} | |||
===Launcher Lighting=== | |||
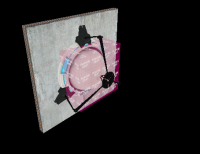
[[File:portal_eball_launcher_light.PNG|thumb|right|200px|Launcher Light Entity]] | |||
Create a <code>[[light]]</code> entity and enter the following properties: | |||
{| class=standard-table | |||
! Property Name || Value | |||
|- | |||
| Brightness || 218 76 26 30 | |||
|- | |||
| BrightnessHDR || 218 76 26 30 | |||
|} | |||
Place the light inside the Launcher Model. | |||
{{clr}} | |||
===Launcher Clipping=== | |||
[[File:portal_eball_launcher_playerclip.PNG|thumb|right|200px|Launcher Clip Brush]] | |||
Create a 32w*64l*64h brush with the <code>playerclip</code> texture. Position this brush in front of the Launcher Base. | |||
{{clr}} | |||
===Launcher noportal=== | |||
[[File:portal_eball_launcher_noportal.PNG|thumb|right|200px|Launcher noportal volume]] | |||
Create a 8w*96l*96h brush with the <code>invisible</code> texture. | |||
{{note|The noportal brush isn't needed if your launcher is on a metal wall}} | |||
{{clr}} | |||
===Launcher Collision=== | |||
[[File:portal_eball_launcher_collision.PNG|thumb|right|200px|Launcher Collision]] | |||
Create a 1w*16l*16h brush with the <code>nodraw</code> texture. Position this brush in the front in the model. Tie this brush to a <code>func_detail</code>. | |||
{{clr}} | |||
===Launcher Spawner=== | |||
[[File:portal_eball_launcher_spawner.PNG|thumb|right|200px|Launcher Spawner]] | |||
Create a <code>[[point_energy_ball_launcher]]</code> entity and position the entity right in front of the Collision Brush, touching the outer face. | |||
Enter the following properties: | |||
{| class=standard-table | |||
! Property Name || Value | |||
|- | |||
| Name || energy_ball_launcher | |||
|- | |- | ||
| | | Ball count || 1 | ||
|- | |- | ||
| | | Min ball speed || 200 | ||
|- | |- | ||
| | | Max ball speed || 200 | ||
|- | |||
| Ball radius || 12.0 | |||
|- | |||
| Ball Respawn Time || 2.0 | |||
|} | |} | ||
: | {{note| The <code>Min ball speed</code> and <code>Max ball speed</code> values can be changed, but make sure they are the same value. The minimum value to enter is 200 and the max is 400.}} | ||
Sometimes under flags, the launcher starts inactive and gets activated when you touch a trigger. | |||
Enter the following output: | |||
{| {{OutputsTable}} | |||
| [[File:Io21.png]] || OnPostSpawnBall || ball_spawner_prop || SetAnimation || close || 0.00 || No | |||
|} | |||
{{clr}} | |||
==Ball Catcher== | |||
{{note|Ball Catchers are modified ball catchers from [[Half-Life 2: Episode One]].}} | |||
===Catcher Base=== | |||
[[File:portal_eball_catcher_base.PNG|thumb|right|200px|Catcher Base]] | |||
Create 2 8w*40l*128h brushes with the <code>nodraw</code> texture. | |||
Create 2 8w*48l*40h brushes with the <code>nodraw</code> texture. | |||
Texture the front faces with <code>concrete/concrete_modular_wall001a</code> and the outer edge faces with <code>signage/hazard_orange_03b</code>. Rotate the textures if they aren't aligned. | |||
Create an 8w*48l*48h brush with the <code>playerclip</code> texture and put the brush inside of the concrete base so the player can't fall through. | |||
{{note| | {{note|The base isn't needed if your catcher is on a metal wall}} | ||
{{clr}} | |||
===Catcher Interior=== | |||
[[File:portal_eball_catcher_interior.PNG|thumb|right|200px|Catcher Interior]] | |||
Create 2 16w*16l*48h brushes with the <code>nodraw</code> texture. | |||
Create 2 16w*48l*16h brushes with the <code>nodraw</code> texture. | |||
Create a 16w*48l*48h brush with the <code>nodraw</code> texture. | |||
* | |||
* | |||
Put these brushes behind the Catcher Base. | |||
{{clr}} | |||
===Catcher Model=== | |||
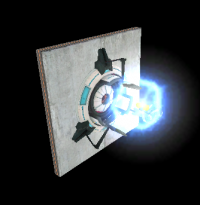
[[File:portal_eball_catcher_model.PNG|thumb|right|200px|Catcher Model]] | |||
Create a <code>prop_dynamic</code> entity and enter the following properties: | |||
{| class=standard-table | |||
! Property Name || Value | |||
|- | |||
| World Model || models/props/combine_ball_catcher.mdl | |||
|- | |||
| Disable Shadows || Yes | |||
|- | |||
| Name || ball_trap_1_housing | |||
|} | |||
{{clr}} | |||
===Catcher Sprites=== | |||
[[File:portal_eball_catcher_sprites.PNG|thumb|right|200px|Catcher Sprites]] | |||
Create an <code>[[env_sprite]]</code> entity and enter the following properties: | |||
{| class=standard-table | |||
! Property Name || Value | |||
|- | |||
| Name || ball_trap_1_sprite | |||
! | |||
|- | |- | ||
| | | Parent || ball_trap_1_housing | ||
|- | |- | ||
| | | Render FX || Distort | ||
|- | |||
| Render Mode || Additive | |||
|- | |||
| Framerate || 30 | |||
|- | |||
| Sprite Name || materials/sprites/physring1.vmt | |||
|- | |||
| Scale || 1.5 | |||
|- | |||
| Size of Glow Proxy Geometry || 0 | |||
|} | |} | ||
Create another <code>env_sprite</code> entity and enter the following properties: | |||
{| class=standard-table | |||
: | |||
! Property Name || Value | ! Property Name || Value | ||
|- | |||
| Name || ball_trap_1_sprite | |||
|- | |||
| Parent || ball_trap_1_housing | |||
|- | |- | ||
| | | Render FX || Distort | ||
|- | |- | ||
| | | Render Mode || World Space Glow | ||
|- | |- | ||
| | | Framerate || 30 | ||
|- | |- | ||
| | | Sprite Name || materials/sprites/glow01.vmt | ||
|- | |- | ||
| | | Scale || 2 | ||
|- | |- | ||
| | | Size of Glow Proxy Geometry || 0 | ||
|} | |} | ||
{{clr}} | |||
===Catcher Ball=== | |||
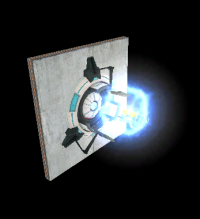
[[File:portal_eball_catcher_ball_model.PNG|thumb|right|200px|Ball Model]] | |||
Create a <code>prop_dynamic</code> entity and enter the following properties: | |||
: | {| class=standard-table | ||
! Property Name || Value | |||
|- | |||
| Parent || ball_trap_1_housing | |||
|- | |||
| World Model || models/Effects/combineball.mdl | |||
|- | |||
| Name || ball_trap_1_ball | |||
|- | |||
| Start Disabled || Yes | |||
|} | |||
{{clr}} | |||
===Catcher Spotlight=== | |||
[[File:portal_eball_catcher_spotlight.PNG|thumb|right|200px|Catcher Spotlight]] | |||
: | Create a <code>[[point_spotlight]]</code> entity and enter the following properties: | ||
{| class=standard-table | |||
! Property Name || Value | ! Property Name || Value | ||
|- | |||
| Name || spotlight1 | |||
|- | |||
| Color || 218 76 26 | |||
|- | |- | ||
| | | Spotlight Length || 256 | ||
|- | |- | ||
| | | Spotlight Width || 32 | ||
|- | |||
| HDR color scale || 2.0 | |||
|} | |} | ||
{{clr}} | |||
===Catcher Filter=== | |||
[[File:portal_eball_catcher_filter.PNG|thumb|right|200px|Ball Filter]] | |||
Create a <code>filter_combineball_type</code> entity and enter the following properties: | |||
{| class=standard-table | |||
! | ! Property Name || Value | ||
|- | |||
| Parent || ball_trap_1_housing | |||
|- | |||
| Name || filter_combine_ballpermit_alt | |||
|- | |||
| Ball Type || Launched by point_combine_ball_launcher | |||
|} | |||
{{clr}} | |||
===Catcher Sounds=== | |||
[[File:portal_eball_catcher_sounds.PNG|thumb|right|200px|Catcher Sound]] | |||
Create an <code>[[ambient_generic]]</code> entity and enter the following properties: | |||
{| class=standard-table | |||
! Property Name || Value | |||
|- | |||
| Name || sound_activate | |||
|- | |- | ||
| [[ | | Sound Name || AlyxEMP.Charge | ||
|} | |||
{{clr}} | |||
===Catcher Setup=== | |||
[[File:portal_eball_catcher_setup.PNG|thumb|right|200px|Catcher Sound]] | |||
Create a <code>[[logic_relay]]</code> entity and enter the following property: | |||
{| class=standard-table | |||
! Property Name || Value | |||
|- | |||
| Name || relay_ball_trap_1_setup | |||
|} | |} | ||
Enter the following outputs: | |||
Enter the following output: | |||
: | {| {{OutputsTable}} | ||
| [[File:Io21.png]] || OnSpawn || ball_trap_1_ball || SetParentAttachment || ball_attachment || 0.00 || No | |||
|- | |- | ||
| [[ | | [[File:Io21.png]] || OnSpawn || ball_trap_1_sprite || SetParentAttachment || ball_attachment || 0.00 || No | ||
|} | |||
{{clr}} | |||
===Catcher Trigger=== | |||
[[File:portal_eball_catcher_trigger.PNG|thumb|right|200px|Catcher Trigger]] | |||
Create a 96w*96l*32h cylinder with 8 sides with the <code>trigger</code> texture | |||
Use the [[Hammer Transform Dialog]] and set its Y rotation value to 90. | |||
Position the brush inside of the catcher. | |||
Tie this brush to a <code>[[trigger_multiple]]</code> entity and enter the following properties: | |||
{| class=standard-table | |||
! Property Name || Value | |||
|- | |||
| Name || ball_trap_1 | |||
|- | |- | ||
| [[ | | Filter Name || filter_combine_ballpermit_alt | ||
|} | |||
Enter the following outputs: | |||
{| {{OutputsTable}} | |||
| [[File:Io21.png]] || OnTrigger || !activator || Kill || <none> || 0.00 || No | |||
|- | |- | ||
| [[ | | [[File:Io21.png]] || OnTrigger || ball_trap_1_ball || Enable || <none> || 0.00 || No | ||
|- | |- | ||
| [[ | | [[File:Io21.png]] || OnTrigger || ball_trap_1_housing || SetAnimation || close || 0.00 || No | ||
|- | |- | ||
| [[ | | [[File:Io21.png]] || OnTrigger || ball_trap_1_housing || SetAnimation || closed || 2.00 || No | ||
|- | |- | ||
| [[ | | [[File:Io21.png]] || OnTrigger || ball_trap_1_sprite || ShowSprite || <none> || 0.00 || No | ||
|- | |- | ||
| [[ | | [[File:Io21.png]] || OnTrigger || energy_ball_launcher || Disable || <none> || 0.00 || No | ||
|- | |- | ||
| [[ | | [[File:Io21.png]] || OnTrigger || sound_activate || PlaySound || <none> || 0.00 || No | ||
|- | |- | ||
| [[ | | [[File:Io21.png]] || OnTrigger || spotlight1 || LightOff || <none> || 0.00 || No | ||
|} | |} | ||
Under Flags, modify the following: | |||
{{ | {{entity-flag-start}} | ||
{{entity-flag|Clients|off|}} | |||
{{entity-flag|Physics Objects|on|}} | |||
{{entity-flag-end}} | |||
{{clr}} | |||
==Implementation== | |||
You should have the same amount of launchers as catchers. If you have multiple catchers and launchers, remember to change the <code>energy_ball_launcher</code> in the trigger's outputs. | |||
== See also == | == See also == | ||
* [[Portal Level Creation]] | * [[Portal Level Creation]] | ||
[[Category:Portal]] | [[Category:Portal]] | ||
[[Category:Level Design]] | |||
[[Category:Tutorials]] | |||
Latest revision as of 17:51, 19 April 2025
Introduction
This page will show you how to create Energy Ball Launchers and Catchers.
Launcher
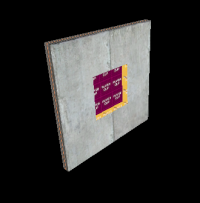
Launcher Base
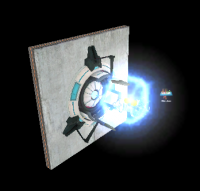
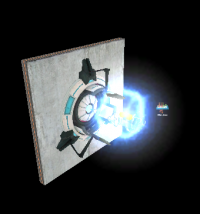
Create a 8w*128l*128h brush with the nodraw texture. Tie this brush to a func_detail. Texture the front face with concrete/concrete_modular_wall001a and the border faces with signage/hazard_orange_03b. Rotate the textures if they aren't aligned.
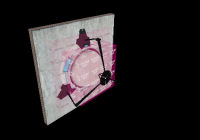
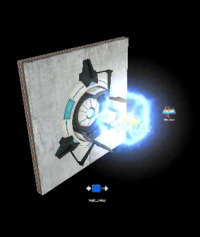
Launcher Model
Create a prop_dynamic entity and enter the following properties:
| Property Name | Value |
|---|---|
| Name | ball_spawner_prop |
| World Model | models/props/combine_ball_launcher.mdl |
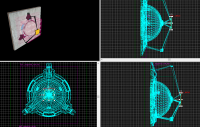
Launcher Lighting
Create a light entity and enter the following properties:
| Property Name | Value |
|---|---|
| Brightness | 218 76 26 30 |
| BrightnessHDR | 218 76 26 30 |
Place the light inside the Launcher Model.
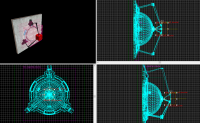
Launcher Clipping
Create a 32w*64l*64h brush with the playerclip texture. Position this brush in front of the Launcher Base.
Launcher noportal
Create a 8w*96l*96h brush with the invisible texture.
Launcher Collision
Create a 1w*16l*16h brush with the nodraw texture. Position this brush in the front in the model. Tie this brush to a func_detail.
Launcher Spawner
Create a point_energy_ball_launcher entity and position the entity right in front of the Collision Brush, touching the outer face.
Enter the following properties:
| Property Name | Value |
|---|---|
| Name | energy_ball_launcher |
| Ball count | 1 |
| Min ball speed | 200 |
| Max ball speed | 200 |
| Ball radius | 12.0 |
| Ball Respawn Time | 2.0 |
Min ball speed and Max ball speed values can be changed, but make sure they are the same value. The minimum value to enter is 200 and the max is 400.Sometimes under flags, the launcher starts inactive and gets activated when you touch a trigger.
Enter the following output:
| My Output | Target Entity | Target Input | Parameter | Delay | Only Once | |
|---|---|---|---|---|---|---|
| OnPostSpawnBall | ball_spawner_prop | SetAnimation | close | 0.00 | No |
Ball Catcher
Catcher Base
Create 2 8w*40l*128h brushes with the nodraw texture.
Create 2 8w*48l*40h brushes with the nodraw texture.
Texture the front faces with concrete/concrete_modular_wall001a and the outer edge faces with signage/hazard_orange_03b. Rotate the textures if they aren't aligned.
Create an 8w*48l*48h brush with the playerclip texture and put the brush inside of the concrete base so the player can't fall through.
Catcher Interior
Create 2 16w*16l*48h brushes with the nodraw texture.
Create 2 16w*48l*16h brushes with the nodraw texture.
Create a 16w*48l*48h brush with the nodraw texture.
Put these brushes behind the Catcher Base.
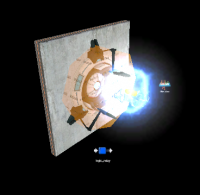
Catcher Model
Create a prop_dynamic entity and enter the following properties:
| Property Name | Value |
|---|---|
| World Model | models/props/combine_ball_catcher.mdl |
| Disable Shadows | Yes |
| Name | ball_trap_1_housing |
Catcher Sprites
Create an env_sprite entity and enter the following properties:
| Property Name | Value |
|---|---|
| Name | ball_trap_1_sprite |
| Parent | ball_trap_1_housing |
| Render FX | Distort |
| Render Mode | Additive |
| Framerate | 30 |
| Sprite Name | materials/sprites/physring1.vmt |
| Scale | 1.5 |
| Size of Glow Proxy Geometry | 0 |
Create another env_sprite entity and enter the following properties:
| Property Name | Value |
|---|---|
| Name | ball_trap_1_sprite |
| Parent | ball_trap_1_housing |
| Render FX | Distort |
| Render Mode | World Space Glow |
| Framerate | 30 |
| Sprite Name | materials/sprites/glow01.vmt |
| Scale | 2 |
| Size of Glow Proxy Geometry | 0 |
Catcher Ball
Create a prop_dynamic entity and enter the following properties:
| Property Name | Value |
|---|---|
| Parent | ball_trap_1_housing |
| World Model | models/Effects/combineball.mdl |
| Name | ball_trap_1_ball |
| Start Disabled | Yes |
Catcher Spotlight
Create a point_spotlight entity and enter the following properties:
| Property Name | Value |
|---|---|
| Name | spotlight1 |
| Color | 218 76 26 |
| Spotlight Length | 256 |
| Spotlight Width | 32 |
| HDR color scale | 2.0 |
Catcher Filter
Create a filter_combineball_type entity and enter the following properties:
| Property Name | Value |
|---|---|
| Parent | ball_trap_1_housing |
| Name | filter_combine_ballpermit_alt |
| Ball Type | Launched by point_combine_ball_launcher |
Catcher Sounds
Create an ambient_generic entity and enter the following properties:
| Property Name | Value |
|---|---|
| Name | sound_activate |
| Sound Name | AlyxEMP.Charge |
Catcher Setup
Create a logic_relay entity and enter the following property:
| Property Name | Value |
|---|---|
| Name | relay_ball_trap_1_setup |
Enter the following outputs: Enter the following output:
Catcher Trigger
Create a 96w*96l*32h cylinder with 8 sides with the trigger texture
Use the Hammer Transform Dialog and set its Y rotation value to 90.
Position the brush inside of the catcher.
Tie this brush to a trigger_multiple entity and enter the following properties:
| Property Name | Value |
|---|---|
| Name | ball_trap_1 |
| Filter Name | filter_combine_ballpermit_alt |
Enter the following outputs:
Under Flags, modify the following:
| Flag | ||||
| Clients | ||||
| Physics Objects | ||||
Implementation
You should have the same amount of launchers as catchers. If you have multiple catchers and launchers, remember to change the energy_ball_launcher in the trigger's outputs.
