Blending materials on a model using Blender
Jump to navigation
Jump to search
")
")
 Note:This article assumes that you already know how to work with vertex painting in Blender and create simple models in ModelDoc.
 Warning:Please note that map compilers are not aware of blended materials on models, so you will need to manually create two or more meshes or hulls for different surface types.
Todo: Write the same article, but about
VertexPaintTintColor$ (works the same way, but when specified together with VertexPaintBlendParams$, requires specifying a different vertex color slot).A quick guide on how to add material blending to your model in Source 2 using ModelDoc and Blender.
Step 1. Vertex Painting
In Blender, switch to vertex painting mode and add the desired colors to the desired parts of the model. Below is a list of colors used in Source 2 for blending materials.
| Vertex Сolor | Layer in blend material |
|---|---|
| Black | Layer 1. |
| Red | Layer 2. |
| Green | Layer 3. |
| Blue | [Todo] |

Applied vertex painting in Blender

Example of a blend material (section colors have no meaning)


Step 2. Renaming a data stream
- Open your model via ModelDoc.
- Right-click on the render mesh.
- Find and select Add RenameStream.
- Click on RenameStream under the desired mesh and fill in the nodes as shown below:
- From Name:
color$0
- Note:Digit specifies the slot for vertex painting in Blender, so instead of 0 (first slot), it can be anything if your model has more than one slot.
- To Name:
VertexPaintBlendParams$
- From Name:

Step 3. Enjoyment
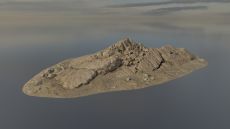
Model with simple material
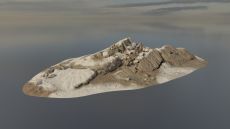
Model with material blending

Color channels of the blending material


Supported shaders
List of shaders for various Source 2 games that support material blending on models.
| Game | Shader(s) |
|---|---|
| Csgo Environment Blend |