Moving water (Source)
The Source engine supports water with the func_water_analog entity which can move in a similar way to a func_movelinear entity.
Limitations
The main limitation of moving water is that the Water shader can't be used; the way it is implemented requires visleaves to be split across the water surface, and visleaves are fundamentally completely static. However, all other brush-compatible shaders and effects will work.
Valve provides a few moving water materials with ![]() Half-Life 2 and other games, but all of them look rather terrible due to being flat textures, sometimes without even a normal map! To create materials which more closely resemble static water, the Refract shader can be used, as this is capable of moving. Example moving water material using the refract shader. It is possible to replicate the real-time reflections via a func_reflective_glass parented just under the surface of the water and a func_brush with a refractive material applied to it. See here for an example.
Half-Life 2 and other games, but all of them look rather terrible due to being flat textures, sometimes without even a normal map! To create materials which more closely resemble static water, the Refract shader can be used, as this is capable of moving. Example moving water material using the refract shader. It is possible to replicate the real-time reflections via a func_reflective_glass parented just under the surface of the water and a func_brush with a refractive material applied to it. See here for an example.
Additionally, the following bugs are present:
- Client-side entities such as gibs and death ragdolls do not float in dynamic water.
- Splashes do not move, so they will appear incorrectly (floating above or sinking into the water) if it is currently moving when objects splash into it.
- Underwater fogging does not occur, making the water seem "bright" compared to normal water brushes.
 Workaround:Place a trigger 64 units (the player's eye height) below the surface of the water, which switches the active env_fog_controller to one with "underwater" settings.
Construction
To add a moving water volume to your level, follow these steps:
Creating the Water Brush
- Create a brush the size of the water volume using the Block Tool.
- Open the Texture Browser by clicking the Browse button on the Texture Bar.
- Double-click the
tools\toolsnodrawmaterial in the Texture Browser. - With your water brush selected, click the Apply Current Texture button to assign the
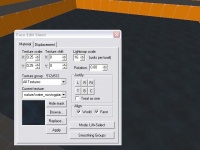
tools\toolsnodrawmaterial to the whole brush. - Select the Texture Application tool, which opens the Face Edit mode.
- Left-Click the top face of the water brush in the 3D view to select it.
- Click Browse to bring up the Texture Browser again.
- Type
movingplaneinto the filter field and select the texturenature/water_movingplaneor another water material capable of moving. - Click the Apply button on the Face Edit panel.
Configuring the func_water_analog entity
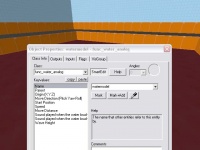
- Now you have constructed the water brush, press Ctrl + T to tie the brush to an entity. Select
func_water_analogfrom the list. - In order to trigger your water, you must name it. Enter an identifier for the water in the
Namefield. - Select the direction for the water to move in the
Move Directionfield. In most cases, you will want to select Up or Down from the dropdown menu. - Enter a speed at which your water should move. 55 works well, but the speed should depend on the situation.
- The entity uses the
Move Distancefield to determine how far the water should move. If you enter the height of your water brush, it will move fully above its starting position (the bottom of the brush will be where the top of the brush was originally). - You can select sounds to be played when the water starts or stops moving with the
Sounds played...fields.
Triggering the Water
The func_water_analog entity can be moved via two inputs, Open and Close. See Inputs & Outputs for more information.
Cubemaps and Moving Water
Since moving water can't use the Water shader, dynamic reflections are unavailable, so a pre-calculated environment map from an env_cubemap must be used instead.
Adding a env_cubemap to water surfaces:
- Add an env_cubemap entity using the Entity Tool.
- Place the env_cubemap above the top surface of the water, near the center.
- Double-click the env_cubemap in the 3D view to bring up the Object Properties dialog.
- Click on the Brush faces key in the Object Properties.
- Click the Pick... button. The mouse cursor will change to the eye dropper icon.
- Click the top water face to select it with the eyedropper. The face will highlight in red, to show it has been associated with the env_cubemap entity.
- Close the Object properties dialog.
The water brush has now been configured to use a specific cubemap. In order for this to appear in-game, you will need to build cubemaps.

