Level Design Introduction/Your First Level (Portal 2)
A brush is a simple 3D shape created with Hammer's Block tool. Brushes are used to created the majority of large surfaces in your level, such as ceilings and floors. We will now create a simple room using brushes.
Creating a floor brush
- From the Tool bar on the left, select the
 Block Tool.
 - Now, left-click and drag in the Top 2D view in a movement that is Right and Downward as shown below.
- You should see a dotted outline of a rectangle or square as you drag.
- Create a square 512x512 units and let go of the left-mouse button.
- Press ↵ Enter on your keyboard to create this brush that you've just drawn.
To go back to selection mode, click on the ![]() Selection tool icon on the Tool bar or press the Esc key.
Selection tool icon on the Tool bar or press the Esc key.
In selection mode, with the brush selected, you can change the size of the brush by left-clicking on any of the boxes that appear on the borders of the brush and dragging them out or in.
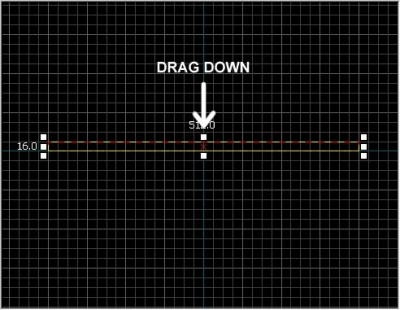
Let's decrease the thickness of the brush (which we'll be using as a floor) from the default 64 units to 16. To do this, we need to change the size of the grid.
The grid
A grid is displayed in all the 2D views. By default, all objects snap to the grid. Although you can turn this off, it is considered good practice to leave it on because it prevents leaks and other errors in your map.
The default grid size is 64 units, which means that each line is 64 units apart. The current size of the grid is displayed in the status bar at the bottom of the Hammer window.
- Clicking the Smaller Grid icon
 will make the grid half as big, for finer adjustments. You can also decrease the grid size with the [ key
 - Clicking the Larger Grid icon
 will make the grid twice as big, for larger adjustments. You can also increase the grid size with the ] key.
To bring the grid size down to 16 units, press the [ key twice. Look at the Status bar at the bottom right of the Hammer window and make sure it reads Grid: 16. If it doesn't, press [ or ] until is does.
Resize the floor
Now the grid should be small enough.
Switch to the bottom right viewport. It should be labeled Side when you mouse over it. Drag the top border of the brush down so that it's 16 units thick.
Moving brushes
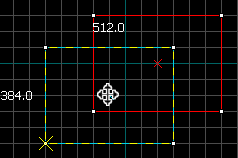
You can move brushes around once they're created. Select the Selection Tool ![]() and mouse over the brush in one of the 2D views, staying clear of the corner handles. The pointer will change into four arrows pointing in all four directions
and mouse over the brush in one of the 2D views, staying clear of the corner handles. The pointer will change into four arrows pointing in all four directions ![]() , indicating the option to move the object.
, indicating the option to move the object.
Click and drag the brush to move the brush in any of the 2D views. Upon release, the brush will be moved to that position.
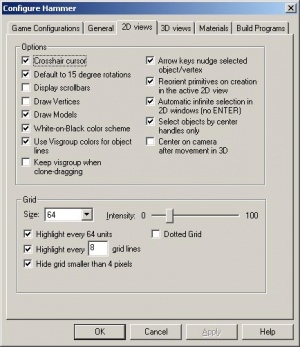
You can also move objects with the arrow (cursor) keys. To do that, we'll need to change a setting in the Hammer options to allow the arrow keys to be used:
- Go to Tools menu and pick Options to bring up the Configure Hammer dialog box.
- Click on the 2D Views tab.
- There are other settings here as well, but for now, we just need to check the box marked Arrow keys nudge selected object/vertex.
- Press OK to confirm the change and close the settings.
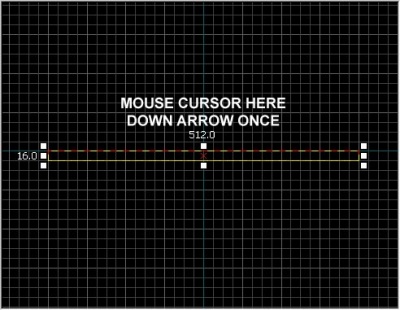
Now let's move the floor brush down 16 units by placing the mouse cursor over the Side viewport and pressing the Down_arrow once.
- Use can use the scrollbars to pan the view.
- For a faster method, hold down the Space bar and left-click and drag to pan.
- Use the Mouse Wheel to zoom in and out.
Texturing
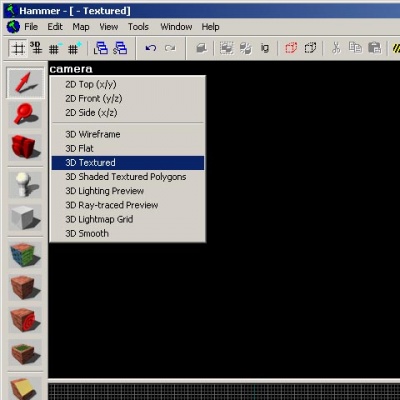
To see textures in the 3D Camera viewport, right-click on the camera text in the 3D Camera viewport and select 3D Textured.
Moving around in 3D is a bit different from the 2D viewports:
- Hold down the Space and left-click and drag to rotate the camera.
- Hold down the Space and right-click and drag to move up/down and left/right.
- Hold down the Space and both right and left-click and drag to move forward and backward.
- You can also use W, A, S, and D to move forward, backward, strafe left and strafe right respectively.
- The Z key toggles on and off "mouse look" mode. Move your mouse cursor over the 3D Camera viewport and press the Z key. You can now move your mouse around as if mouse look was on in the game.
Move up in the 3D Camera viewport and look downward at the floor that you've just created.
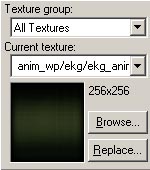
You'll notice there's a default texture on your floor. You'll probably want to change it. To change the current texture, click on the Browse button on the Texture Box.
This will bring up the Texture Browser window.
In the Filter field at the bottom of the browse, you can filter the textures shown based on name. For this tutorial, type in the word "dev_measure" (with the underscore) into the field. This will bring up a listing of "developer" textures that will make it easier to create something quickly.
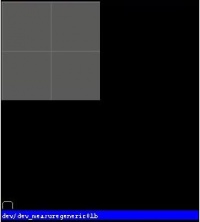
Now, find the texture called dev/dev_measuregeneric01b and double-click on it.
This should bring back the 4 viewports of the editor and place the generic developer texture as the current one in the Texture bar.
Select the floor brush, if it isn't already selected, by clicking on it in the Camera viewport. It should turn red.
After the brush is selected, click on the ![]() Apply current texture icon on the Tool bar to apply the current texture to the selection. The gray developer texture should appear on the floor as shown.
Apply current texture icon on the Tool bar to apply the current texture to the selection. The gray developer texture should appear on the floor as shown.
Creating the walls and ceiling
Now let's go over how to create the walls and ceiling of the room. The easiest way to do this is to duplicate the floor brush.
Duplicating
You can also select an existing brush and duplicate it to create them.
To duplicate:
- Select the floor brush that you've created.
- Move your cursor over the Side viewport.
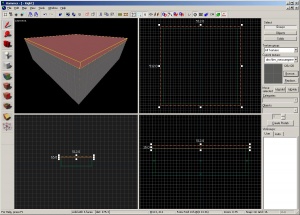
- Hold the ⇧ Shift key down and press the Up_arrow key to create a duplicate and move it up 1 grid unit.
This will create a brush exactly like the floor on top of the existing floor.
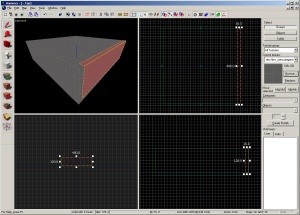
You can now change the size and dimensions of this new brush to create a wall grabbing the corner handles on the brush and dragging it to the size you wish. Let's make the wall 128 units tall and 16 units thick.
Now duplicate the wall 3 more times to outline the floor.
Duplicate the floor brush 1 more time and raise it to become the ceiling.
Deleting brushes
To delete a brush, select it with the Selection Tool ![]() and press the Delete key.
and press the Delete key.
Multiple selection
You'll notice that in the Camera viewport, if you navigate inside the room, it's hard to tell what's going on because all of the walls, floor and ceiling are the same texture. Next we'll change the walls to a different texture.
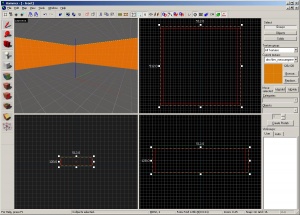
You can select all of the walls by holding down the Ctrl key and clicking on them one at a time in the Camera viewport. You will have to use the SPACE camera controls to rotate the camera around so you can select each wall.
After you have all of the walls selected, click on the Browse button in the Texture bar. This time, select the orange texture next to the current one, labeled dev/dev_measuregeneric01. Double-click it to select it and close the browser window.
Use the ![]() tool on the Tool Bar to apply the orange texture to the walls.
tool on the Tool Bar to apply the orange texture to the walls.
Saving the file
To save a level, you can use Ctrl+S or Save from the File menu.
You will need to give the map a file a name and choose the directory to place it in.
For this tutorial, name the map "tutorial01" and save it into the mapsrc directory, located by default at:
C:\Program Files\Steam\steamapps\common\portal 2\sdk_content\maps\
Your directory may be slightly different, depending upon where you have installed Steam.
When naming your file, dont give it too long a name. Maps with names of excessive length will not load in-game.
Included sample maps
When you went to save your map, you may have noticed other directories underneath the mapsrc path. The Portal 2 Authoring Tools come with some example maps to help you. (The Portal 2 maps can be decompiled using a tool named BSPSource.)
| Directory | Contents | Useful for Studying |
|---|---|---|
maps\mp_coop_doors |
Simple coop map. | How to begin and end coop maps; how to use glass in coop. |
maps\mp_coop_paint_red_racer |
Underground-themed coop map with Propulsion Gel. | How to begin and end coop maps in Underground-themed maps; how to use turrets, lasers and gel in Underground-themed coop maps. |
maps\sp_a2_column_blocker |
Single Player map with a Hard Light Bridge and some other stuff. | Using and placing hard light bridges, lasers, laser catchers, laser relays, panels, turrets, glass, grating, deadly goo, and aerial faith plates in a Portal 2 map. |
maps\sp_a2_trust_fling |
Single Player map with Aerial Faith Plates. | Great for learning about how to make panels for reconstructing-themed maps. |
maps\sp_a3_speed_ramp |
Underground-themed Single Player map with Propulsion and Repulsion Gel. | How to make a simple Underground-themed map for Portal 2. |
maps\sp_a4_laser_catapult |
Single Player map with Excursion Funnels, a Laser and a couple of Piston Platforms. | How to place excursion funnels; making piston platforms; working with the Wheatley theme. |
maps\zoo_mechanics |
Contains a sampling of some of the gameplay mechanics used in Portal 2. | More information on creating excursion funnels, gel droppers, deadly goo, etc. |
Placing entities
Next we'll place an entity in our level:
- Select the
 Entity Tool on the Tool Bar.
 - Once the Entity Tool is enabled, the Entity selection list on the Object bar becomes active.
- Keep the Categories entry as Entities.
- Click the arrow on the Objects drop down list and select
info_player_start. - Now, navigate in the Camera viewport to the middle of the inside of the room.
- left-click on the floor to place the entity.
- Do the same with
weapon_portalgunand try to place it in a position so theinfo_player_startis touching it.
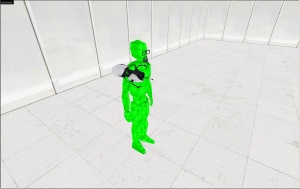
This will place an info_player_start entity in the middle of the room. You will also receive a Portal Gun when you spawn.
Placing a light
Now we'll place a source of illumination in the map:
- Select the Entity Tool again
- Select
lightfrom the Objects drop down list on the Object bar. - This time, place the light on the ceiling (above the player's head).
- Go back into selection mode by clicking on the
 Selection tool in the Tool Bar or by pressing the Esc key.
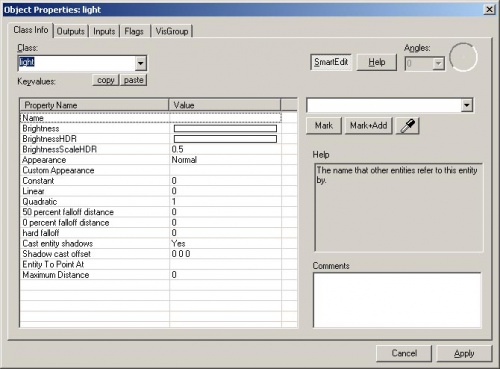
Next we'll change some settings on the light. Bring up the light's properties by double-clicking it in the Camera viewport or by selecting it (left-clicking on it) and then pressing the Alt+↵ Enter keys. This will bring up the Object Properties dialog box.
From the Object Properties, you can change various properties of the entity. For example, you can change the Brightness of this light. Click on the Brightness row under Keyvalues and you will see a set of numbers on the drop down menu on the right side. The default setting for the brightness of a light is 255 255 255 200. The first three numbers represent the RGB values (color) and the last number represents the intensity of the light.
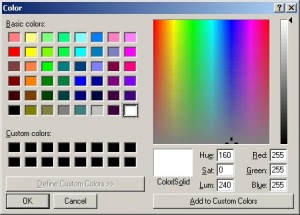
You can click on the Pick Color button to select a color rather than input values for it.
Simply click on the color you want the light to be and click OK.
This will bring you back to the Object Properties dialog box for the light. You should see any changes you made to the brightness on the Brightness row and the drop down field on the right side if the Brightness row is selected.
Click the Apply button to set your changes to the entity and close the dialog box by clicking on the "X" at the upper right side of the window.
Placing a prop_static
Entities also consist of props like furniture, decoration, and complex parts of architecture. There are a variety of different kinds of props. Prop_static entities are props that are static – they don't move, animate, turn on or turn off. There are also prop_dynamic entities that can move, animate, be enabled and disabled. There are also prop_physics entities which the player can interact with and behave physically as they would in the real world.
To place a prop:
- Select on the Entity Tool again.
- Go to the Object bar and change the Objects field to
prop_static. - Point to the floor in front of the
info_player_startand left-click to place a prop_static. You will see a red cube that represents theprop_staticbefore a model is attached to it. - Go back into selection mode by clicking on the
 Selection tool in the Tool Bar or by pressing the Esc key.
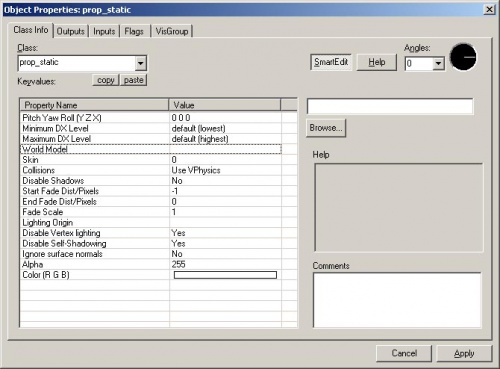
 - Double-click on the red cube to open the properties.
- Double-click on the World Model field to open the Model Browser.
Selecting the model
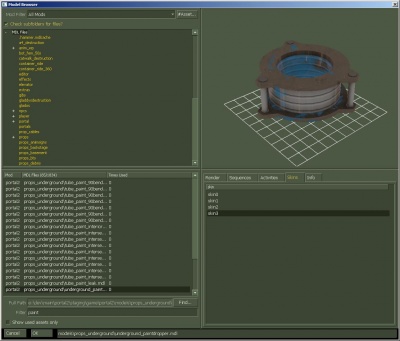
- In the Filter field at the bottom of the dialog box, type in "
paint". This will show all the models that have the word "paint" in their name. - Scroll down to the one named:
- "
props_underground\underground_paintdropper.mdl". - It should look like the image shown.
- "
- Click OK to select it and close the browser and return to the Object Properties dialog box. You should see the name of the model now in the World Model row.
- Click the Apply button to set your changes to the entity.
- Close the Properties box.
You will see the paintdropper that you just placed in the room in the viewports in the editor.
Moving entities
You can move entities like our paintdropper the same way you can move brushes. Click and drag inside the bounding box of the selected entity to move it around with your mouse or put your mouse over any of the viewports and use the arrow keys on your keyboard to move them around.
Rotating entities
To rotate an object , you simply select the object you wish to rotate using the Selection Tool ![]() , then click once on the object. You should see the object surrounded at the corners with circles. Mouse over a circle in any 2D view, then click and drag to rotate the object.
, then click once on the object. You should see the object surrounded at the corners with circles. Mouse over a circle in any 2D view, then click and drag to rotate the object.
Use your mouse wheel to zoom into the Front viewport and click once inside the bounding box of the paintdropper model to make its four corners highlight with circles around each one.
Left-click and drag in a counter-clockwise motion to rotate the paintdropper so that it can drop paint from the ceiliing.
Running your level in the game
You have saved your map, but you will also need to compile it before it can be played in the game engine.
When a map is compiled, it is converted from the raw .VMF file that you just saved, into the .BSP format used by the game engine. The geometry is processed and the proper lighting and shadows are pre-calculated with several compile programs.
- Open the File menu, and choose Run Map... or press the F9 key.
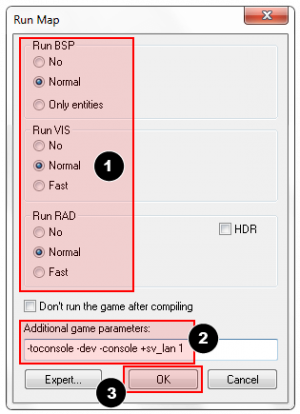
- The Run Map dialog will open.
- This dialog is used to set some basic compile parameters.
- Make sure that Normal is set under the Run BSP, Run VIS, and Run RAD settings.
- Under Additional game parameters:, make sure these settings are present, and type them in if not:
-toconsole -dev -console +sv_lan 1
- You may wish to check "Wait for keypress" so that you can see any error messages that occur.
- Now click the OK button to start the map compile process.
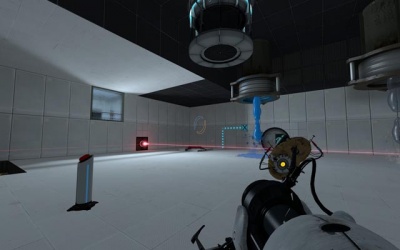
The Compile Process Window will show the progress of the compile. When the compilation is done, the game you are mapping for will automatically launch, and load your map in the engine.
Your level in the game should load up after compiling. It may take a minute or two.
Next time you compile, you may wish to check the "Don't run the game after compiling" checkbox. Otherwise, it will complain that only one instance of the game can run at once. Instead of exiting and relaunching the game (slow!), you can simply recompile the map (F9) and then type map myMapFileName in the developer console to reload the map.
The Developer console
Making levels for Portal 2 sometimes involves using commands typed into the Developer Console window. The console can also be used to do things like spawn cubes and turrets to test your level.
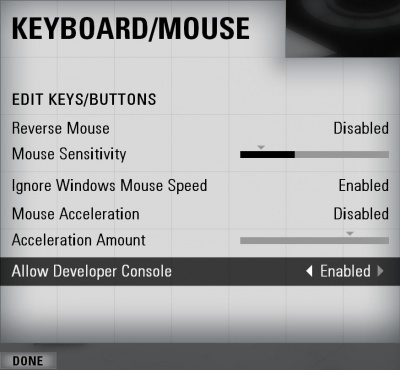
If you haven't already, make sure the console is enabled in the game:
- Press the Esc key in the game.
- Click on Options, then Keyboard/Mouse.
- Click on the Allow Developer Console and select "Enabled".
- Click on the Done Button.
- Click on Return to Game.
Using the developer console:
- Bring down your developer console ` (tilde).
- Type any console command and press the ↵ Enter key.
- Hide the console again with `.
Noclip mode
One console command you'll find constantly useful is noclip mode. This is a mode that let's you fly around the level without being stopped ("clipped") by anything in the level. It's useful to get around large levels quickly.
To enter noclip mode:
- Press ` to enter the console.
- Type
noclipin the console and press ↵ Enter. - Fly around the level.
- Type
noclipagain to leave noclip and walk around the level normally. - You can toggle noclip with the press of a button with the bind console command. For example,
bind mouse3 noclipfor the middle mouse button.
Some useful console commands
There are lots of console commands available. Here is a very small sampling:
- sv_cheats 1
- Turns on cheats. Necessary for many console commands.
- map <name of map>
- Loads a map or reloads the level you're in.
- changelevel <name of map>
- Loads a map while continuing the session.
- god
- Toggle the god mode. The player is invulnerable.
- noclip
- Allows you to fly through the world.
