Fixing Game Lighting
When getting started with Half-Life: Alyx's SFM, you may immediately notice that there is something up with the lighting. It's not loading! Never fear though, with a simple trick, you can add the lighting back into your level.
Prerequisites
If you're only familiar with the Source 1 Filmmaker, you may not know how the console works. In short, press the ~ key on your keyboard, and it will open the console.
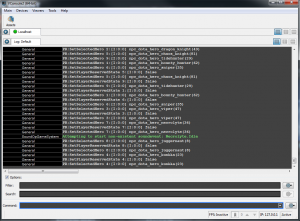
In Source 2, this comes in the form of the VConsole, which is a separate program entirely and allows you to run console commands separated from the engine, among other new features.
It's still the same old console, and you can still run all your favorite commands through it,
Loading the Map
Like Source 1, when you want to load a map in SFM, you Right-Click the Viewport->Set Session Map. However, for this setup, we are going to take an extra step.
Open the VConsole (by pressing ~) Depending on what kind of map this is, there is one of two console commands you may need to use to load it:
- If it is a map from the retail game or inside of a game folder (i.e. hlvr/maps) then use the command map map_name
- If it is a map from the workshop game or inside of a addon folder (i.e. hlvr_addons/mod_name/maps) then use the command addon_tools_map map_name
Recording the Lights
By default, you will notice one of two issues with the lights. Either no lights will appear in the SFM, or lights will not shade models loaded in the SFM.
If you see either of these issues, then you will need to record the lights so they will interact with the SFM.
- Load the map as previously described.
- While in the SFM, press the circular "Record" button on the bottom of the viewport.
- Record a couple seconds of gameplay, then press Esc to stop the recording.
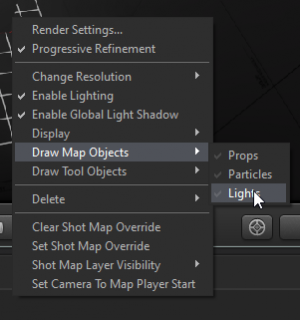
- Disable the map's lighting, to stop it from interacting with your new lights, by right-clicking the viewport, and un-checking Draw Map Objects->Lights
Your lights will now appear in the SFM and interact with SFM models and animation sets. However, the sun can have some issues not showing shadows on SFM characters. Please refer to the next section on how to fix this.
"Game" Lights: An Explaination
If you're an S1FM user, you may be used to spawning lights by right-clicking the animset viewer and adding lights that way, and that still functions in Source 2. However, for Half-Life: Alyx, almost all the rendering techniques used in-game are incompatible with these lights (referred to as "SFM Lights"), and there's some other shading issues with them. So, it's recommended that you use lights from the map (referred to as "Game Lights" or "Map Lights") that already exist in your scene, or add lights manually with the following processes:
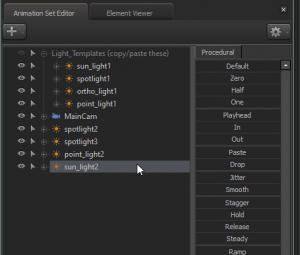
- If you want to modify a light recorded from the previous steps (such as the sun light,) you will want to add an animation set for it by clicking the Add button (
 ), clicking Create Animation Set(s) for Existing Element(s), and choosing the recorded light you want to modify. You can then duplicate these lights and reuse them all over your scene.
 - If you want to spawn all of the possible light types in a scene, your best bet is to have a template file with all four of the lighting types available. A pre-made template file with all of the lights is available here.
Specifically with Sun Lights, the sun may not cast shadows on SFM models. This is an odd issue, but can be fixed easily by un-ticking "mixedShadows" in the Element viewer of the light:
Improving the Lights
One thing you may notice about lighting with these new Game Lights is that they are a bit jaggy in some parts. You can improve this by lowering the FOV of your light throug the "Outer Cone Angle," but I have a different approach that will increase the shadow resolution of your lights.
- Right click your desired light (sun lighting not supported, you may change the resolution of the sun light with commands starting with csm_)
- Click Show in Element Viewer->Light
- Find the settings 'shadowTextureWidth' and 'shadowTextureHeight,' and give them a nice high value, i.e. 8192 (non-powers of two are supported, but not recommended.)
Your lights should now be sharper!
Fixing Crash with Volumetric Lighting
Volumetric lights in maps can sometimes cause crashes or holdups in the engine. This can easily be tested by loading 'a1_intro_world' and trying to fly towards Alyx's hideout, causing the hangup.
This seems to be a memory handling issue with very specific hardware (in this case, a 1st Gen Ryzen board with a 3rd Gen Ryzen CPU.) If you also experience this issue, try this fix:
- Navigate to your content folder, i.e. C:/Steam/steamapps/content/Half-Life Alyx/content.
- Navigate to content/core/materials/dev
- Find the file named cs_volumetric_fog.vmat. Rename the file to cs_volumetric_fog.vmat.donotuse.
This should make SFM a lot more stable and may also fix issues with volumetrics in Hammer.


