Ru/Prefab
Префаб означает предварительно созданный, и является отдельно сохраненным объектом, состоящим, как правило, из разных частей - брашей, пропов или сущностей. Система префабов позволяет легко хранить части ваших уровней, которые можно использовать неоднократно. Примеры полезных префабов включают коридоры, столбы, специально установленные сущности, и т.д..
Префабы - это просто маленькие файлы карты (.VMF), которые содержат только ваш префаб. Эти файлы хранятся в определенной папке, обычно \sourcesdk\bin\prefabs, чтобы Хаммер мог легко их найти и вставить на ваш уровень.
Примечание: В играх orangebox, убедитесь, что используете \sourcesdk\bin\orangebox\bin\prefabs
Префабы можно выстраивать по иерархии, просто добавляя их в подпапки каталога \prefabs. Это позволяет сортировать их на основе принадлежности к карте или моду, тем самым облегчая поиск.
Создание префабов
Следующие шаги позволяют создавать префабы в Хаммере:
- Если префабы предназначены для взаимодействия с поименованными объектами внутри себя, в конце имени каждого объекта добавляем маркер "_&i". См. ниже Маркер префабов.
- Выделите объекты, которые нужно добавить в префаб (зажав Ctrl).
- Если вы планируете вставлять префаб, используя Entity Tool, то начало координат (0,0,0) вашей карты будет использовано в качестве точки отсчета, поэтому желательно перенести выбранные объекты в эту точку и центрировать префаб по ней.
- Нажмите кнопку Create Prefab на панели объектов, или выберите команду Create Prefab в меню инструментов. (Горячая клавиша: Ctrl+R)
- Откроется диалог Save As..., показывая каталог префабов Хаммера. Впишите имя файла и сохраните префаб, нажав кнопку Save. Template:Note:ru Template:Bug:ru
- Теперь новый префаб будет доступен для вставки на панели объектов.
Маркер префабов
A special token "&i" can be added to the name of entities in prefab objects so the entity will have a unique name when placed in the level. When the prefab is placed, the &i token will be replaced by a unique number. The token can be included in the targetname, inputs and outputs, etc. All tokens in the prefab will be replaced with the same number. This allows entities within the prefab to reference each other, but still have a unique name so multiple prefabs won't trigger each other.
For example, a func_door entity with the name "door_sliding_&i" in the prefab would become "door_sliding_1" when placed in a level. Consecutive placements of the prefab would be called "door_sliding_2", "door_sliding_3", ...
A trigger_multiple included in the same prefab, set to trigger "door_sliding_&i" upon initial creation, would upon insertion share the same token number as the door.
For ways to address prefab names using this token, see search wildcards.
Inserting prefabs
Once you have prefab objects created, it is a simple task to insert a prefab into your level.
There are two ways of putting a prefab into your level: Using the Entity tool ![]() , or using the Block tool
, or using the Block tool ![]() .
.
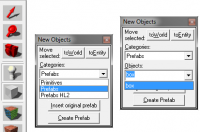
The process is basically the same for both tools: First select the tool you wish to use, then select the prefab from the Object bar, and then insert it through one of the views.
The Entity tool ![]() should be used for most prefab placement, as it retains the exact size of the original prefab. Placement with the Block tool
should be used for most prefab placement, as it retains the exact size of the original prefab. Placement with the Block tool ![]() allows for resizing of the prefab as it's placed, but is slightly more time-consuming to place correctly.
allows for resizing of the prefab as it's placed, but is slightly more time-consuming to place correctly.
Using the Entity Tool
The Entity tool ![]() is used to place a prefab object that should retain its original size.
is used to place a prefab object that should retain its original size.
- Select the Entity tool
 from the toolbar. (Shortcut: Shift+E)
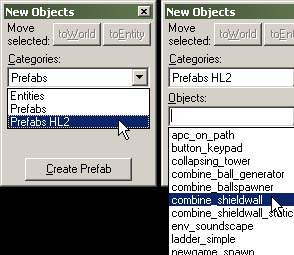
 - In the Object bar, select a prefab library in the Categories: selection box.
- Select a specific prefab to insert from the library in the Objects: selection box.
- Click in one of the 2D views where you want the prefab to be placed. Alternatively you can instead just click in the 3D view, whereupon the prefab will be inserted automatically.
- Press Return or ↵ Enter to insert the prefab.
Using the Block Tool
The Block tool ![]() is used if you want to insert a prefab scaled to a certain size.
is used if you want to insert a prefab scaled to a certain size.
To place a prefab object, scaling it to an exact size:
- Select the Block tool
 from the toolbar. (Shortcut: Shift+B)
 - In the Object bar, select a prefab library in the Categories: selection box.
- Select a specific prefab to insert from the library in the Objects: selection box.
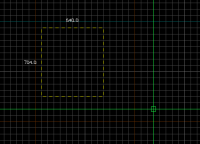
- Drag a selection box in one of the 2D views, making sure it is the size and in the position that you want the prefab to be in each of the views.
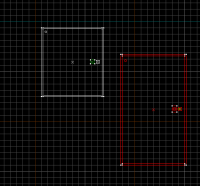
- Press Return or ↵ Enter to insert the prefab. It will be scaled to fit the selection box.
Notice that any inserted prefab is automatically grouped, and therefore needs to be ungrouped before individual components can be moved.
The Skip tool texture
A prefab typically consists of many objects that you want to move or copy somewhere, and if the prefab happens to be of an odd size, you may end up with components ending up not exactly where you want them. You can prevent this by enveloping the prefab inside a skip tool texture:
- Set the grid size to a the maximum size that you expect to move the prefab in. (Typically you plan the skip brush to be a size of about 4x4x4 grid squares.)
- Create a brush enveloping all the components of the prefab.
- Cover every side of the brush with the skip tool texture.
- Select all the components of the prefab (including the skip brush) and save it.
The positions of the components inside the brush are now relative to the enveloping skip brush, and the even size of the brush makes the movements of every component on par with the Hammer editor's graph. As the brush is covered in a skip tool texture, it will not be compiled with the map.
Available prefabs
For a list of prefabs that are already available in the Source SDK, see Category:Prefabs.
See also
- func_instance - An advanced dynamic alternative to prefabs, available for the Counter-Strike: Global Offensive, Left 4 Dead 2, Alien Swarm and Portal 2 engines.
External links
The following sites host custom made prefabs and models:


