Zh/Applying Textures
在这部分里我们要为墙面、地板和天花板挑选纹理。
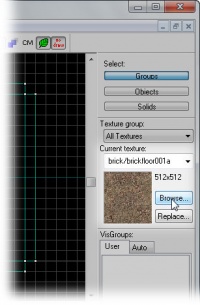
要打开纹理浏览器,点击Hammer界面右边纹理群组中的 浏览...按钮。
纹理浏览器
使用纹理浏览器查看并选择你想应用在笔刷上的纹理。
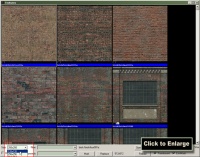
要浏览纹理时更轻松,你可能需要调整纹理的预览大小。
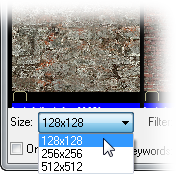
在纹理浏览器窗口的左下角,从大小:下拉列表中选择128x128。 这样可以减小纹理的采样大小,因此我们能同时看到更多内容。
纹理浏览器包含了数以千计的纹理,如果没有过滤器功能,想要精确的定位你所需要的纹理可是件麻烦事。 这项工鞥允许你指定文件的部分名称,像是"水泥墙","石灰天花板"或者"金属门"。 纹理浏览器稍后会过滤出那些只包含此文本的纹理。
开发用纹理
当要制作一幅地图时,开始时先使用能辅助创建适当大小物体的纹理是一种良好习惯。Hammer包含了一些专门辅助你创建和玩家相同比例的地图的纹理,叫做"开发用纹理"。
- 在过滤器中键入
dev wall。 - 双击纹理 dev/dev_measurewall01a。
选中的纹理显示在Hammer界面右边的当前纹理下。
应用纹理
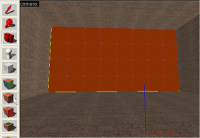
- 激活 选取工具
 。
。 - 在相机视图中点击你想应用纹理的墙面。
 注意:如果你是选择了一组墙中的一面那么整个房间都会被选中,下面你就必须把右上角的"选择:"从"群组"改到"物体",或让笔刷们取消群组。要取消群组,在任意视图选择房间,然后到工具 > 取消群组,再选择单个的墙体。
 - 在左边的面板上点击应用当前纹理图标File:Hammer applycurrenttextureicon.jpg在选定的笔刷上应用已选择的纹理。
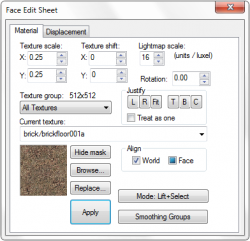
Depending on the texture and the surface, your texture may not fit perfectly on your wall. Using the Toggle Texture Application tool File:Hammer toggletextureapplicationicon.jpg, you can adjust your texture to fit the wall appropriately. The Toggle Texture Application tool opens the Face Edit Sheet for the selected surface.
Because we are using a dev texture that is 128 units and we are applying it to a wall that is 1024 x 512 (both multiples of 128), the texture should already fit the wall perfectly, but we can still see some changes by altering the settings in the Face Edit Sheet.
- Texture Scale adjusts the size of the texture. Numbers smaller than 1 make the texture smaller. Numbers greater than 1 make the texture larger. Negative numbers mirror the texture.
- Texture Shift moves the texture along the X or Y axis. Positive numbers move the texture left (X axis) and down (Y axis). Negative numbers move the texture right (X axis) and up (Y axis).
- Current Texture changes the applied texture on the surface.
- Lightmap scale affects how light effects apply to the surface. Smaller numbers are higher resolution and produce more expensive lighting effects. Larger numbers are lower resolution and produce cheaper lighting effects.
- Rotation rotates the texture on a brush face.
- Justify specifies how the texture lines up to an edge. L for left, R for right, T for top, B for bottom, C for center, and Fit scales the X & Y values to fit the entire texture onto the surface.
- Align specifies how the texture is treated spacially. World alignment forces the texture to be stay in place as the object it is applied to moves. Face alignment uses the coordinates of the face as a basis for alignment.
- Mode allows you to select what will happen when you click on a brush face with the left mouse button.
Apply the same texture to the remaining three walls.
Using the same process apply a dev texture to the ceiling and the floor.
Template:Otherlang:zh-cn Template:Otherlang:zh-cn:en Template:Otherlang:zh-cn:fr
