Nodegraph
A nodegraph is used to aid real-time NPC navigation. It is created by the mapper at design-time. When an NPC attempts to move to a point farther than the local navigation limit (600 units in HL2), it will use the nodegraph; complex or very small (e.g. doorways) areas will also require a graph for NPCs to move around efficiently. Unlike GoldSrc, NPCs can move off a Source nodegraph - it is mostly used in only a general sense.
The nodegraph is built into an AIN file on map load, if changes are detected or if no AIN exists. During the build the AI system draws links between all nodes near to each other and with a straight path between. For each node, the AI system determines which other nodes should connect to it, and for which NPC Hull. The AI system ignores all potentially movable entities (doors, func_trains, etc) when building the graph. The resulting AIN files are stored in <game>\maps\graphs.
There are separate nodegraphs for flying and land-based NPCs. An NPC could switch between the two, but there is currently no known example of such behavior.
Components
The following entities are used to create nodegraphs:
- Land
info_nodeinfo_node_hintinfo_node_climb- Air
info_node_airinfo_node_air_hint- Link control
info_node_linkinfo_node_link_controller
Construction
Node placement
The goal of a nodegraph is to record pathways, and the pattern of your node placement should reflect this. It should be possible to travel anywhere across your map by tracing a straight line from one node to another. Generally, this means placing a node on each corner of an obstacle. The more detailed an area, the more nodes will be required for NPCs to properly navigate. If you do not provide enough NPCs will not make use of tactical opportunities, and may even have trouble simply walking around. Provide no nodes at all and NPCs will be practically stranded, unable to do anything more complex than static actions like shooting and acting.
However, this is not to say you should blast your map into oblivion with an avalanche of nodes. Low-detail areas can be beneficial sometimes, as areas through which you want NPCs to travel but not get bogged down. If you are building a beach assault for example, you will probably want to keep the beach relatively sparse of nodes to ensure that the attacking NPCs keep moving until they reach cover (even if you did add nodes, there would probably be few landmarks for the AI to make use of).
The destination should have a dense nodegraph however, to ensure that the NPCs do not all arive at the same point and trip each other over.
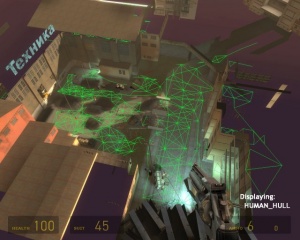
The actual density with which to place the nodes is up to you. You can use the image to the right as a guide to the numbers you should be aiming for. Note how the graph is quite sparse on the building roof to the extreme right, but much denser down on the ground, where the player will be.
Hint nodes
Hint nodes are navigation nodes with meaning, presenting NPCs with information about the area in which they are located. Their application is very important for a successful nodegraph.
As their name suggests, hints nodes will add to the nodegraph like a normal node; because of this, NPCs will be able to one as a normal node, even if they can't use it as a hint. Hint nodes can only be used as hints at, to, or from the precise location of the entity.
There are several key hints that you should know about when constructing your nodegraph:
- Entrance / Exit Pinch
- Forces NPCs to file through one at a time and prevents congestion. You should place one of these anywhere that a wider area narrows into a smaller one, particuarly doorways. Narrow corridors should have a hint of this type at both ends. You may want to place the node slighly before or after the pinch, if there are problems with its links or with NPCs reaching it. It is quite possible to have two hints of this type adjacent to each other if there is enough room.
- Crouch Cover Low
- Crouch Cover Medium
- These two hints tell NPCs that a node is safe to take cover at. While the safety of a node could be calculated off the cuff, placing this hint makes its location more obvious to the AI and lowers processing overhead. NPCs won't use the hint if it can be seen by a hostile.
- Override jump permission
- NPCs can jump from one hint of this type to another, if they can reach their destination and if doing so will not hurt them. This is the only way to allow NPCs to jump while navigating. Note that it is not required for an Antlion or Fast Zombie to make its leaping attack, but is for them to jump while moving to a location.
There are many more useful hints: for a complete list, see the Hint nodes article.
Debugging the graph
TODO
Usage by NPCs
When an NPC attempts to build a route, it accesses the nodegraph to follow these steps:
- Find the nearest node to the NPC's current position.
- Find the nearest node to the NPC's desired movement point.
- Ensure the two points are connected, and find the best path between them.
- Use moveprobes to ensure that the NPC can reach the nearest node.
- Use moveprobes to ensure that the NPC can reach the desired movement point from the nearest node to it.
TBD
Good nodegraph construction tips.
- When placing nodes on steep displacements, raise them by around 10 units to ensure a connection.
- Check your graph with
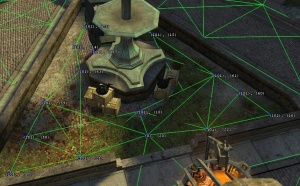
ai_show_connectin-game for any bad or missing links.

