Creating a Room: Difference between revisions
No edit summary |
(Moving the camera part to the new View Navigation chapter.) |
||
| Line 30: | Line 30: | ||
Positive values create the walls inside yours brush and will make a smaller room than the brush you drew. | Positive values create the walls inside yours brush and will make a smaller room than the brush you drew. | ||
<br style="clear:both"> | <br style="clear:both"> | ||
==Selecting and Ungrouping the room== | ==Selecting and Ungrouping the room== | ||
Revision as of 01:19, 15 February 2006
This is an continuation of the "Your First Half-Life 2: Deathmatch Room" tutorial. In this section, you'll learn how to make a room out of the brush you've created.
Making a hollow room
First, make sure the brush is still selected.
Now select Make Hollow from the Tools Menu.
We can use this to make a hollow room out of the single solid brush we've made.
It will create new brushes that are no different from the brush you drew earlier, they will instead make walls for a room. Make hollow is a helper designed to save you time.
Instead of drawing the six brushes it usually takes to make a room, you can do it with one brush and the hollow command.
The Hollow dialog appears.
Change the value in the box from the default of "32" to "-16", which will create 16-inch walls for our room. Click OK when you are done.
The negative number will create the walls outside the brush you drew, it will leave the inisde of your room exactly the size you drew the brush.
Positive values create the walls inside yours brush and will make a smaller room than the brush you drew.
Selecting and Ungrouping the room
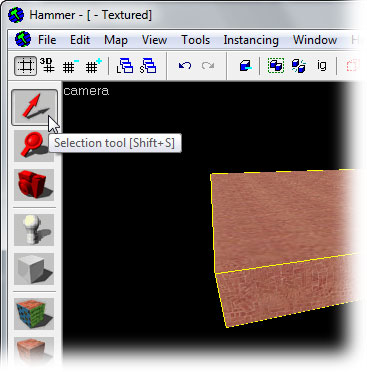
Pick the Selection Tool again.
Left-click the hollow room, so that it turns red, like in the image here. You've selected the room.
Select Ungroup from the Tools Menu.
This separates the pieces of the hollowed room into separate brush objects that can be individually selected and manipulated.
Ungrouping is generally advised because as you advance you will wish to edit the floor seperate to the rest of the room for example. This is difficult to do grouped and ungrouping now will save unexpected problems in the future when you select the room instead of the wall.
Now onto the next part of the tutorial, Applying Textures.
