Creating indicator lights: Difference between revisions
No edit summary |
m (→Checkmark Box) |
||
| Line 22: | Line 22: | ||
Align it so it will be at the end of your light path. | Align it so it will be at the end of your light path. | ||
[[Image:Indicatorlights3.jpg|right|thumb|Where to put the brush.]] | [[Image:Indicatorlights3.jpg|right|thumb|Where to put the brush.]] | ||
2. Create a | 2. Create a 32Wx4Lx32H block brush textured with ''tools/toolsnodraw''. Texture the edges with ''signage/signage_border'' and the front with ''signage/signage_doorstate. Align this brush so it fits inside the [[prop_static]] sign frame. | ||
3. Tie the brush to a [[func_brush]] entity and give it the same name as your [[info_overlay]]s. | 3. Tie the brush to a [[func_brush]] entity and give it the same name as your [[info_overlay]]s. | ||
{{clr}} | {{clr}} | ||
=Making it Work= | =Making it Work= | ||
[[Image:Indicatorlights4.jpg|right|thumb|Final product]] | [[Image:Indicatorlights4.jpg|right|thumb|Final product]] | ||
Revision as of 17:53, 20 November 2007
Introduction
This tutorial will show you how to make those indicator strips on the ground and walls that change color when the trigger is activated.
Overlays
The bulk of the lights are comprised of info_overlays. The four textures used are:
- signage/indicator_lights/indicator_lights_floor
- signage/indicator_lights/indicator_lights_wall
- signage/indicator_lights/indicator_lights_corner_floor
- signage/indicator_lights/indicator_lights_corner_floor
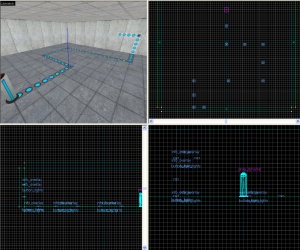
1. Create a path using the above info_overlays from your trigger to whatever they should activate. Give them all the same name; in this example we will use button_lights.
Checkmark Box
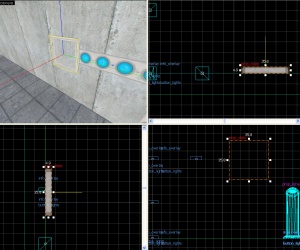
1. Create a prop_static with the following properties:
Property Name Value World Model models/props/sign_frame01/sign_frame01.mdl
Align it so it will be at the end of your light path.
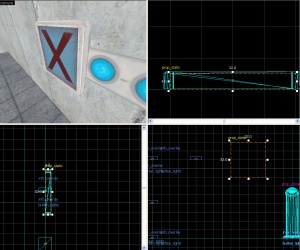
2. Create a 32Wx4Lx32H block brush textured with tools/toolsnodraw. Texture the edges with signage/signage_border and the front with signage/signage_doorstate. Align this brush so it fits inside the prop_static sign frame.
3. Tie the brush to a func_brush entity and give it the same name as your info_overlays.
Making it Work
1. Create a env_texturetoggle entity somewhere near your overlays. Give it the following properties:
Property Name Value Name button_lights_toggle Target Brush(es) button_lights (or whatever you named the overlays/func_brush)
2. Now just add the following output to the trigger for your button/switch/ect:
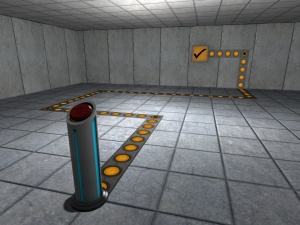
You now have helpful indicator lights to put around your map! You can download the tutorial map here.


