Zh/Source 2/Docs/Level Design/3D Skybox Creation: Difference between revisions
No edit summary |
No edit summary |
||
| Line 34: | Line 34: | ||
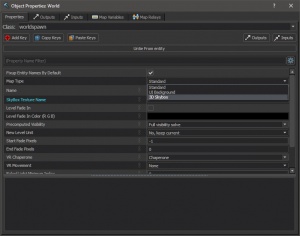
#然后点击 '''Map → Map Properties''' {{key|Ctrl|Shift|P}},把 '''Map Type''' 的 ''Standard'' 换成 ''3D Skybox''。 其他设置不变。 | #然后点击 '''Map → Map Properties''' {{key|Ctrl|Shift|P}},把 '''Map Type''' 的 ''Standard'' 换成 ''3D Skybox''。 其他设置不变。 | ||
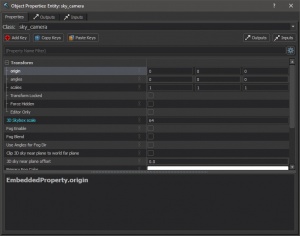
#接下来创建一个 [[sky_camera]] 点实体, 然后将它置于世界原点坐标:'''0,0,0'''(2D网格中心交叉的两条水色线表示)的中心。 你也可以通过对象属性来调整,在选择模式下选中并双击 sky_camera 实体 (或在选中后依次按 {{key|Alt|Enter}}), 然后在'''Transform'''类别下调整值。 其他不变。 | #接下来创建一个 [[sky_camera]] 点实体, 然后将它置于世界原点坐标:'''0,0,0'''(2D网格中心交叉的两条水色线表示)的中心。 你也可以通过对象属性来调整,在选择模式下选中并双击 sky_camera 实体 (或在选中后依次按 {{key|Alt|Enter}}), 然后在'''Transform'''类别下调整值。 其他不变。 | ||
# | #地图已经可以作为3D天空盒了,现在我们可以添加东西了,例如模型,网格实体,粒子效果。 | ||
# | #当你搭建完后,将你的地图保存到你插件的地图文件夹或地图文件夹中的一个子文件夹进行组织。 | ||
# | #最后将其编译 | ||
=== | === 将3D Skybox添加到你的地图中 === | ||
# | #加载你的地图文件。 | ||
# | #创建一个[[skybox_reference]] 点实体, 并将其完美地置于原点坐标,就像前文的[[sky_camera]]一样。 它决定了3DSky box将被创建的位置,相对于3D Skybox 地图文件中的sky_camera坐标。 | ||
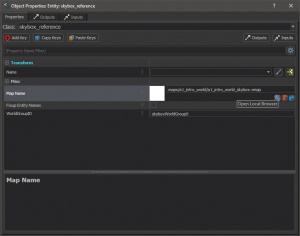
# | #点开 [[skybox_reference]]的Object Properties,并通过单击蓝色放大镜图标来更改Map Name键值,以打开本地资产浏览器。 | ||
# | #在搜索框中搜索你的3D Skybox地图的名称,选择它 | ||
=== | === 为你的3D Skybox添加光照 === | ||
正如前文所说,你的3D skybox现在可能会因为没有光照而漆黑一片,包括2DSkybox现在在你的地图编辑预览中消失了。 | |||
你的3D Skybox .vmap现在需要它自己的[[light_environment]]实体来照亮地图,它自己的[[env_sky]]来保持2D Skybox在编辑器预览中活跃。 | |||
The issue with the 2D skybox disappearing is likely due to the 3D Skybox overriding your actual map's 2D skybox - and since one doesn't presently exist in the 3D skybox until you create one, it has no skybox material to load. | The issue with the 2D skybox disappearing is likely due to the 3D Skybox overriding your actual map's 2D skybox - and since one doesn't presently exist in the 3D skybox until you create one, it has no skybox material to load. | ||
Revision as of 23:03, 31 January 2023
介绍
这篇文章将从头开始介绍起源2创建3DSkybox的方法。另外还包括一个步骤,在起源2中为3DSkybox提供光照。起源2中的步骤与起源1有所出入。
与起源1不同,起源2中的3DSkybox是在编译后的.vmap文件中创建的,与实际地图分开,然后在hammer中加载预览,并通过Skybox参考点实体选择您的"3DSkybox .vmap"。你的3DSkybox地图的光照也需要与你的主地图分开,否则你的3DSkybox将没有光照——此外,3DSkybox自身也需要2DSkybox设置,以便在你的地图中加载和使用预览编辑器。
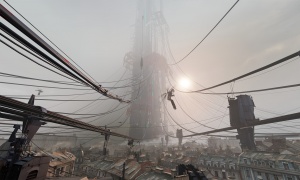
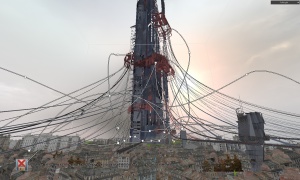
当我们想要给玩家一种规模感和沉浸感、真实感时,3DSkybox就会派上用场,它会在地图的可玩范围内提供一个看似一个人口十分密集而充实的世界,给玩家造成一种十分真实的幻觉。 通常情况下,玩家不会近距离看到这些资产,而且这些资产通常是由十分低质量的模型组成的,这些模型的渲染成本很低,在远处时玩家很难察觉到模糊感。
3DSkybox还提供了统一缩放所有内容的功能,将Sky_camera实体作为向外缩放的参考原点。 这在某些情况下是很有用的,例如你必须准确描绘某种类型的巨大的建筑,而不受渲染距离的限制,在将其置于实际地图的较远位置时,会切断并且模糊化建筑。
需要
本篇文章仅专注于在Hammer中创建3DSkybox与提供光照,并假设您使用的是Valve提供的半条命Alyx车间工具,没有任何改变或修改。 你需要知道标准2DSkybox的设置,起源2中的环境光照设置与如何编译地图。
并非所有用来创建3DSkybox的实体都在Valve Developer Wiki上有文档,但它们大多都很好理解。
本篇文章中将使用的实体如下:
创建
3D Skybox
- 点击 File → New Ctrl+N 创建一个空白地图。
- 然后点击 Map → Map Properties Ctrl+⇧ Shift+P,把 Map Type 的 Standard 换成 3D Skybox。 其他设置不变。
- 接下来创建一个 sky_camera 点实体, 然后将它置于世界原点坐标:0,0,0(2D网格中心交叉的两条水色线表示)的中心。 你也可以通过对象属性来调整,在选择模式下选中并双击 sky_camera 实体 (或在选中后依次按 Alt+↵ Enter), 然后在Transform类别下调整值。 其他不变。
- 地图已经可以作为3D天空盒了,现在我们可以添加东西了,例如模型,网格实体,粒子效果。
- 当你搭建完后,将你的地图保存到你插件的地图文件夹或地图文件夹中的一个子文件夹进行组织。
- 最后将其编译
将3D Skybox添加到你的地图中
- 加载你的地图文件。
- 创建一个skybox_reference 点实体, 并将其完美地置于原点坐标,就像前文的sky_camera一样。 它决定了3DSky box将被创建的位置,相对于3D Skybox 地图文件中的sky_camera坐标。
- 点开 skybox_reference的Object Properties,并通过单击蓝色放大镜图标来更改Map Name键值,以打开本地资产浏览器。
- 在搜索框中搜索你的3D Skybox地图的名称,选择它
为你的3D Skybox添加光照
正如前文所说,你的3D skybox现在可能会因为没有光照而漆黑一片,包括2DSkybox现在在你的地图编辑预览中消失了。 你的3D Skybox .vmap现在需要它自己的light_environment实体来照亮地图,它自己的env_sky来保持2D Skybox在编辑器预览中活跃。
The issue with the 2D skybox disappearing is likely due to the 3D Skybox overriding your actual map's 2D skybox - and since one doesn't presently exist in the 3D skybox until you create one, it has no skybox material to load. This stems from how the 3D skybox exists in a separate map file, as explained in the introduction, and it will not take on any lighting from entities in your actual map.
- To fix these issues and properly light your skybox elements, copy your map's light_environment and env_sky entities Ctrl+C and paste them (Ctrl+V, or Ctrl+⇧ Shift+V for Paste Special) into your 3D Skybox .vmap. This ensures that the light_environment and the env_sky maintains the same settings, angles, sky material, etc, as your actual map.
- You are now finished with this guide, and should have a working and properly lit 3D skybox in-editor and in-game.
额外
笔记
- Don't forget to compile your 3D skybox the first time you finish building it, including at any time you make changes to it in the future.
- The skybox_reference entity can be freely rotated on any axis if needed, much like an env_sky, or light_environment.
- Remember to always place the sky_camera and skybox_reference entities at the exact same coordinates in both your actual map, and the map you're creating the 3D skybox in.
- Distance based fog can be applied to your 3D skybox in the sky_camera properties, and will only affect your 3D skybox - leaving you with more control over fog in your actual map. This fog behaves in the same way as sky_camera distance-based fog in the Source engine.
致谢
- Discord的用户Trevor#7686分享了在起源2中创建3DSkybox与起源1引擎的不同之处
- Discord用户youmenow1#0369告知了我们需要编译3D Skybox .vmap - youmenow1's Steam Profile
