Half-Life 2 map reference: Difference between revisions
Frying1Pans (talk | contribs) |
(<gallery> -> <gallery mode=packed>. Better? Used Template:Game name.) |
||
| Line 1: | Line 1: | ||
{{toc-right}} | {{toc-right}} | ||
In the order commonly played, here is every | In the order commonly played, here is every {{game name|hl2|name=Half-Life 2}} map: | ||
=Day 1= | =Day 1= | ||
| Line 11: | Line 11: | ||
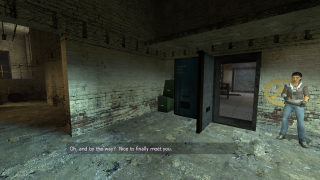
The map with [[Gman]]'s intro monologue. From there, the player arrives at the train station, encounters [[Barney]], and leaves the interrogation room with the first freely openable door in the game. | The map with [[Gman]]'s intro monologue. From there, the player arrives at the train station, encounters [[Barney]], and leaves the interrogation room with the first freely openable door in the game. | ||
<gallery> | <gallery mode=packed> | ||
Hl2 d1 trainstation 01 gman.png|Gman speaking to Gordon before dropping him in City 17. | Hl2 d1 trainstation 01 gman.png|Gman speaking to Gordon before dropping him in City 17. | ||
Hl2 d1 trainstation 01 trainyard.png|The outside. | Hl2 d1 trainstation 01 trainyard.png|The outside. | ||
| Line 20: | Line 20: | ||
Starts with the well-known "pick up that can" cop. Goes through the train station, then out into a plaza with checkpoints. Through old streets, an alley and a playground with two citizens talking about [[Civil Protection]]. It ends with the player heading into an apartment building. | Starts with the well-known "pick up that can" cop. Goes through the train station, then out into a plaza with checkpoints. Through old streets, an alley and a playground with two citizens talking about [[Civil Protection]]. It ends with the player heading into an apartment building. | ||
<gallery> | <gallery mode=packed> | ||
Hl2 d1 trainstation 02 cancop.png|"Pick up that can" | Hl2 d1 trainstation 02 cancop.png|"Pick up that can." | ||
Hl2 d1 trainstation 02 foodbuilding.png | Hl2 d1 trainstation 02 foodbuilding.png | ||
Hl2 d1 trainstation 02 plaza.png|The plaza Barney spoke of before. | Hl2 d1 trainstation 02 plaza.png|The plaza Barney spoke of before. | ||
| Line 30: | Line 30: | ||
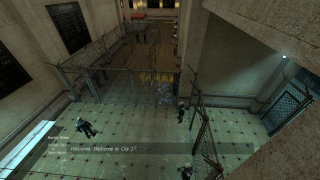
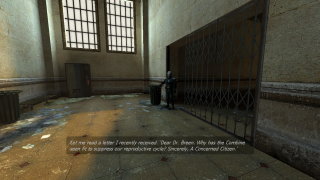
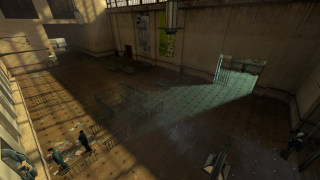
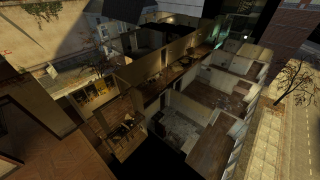
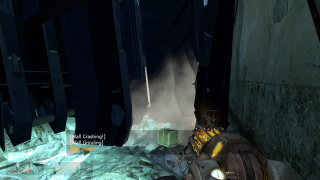
The interior of an apartment complex. Takes a very long and specific path with lots of detail and dialogue to give players more insight into how life is in [[City 17]]. About half-way through, the player is detected as someone who should not be there and becomes a target of [[Civil Protection]] and is chased. | The interior of an apartment complex. Takes a very long and specific path with lots of detail and dialogue to give players more insight into how life is in [[City 17]]. About half-way through, the player is detected as someone who should not be there and becomes a target of [[Civil Protection]] and is chased. | ||
<gallery> | <gallery mode=packed> | ||
Hl2 d1 trainstation 03 overview.png | Hl2 d1 trainstation 03 overview.png | ||
Hl2 d1 trainstation 03 doorcrash.png|CP's raiding an apartment. | Hl2 d1 trainstation 03 doorcrash.png|CP's raiding an apartment. | ||
| Line 38: | Line 38: | ||
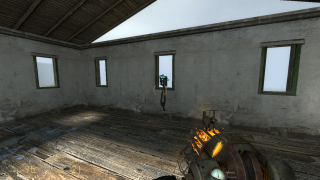
Continues the chase from the previous map across rooftops. [[Gordon]] is trapped by four metrocops in an attic. He is quickly saved by [[Alyx Vance]], their first encounter. Alyx escorts the player over to [[Dr. Kleiner]]'s lab, passing through a secret door with a poster of [[Breen]] on it. | Continues the chase from the previous map across rooftops. [[Gordon]] is trapped by four metrocops in an attic. He is quickly saved by [[Alyx Vance]], their first encounter. Alyx escorts the player over to [[Dr. Kleiner]]'s lab, passing through a secret door with a poster of [[Breen]] on it. | ||
<gallery> | <gallery mode=packed> | ||
Hl2 d1 trainstation 04 outside.png | Hl2 d1 trainstation 04 outside.png | ||
Hl2 d1 trainstation 04 alyxcloseup.png|The player's first view of Alyx. | Hl2 d1 trainstation 04 alyxcloseup.png|The player's first view of Alyx. | ||
| Line 50: | Line 50: | ||
Alyx takes Gordon to Kleiner's lab, passing through another secret door. Barney arrives short time later, and Gordon gets his suit. Alyx is teleported to [[Black Mesa East]]. [[Lamarr]] interrupts Gordon's teleportation, he is teleported to several random destinations (a wasteland, Breen's office, and a coastline with an [[Ichthyosaur]]), the [[Combine]] become aware of his presence, and Gordon flees. | Alyx takes Gordon to Kleiner's lab, passing through another secret door. Barney arrives short time later, and Gordon gets his suit. Alyx is teleported to [[Black Mesa East]]. [[Lamarr]] interrupts Gordon's teleportation, he is teleported to several random destinations (a wasteland, Breen's office, and a coastline with an [[Ichthyosaur]]), the [[Combine]] become aware of his presence, and Gordon flees. | ||
<gallery> | <gallery mode=packed> | ||
Hl2 d1 trainstation 05 secretdoor.png|Secret door to Kleiner's lab. | Hl2 d1 trainstation 05 secretdoor.png|Secret door to Kleiner's lab. | ||
Hl2 d1 trainstation 05 kleinerlab.png|Kleiner's lab. | Hl2 d1 trainstation 05 kleinerlab.png|Kleiner's lab. | ||
| Line 59: | Line 59: | ||
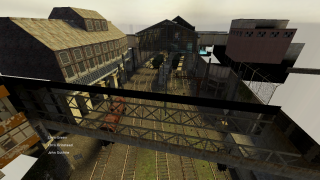
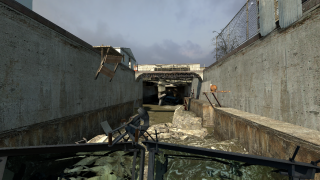
Gordon continues fleeing, but is blocked by wood planks. Barney appears on a platform, telling Gordon to escape through the canals via the refugee network. Barney also gives him the first weapon in the game, the crowbar. Gordon is able to break the planks, and enters the trainyard seen in <code>d1_trainstation_01</code>, pursued by Civil Protection. | Gordon continues fleeing, but is blocked by wood planks. Barney appears on a platform, telling Gordon to escape through the canals via the refugee network. Barney also gives him the first weapon in the game, the crowbar. Gordon is able to break the planks, and enters the trainyard seen in <code>d1_trainstation_01</code>, pursued by Civil Protection. | ||
<gallery> | <gallery mode=packed> | ||
Hl2 d1 trainstation 06 barneycrowbar.png|Barney giving the crowbar. In the distance are the wood planks. | Hl2 d1 trainstation 06 barneycrowbar.png|Barney giving the crowbar. In the distance are the wood planks. | ||
Hl2 d1 trainstation 06 trainyard.png|Trainyard. Compare with the second screenshot from the first map. | Hl2 d1 trainstation 06 trainyard.png|Trainyard. Compare with the second screenshot from the first map. | ||
| Line 70: | Line 70: | ||
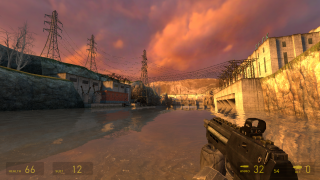
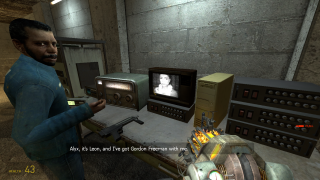
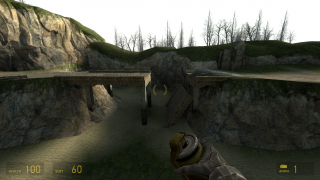
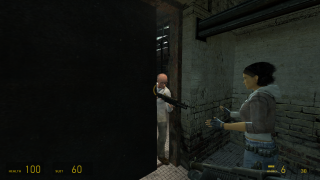
Starts with two cops assaulting a citizen, as another citizen watches in fear. Gordon kills both and picks up the second weapon in the game, the pistol. The player fights on through a railway and comes across a boxcar. Inside, a human and a vortigaunt help the player keep going. Gman is briefly seen on a TV that they are both watching. | Starts with two cops assaulting a citizen, as another citizen watches in fear. Gordon kills both and picks up the second weapon in the game, the pistol. The player fights on through a railway and comes across a boxcar. Inside, a human and a vortigaunt help the player keep going. Gman is briefly seen on a TV that they are both watching. | ||
<gallery> | <gallery mode=packed> | ||
Hl2 d1 canals 01 policeassault.png|Police hurting a citizen. | Hl2 d1 canals 01 policeassault.png|Police hurting a citizen. | ||
Hl2 d1 canals 01 railroad.png|The railroad followed through. Due to the forcefields in the way, the player has to detour around them. | Hl2 d1 canals 01 railroad.png|The railroad followed through. Due to the forcefields in the way, the player has to detour around them. | ||
| Line 85: | Line 85: | ||
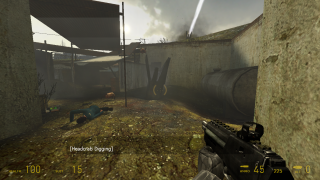
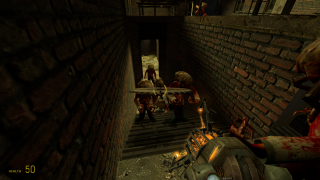
Further along, a citizen calls for the player and reassures them that there are other stations who can help. Metrocops attempt multiple times to kill the player with explosive oil drums. | Further along, a citizen calls for the player and reassures them that there are other stations who can help. Metrocops attempt multiple times to kill the player with explosive oil drums. | ||
<gallery> | <gallery mode=packed> | ||
Hl2 d1 canals 01a barnacle.png|Crow caught by barnacle. | Hl2 d1 canals 01a barnacle.png|Crow caught by barnacle. | ||
Hl2 d1 canals 01a massacre.png|Station 12 members being shot. (It's hard to see them as they are shot.) | Hl2 d1 canals 01a massacre.png|Station 12 members being shot. (It's hard to see them as they are shot.) | ||
| Line 107: | Line 107: | ||
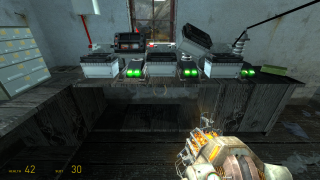
The player encounters another station (11? The number is never stated) with a single person inside. Quickly, a group of manhacks crashes in and attacks. If the player does not attack the manhacks (sometimes just distracting them is enough) the citizen will be killed. This is the first time manhacks are seen. After going through many more areas, there is another small "puzzle" here. The player has to turn a valve to raise the water level in a room in order to pass through it. | The player encounters another station (11? The number is never stated) with a single person inside. Quickly, a group of manhacks crashes in and attacks. If the player does not attack the manhacks (sometimes just distracting them is enough) the citizen will be killed. This is the first time manhacks are seen. After going through many more areas, there is another small "puzzle" here. The player has to turn a valve to raise the water level in a room in order to pass through it. | ||
<gallery> | <gallery mode=packed> | ||
Hl2 d1 canals 03 station.png | Hl2 d1 canals 03 station.png | ||
Hl2 d1 canals 03 puzzle.png | Hl2 d1 canals 03 puzzle.png | ||
</gallery> | </gallery> | ||
===d1_canals_04=== | |||
This map was scrapped during development of {{game name|hl2|name=Half-Life 2}}. {{todo|Find out more about it.}} | |||
===d1_canals_05=== | ===d1_canals_05=== | ||
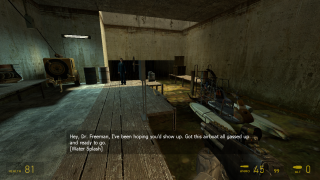
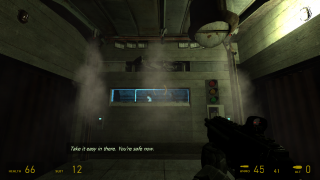
Gordon encounters what is evidently Station 6. Black Mesa East (possibly Alyx speaking?) radios this station to tell them to give Gordon the airboat. Before the player can reach the boat, they must pass through a small area currently being bombarded with headcrab canisters. After this, a citizen gives the airboat over to the player, and says to drive to nearby Station 7. | Gordon encounters what is evidently Station 6. Black Mesa East (possibly Alyx speaking?) radios this station to tell them to give Gordon the airboat. Before the player can reach the boat, they must pass through a small area currently being bombarded with headcrab canisters. After this, a citizen gives the airboat over to the player, and says to drive to nearby Station 7. | ||
<gallery> | <gallery mode=packed> | ||
Hl2 d1 canals 05 station6.png|Station 6. | Hl2 d1 canals 05 station6.png|Station 6. | ||
Hl2 d1 canals 05 canisters.png | Hl2 d1 canals 05 canisters.png | ||
Hl2 d1 canals 05 boat.png|Getting the boat. | Hl2 d1 canals 05 boat.png|Getting the boat. | ||
</gallery> | </gallery> | ||
==[[Water Hazard]]== | ==[[Water Hazard]]== | ||
| Line 130: | Line 130: | ||
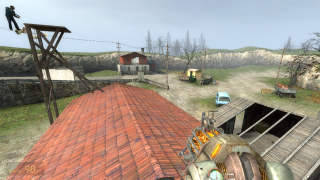
Station 7 is close to the start. The occupants of this station have been zombified by headcrabs, though. On the radio, a woman is heard attempting to reach Station 12 again. Ahead is another physics puzzle. Usually, the player will solve this by putting a few barrels under a ramp, so that they can jump across with the boat. They can also choose to just abandon the boat and go on foot. (good luck) | Station 7 is close to the start. The occupants of this station have been zombified by headcrabs, though. On the radio, a woman is heard attempting to reach Station 12 again. Ahead is another physics puzzle. Usually, the player will solve this by putting a few barrels under a ramp, so that they can jump across with the boat. They can also choose to just abandon the boat and go on foot. (good luck) | ||
<gallery> | <gallery mode=packed> | ||
Hl2 d1 canals 06 station7.png|Station 7 from the river. | Hl2 d1 canals 06 station7.png|Station 7 from the river. | ||
Hl2 d1 canals 06 puzzle.png|Ramp puzzle. | Hl2 d1 canals 06 puzzle.png|Ramp puzzle. | ||
| Line 138: | Line 138: | ||
The player raids a Combine post and must destroy some explosive barrels to allow for a floodgate blocking their path to open. The enemy firepower increases as rocket-firing APCs are deployed more and more frequently. | The player raids a Combine post and must destroy some explosive barrels to allow for a floodgate blocking their path to open. The enemy firepower increases as rocket-firing APCs are deployed more and more frequently. | ||
<gallery> | <gallery mode=packed> | ||
Hl2 d1 canals 07 post.png|The post, from above. | Hl2 d1 canals 07 post.png|The post, from above. | ||
Hl2 d1 canals 07 barrels.png|The player breaks the barrels, and the explosion breaks the wood holding the i-beams in place. The beams become a battering ram for the large gates. | Hl2 d1 canals 07 barrels.png|The player breaks the barrels, and the explosion breaks the wood holding the i-beams in place. The beams become a battering ram for the large gates. | ||
| Line 146: | Line 146: | ||
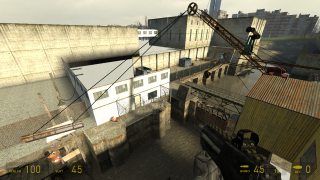
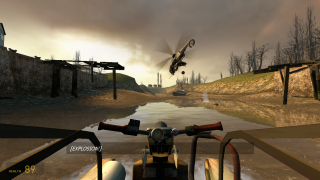
The player raids another Combine post, this time a hunter-chopper is summoned to harass them. As the player drives off, the helicopter starts using bombs on the player for the first time. | The player raids another Combine post, this time a hunter-chopper is summoned to harass them. As the player drives off, the helicopter starts using bombs on the player for the first time. | ||
<gallery> | <gallery mode=packed> | ||
Hl2 d1 canals 08 post.png | Hl2 d1 canals 08 post.png | ||
</gallery> | </gallery> | ||
| Line 153: | Line 153: | ||
The helicopter continues chasing the boat. It mainly attacks by dropping more bombs on the player's path. | The helicopter continues chasing the boat. It mainly attacks by dropping more bombs on the player's path. | ||
<gallery> | <gallery mode=packed> | ||
Hl2 d1 canals 09 bombs.png|Bombs being dropped. | Hl2 d1 canals 09 bombs.png|Bombs being dropped. | ||
</gallery> | </gallery> | ||
| Line 160: | Line 160: | ||
Yet another chase map. The helicopter loses track of the player as they drive through a tunnel. | Yet another chase map. The helicopter loses track of the player as they drive through a tunnel. | ||
<gallery> | <gallery mode=packed> | ||
Hl2 d1 canals 10 tower.png|A chimney falls and interrupts the player's path. | Hl2 d1 canals 10 tower.png|A chimney falls and interrupts the player's path. | ||
</gallery> | </gallery> | ||
| Line 167: | Line 167: | ||
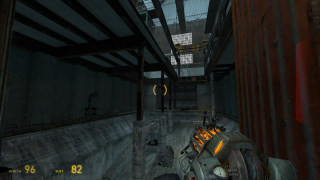
The player encounters a rebel outpost. Here, a vortigaunt equips the airboat with a high-power gun, which is used to ward off the hunter-chopper for a while. | The player encounters a rebel outpost. Here, a vortigaunt equips the airboat with a high-power gun, which is used to ward off the hunter-chopper for a while. | ||
<gallery> | <gallery mode=packed> | ||
Hl2 d1 canals 11 vortgun.png|Vortigaunt welding gun. | Hl2 d1 canals 11 vortgun.png|Vortigaunt welding gun. | ||
</gallery> | </gallery> | ||
| Line 174: | Line 174: | ||
Nothing too special about this map. It has lots of APCs and exploding barrels. | Nothing too special about this map. It has lots of APCs and exploding barrels. | ||
<gallery> | <gallery mode=packed> | ||
Hl2 d1 canals 12 apcs.png | Hl2 d1 canals 12 apcs.png | ||
</gallery> | </gallery> | ||
| Line 181: | Line 181: | ||
The final encounter with a hunter-chopper, which is persistent and fights to the end. After this, the player reaches Black Mesa East. | The final encounter with a hunter-chopper, which is persistent and fights to the end. After this, the player reaches Black Mesa East. | ||
<gallery> | <gallery mode=packed> | ||
Hl2 d1 canals 13 bullrush.png|Helicopter entering "bullrush" mode. | Hl2 d1 canals 13 bullrush.png|Helicopter entering "bullrush" mode. | ||
</gallery> | </gallery> | ||
| Line 191: | Line 191: | ||
Gordon enters the airlock and meets Mossman and Eli again. After a long expository sequence, Alyx takes Gordon over to the scrapyard. | Gordon enters the airlock and meets Mossman and Eli again. After a long expository sequence, Alyx takes Gordon over to the scrapyard. | ||
<gallery> | <gallery mode=packed> | ||
Hl2 d1 eli 01 outside.png|Outside. | Hl2 d1 eli 01 outside.png|Outside. | ||
Hl2 d1 eli 01 airlock.png|Airlock. | Hl2 d1 eli 01 airlock.png|Airlock. | ||
| Line 201: | Line 201: | ||
Alyx gives Gordon the gravity gun, and the player learns how to use it here. Gordon meets Dog and they play fetch. The Combine comes and begins to raid the base. Everyone rushes inside. Alyx has to stay behind but Gordon escapes by going through the Ravenholm tunnel. | Alyx gives Gordon the gravity gun, and the player learns how to use it here. Gordon meets Dog and they play fetch. The Combine comes and begins to raid the base. Everyone rushes inside. Alyx has to stay behind but Gordon escapes by going through the Ravenholm tunnel. | ||
<gallery> | <gallery mode=packed> | ||
Hl2 d1 eli 02 scrapyard1.png|Scrapyard. | Hl2 d1 eli 02 scrapyard1.png|Scrapyard. | ||
Hl2 d1 eli 02 scrapyard2.png|Scrapyard again. | Hl2 d1 eli 02 scrapyard2.png|Scrapyard again. | ||
| Line 213: | Line 213: | ||
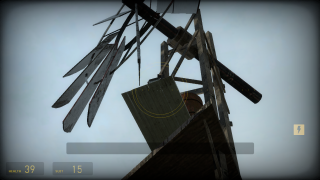
The player enters Ravenholm. Father Grigori is first heard from a distance. At a certain point, Grigori is seen, helping the player fight off zombies. Most of the gameplay elements for the chapter are introduced here: the players uses blades, fire, and cars (crushing traps) to kill zombies. | The player enters Ravenholm. Father Grigori is first heard from a distance. At a certain point, Grigori is seen, helping the player fight off zombies. Most of the gameplay elements for the chapter are introduced here: the players uses blades, fire, and cars (crushing traps) to kill zombies. | ||
<gallery> | <gallery mode=packed> | ||
Hl2 d1 town 01 courtyard.png | Hl2 d1 town 01 courtyard.png | ||
Hl2 d1 town 01 grigori.png|Grigori. | Hl2 d1 town 01 grigori.png|Grigori. | ||
| Line 225: | Line 225: | ||
Basically a continuation of the last map. Killing more zombies in various ways. | Basically a continuation of the last map. Killing more zombies in various ways. | ||
<gallery> | <gallery mode=packed> | ||
Hl2 d1 town 01a explosions.png|A chain reaction of explosive barrels. | Hl2 d1 town 01a explosions.png|A chain reaction of explosive barrels. | ||
Hl2 d1 town 01a zombieline.png | Hl2 d1 town 01a zombieline.png | ||
| Line 234: | Line 234: | ||
Fast zombies are encountered for the first time. Father Grigori gives the player a shotgun. Shortly after that, a poison zombie is also introduced. The player continues on into <code>d1_town_03</code>. | Fast zombies are encountered for the first time. Father Grigori gives the player a shotgun. Shortly after that, a poison zombie is also introduced. The player continues on into <code>d1_town_03</code>. | ||
<gallery> | <gallery mode=packed> | ||
Hl2 d1 town 02 shotgun.png | Hl2 d1 town 02 shotgun.png | ||
</gallery> | </gallery> | ||
| Line 241: | Line 241: | ||
After coming back from <code>d1_town_03</code>, the player eventually ends up at the top of a building connected to where Grigori is by a cart. The player must defend from zombies while waiting for Grigori to send the cart over. Grigori and Gordon finally meet, and they begin to travel over to the Ravenholm mines. | After coming back from <code>d1_town_03</code>, the player eventually ends up at the top of a building connected to where Grigori is by a cart. The player must defend from zombies while waiting for Grigori to send the cart over. Grigori and Gordon finally meet, and they begin to travel over to the Ravenholm mines. | ||
<gallery> | <gallery mode=packed> | ||
Hl2 d1 town 02 cart.png | Hl2 d1 town 02 cart.png | ||
</gallery> | </gallery> | ||
| Line 248: | Line 248: | ||
The player reaches a street with constantly respawning zombies, which must be escaped by taking the higher ground on the rooftops. Grigori says to not go off-path. The exit of this map goes back to <code>d1_town_02</code>. | The player reaches a street with constantly respawning zombies, which must be escaped by taking the higher ground on the rooftops. Grigori says to not go off-path. The exit of this map goes back to <code>d1_town_02</code>. | ||
<gallery> | <gallery mode=packed> | ||
Hl2 d1 town 03 overview.png | Hl2 d1 town 03 overview.png | ||
</gallery> | </gallery> | ||
| Line 255: | Line 255: | ||
Grigori and the player travel through a zombie-occupied graveyard. At the end, Grigori opens a gate so the player can continue on to the mines. | Grigori and the player travel through a zombie-occupied graveyard. At the end, Grigori opens a gate so the player can continue on to the mines. | ||
<gallery> | <gallery mode=packed> | ||
Hl2 d1 town 02a overview.png | Hl2 d1 town 02a overview.png | ||
</gallery> | </gallery> | ||
| Line 262: | Line 262: | ||
The Ravenholm mines, infested by a staggering number of headcrabs of each type. There is one last blade-cart-of-death thing at the end. | The Ravenholm mines, infested by a staggering number of headcrabs of each type. There is one last blade-cart-of-death thing at the end. | ||
<gallery> | <gallery mode=packed> | ||
Hl2 d1 town 04 hole.png | Hl2 d1 town 04 hole.png | ||
Hl2 d1 town 04 bladecart.png|Blade minecart. | Hl2 d1 town 04 bladecart.png|Blade minecart. | ||
| Line 270: | Line 270: | ||
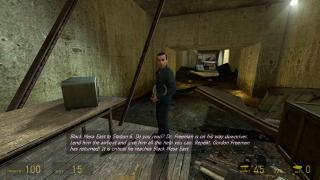
The player re-enters City 17 at one edge. Snipers are guarding the train tracks here, probably looking for Gordon. They player moves on to encounter an active battle between rebel and Combine forces at Shorepoint. After all the enemies are defeated, one of the allies takes Gordon to the back. Alyx is there by radio signal. This is where the player finds out that Eli has been taken to Nova Prospekt. Alyx asks the rebels to lend Gordon the buggy. | The player re-enters City 17 at one edge. Snipers are guarding the train tracks here, probably looking for Gordon. They player moves on to encounter an active battle between rebel and Combine forces at Shorepoint. After all the enemies are defeated, one of the allies takes Gordon to the back. Alyx is there by radio signal. This is where the player finds out that Eli has been taken to Nova Prospekt. Alyx asks the rebels to lend Gordon the buggy. | ||
<gallery> | <gallery mode=packed> | ||
Hl2 d1 town 05 sniper.png|Sniper shooting zombies. | Hl2 d1 town 05 sniper.png|Sniper shooting zombies. | ||
Hl2 d1 town 05 alyx.png|Talking to Alyx. | Hl2 d1 town 05 alyx.png|Talking to Alyx. | ||
| Line 284: | Line 284: | ||
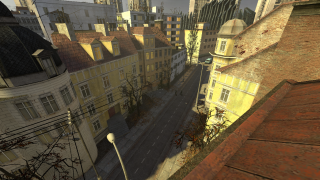
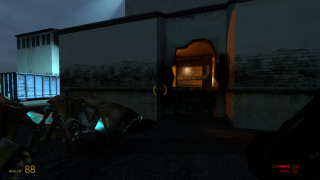
Gordon gets in the buggy and is... "lifted" down to the ground by crane. The player drives on toward Nova Prospekt. | Gordon gets in the buggy and is... "lifted" down to the ground by crane. The player drives on toward Nova Prospekt. | ||
<gallery> | <gallery mode=packed> | ||
Hl2 d2 coast 01 pier1.png|Pier, with the car on it. | Hl2 d2 coast 01 pier1.png|Pier, with the car on it. | ||
Hl2 d2 coast 01 pier2.png|Same pier, from the opposite angle. | Hl2 d2 coast 01 pier2.png|Same pier, from the opposite angle. | ||
| Line 293: | Line 293: | ||
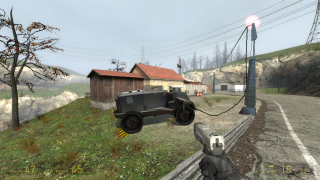
The player drives around a small bay and arrives at [[New Little Odessa]]. Here, Gordon meets [[Colonel Cubbage]], gets the rocket launcher, and takes down a gunship. | The player drives around a small bay and arrives at [[New Little Odessa]]. Here, Gordon meets [[Colonel Cubbage]], gets the rocket launcher, and takes down a gunship. | ||
<gallery> | <gallery mode=packed> | ||
Hl2 d2 coast 03 bino1.png|A pair of binoculars, able to see across the bay to New Little Odessa. | Hl2 d2 coast 03 bino1.png|A pair of binoculars, able to see across the bay to New Little Odessa. | ||
Hl2 d2 coast 03 bino2.png|New Little Odessa from the binoculars. | Hl2 d2 coast 03 bino2.png|New Little Odessa from the binoculars. | ||
| Line 302: | Line 302: | ||
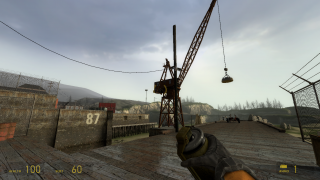
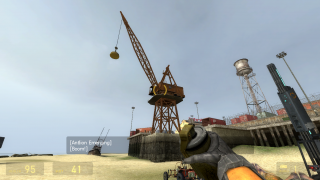
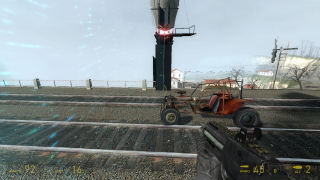
The player arrives at another dock occupied by Combine soldiers. The player has to operate a magnetic crane to move their buggy to higher ground before continuing. Another gunship attack occurs as the player nears the top of the broken bridge. | The player arrives at another dock occupied by Combine soldiers. The player has to operate a magnetic crane to move their buggy to higher ground before continuing. Another gunship attack occurs as the player nears the top of the broken bridge. | ||
<gallery> | <gallery mode=packed> | ||
Hl2 d2 coast 04 crane.png|Crane. | Hl2 d2 coast 04 crane.png|Crane. | ||
Hl2 d2 coast 04 bridge.png|A bridge that is crossed under, then over. | Hl2 d2 coast 04 bridge.png|A bridge that is crossed under, then over. | ||
| Line 310: | Line 310: | ||
This is the first map to have rollermines that attack the player and can latch onto the buggy, severely affecting its handling. It also has a forcefield that blocks the buggy, which can only be disabled by disconnecting the source of power, an APC. | This is the first map to have rollermines that attack the player and can latch onto the buggy, severely affecting its handling. It also has a forcefield that blocks the buggy, which can only be disabled by disconnecting the source of power, an APC. | ||
<gallery> | <gallery mode=packed> | ||
Hl2 d2 coast 05 rollermines.png|Rollermines popping up out of the ground. | Hl2 d2 coast 05 rollermines.png|Rollermines popping up out of the ground. | ||
Hl2 d2 coast 05 crossbow.png|The first crossbow in the game. | Hl2 d2 coast 05 crossbow.png|The first crossbow in the game. | ||
| Line 320: | Line 320: | ||
The player encounters another forcefield blocking them from crossing a bridge. There is one other route that can be used to progress; a door on the side of the bridge leading to <code>d2_coast_08</code>. This route has access to the power source for the forcefield. | The player encounters another forcefield blocking them from crossing a bridge. There is one other route that can be used to progress; a door on the side of the bridge leading to <code>d2_coast_08</code>. This route has access to the power source for the forcefield. | ||
<gallery> | <gallery mode=packed> | ||
Hl2 d2 coast 07 forcefield.png|Forcefield (faint appearance). | Hl2 d2 coast 07 forcefield.png|Forcefield (faint appearance). | ||
</gallery> | </gallery> | ||
| Line 327: | Line 327: | ||
Now that the forcefield is down, the player can continue driving on the top of the bridge, but not before backing up, because a train comes from the other way, and it will kill the player if they collide. From here, the drive continues on, into Sandtraps, the next chapter. | Now that the forcefield is down, the player can continue driving on the top of the bridge, but not before backing up, because a train comes from the other way, and it will kill the player if they collide. From here, the drive continues on, into Sandtraps, the next chapter. | ||
<gallery> | <gallery mode=packed> | ||
Hl2 d2 coast 07 train.png|Train! | Hl2 d2 coast 07 train.png|Train! | ||
</gallery> | </gallery> | ||
| Line 334: | Line 334: | ||
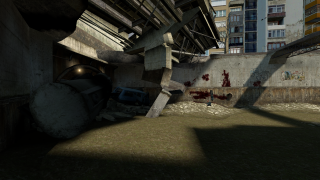
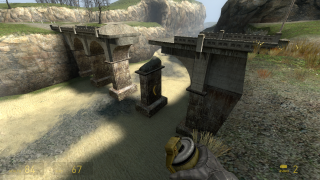
The underside of the large bridge seen in <code>d2_coast_07</code>. The player goes completely across the bottom of the bridge here to reach a button that will turn off the forcefield in <code>d2_coast_07</code>. The player goes back the way they came after pressing this button, except now being harassed by a gunship. | The underside of the large bridge seen in <code>d2_coast_07</code>. The player goes completely across the bottom of the bridge here to reach a button that will turn off the forcefield in <code>d2_coast_07</code>. The player goes back the way they came after pressing this button, except now being harassed by a gunship. | ||
<gallery> | <gallery mode=packed> | ||
Hl2 d2 coast 08 button.png|Room holding the button on the other side of the bridge. | Hl2 d2 coast 08 button.png|Room holding the button on the other side of the bridge. | ||
</gallery> | </gallery> | ||
| Line 350: | Line 350: | ||
A run-in with zombies inside a tunnel, then passing through some Combine-occupied buildings. Finally, a puzzle that requires the player to find two car batteries to power a gate. | A run-in with zombies inside a tunnel, then passing through some Combine-occupied buildings. Finally, a puzzle that requires the player to find two car batteries to power a gate. | ||
<gallery> | <gallery mode=packed> | ||
Hl2 d2 coast 09 battery1.png | Hl2 d2 coast 09 battery1.png | ||
Hl2 d2 coast 09 battery2.png | Hl2 d2 coast 09 battery2.png | ||
| Line 361: | Line 361: | ||
The player arrives at Lighthouse Point. The car has to be ditched here. Combine soldiers invade in dropships. After that, a single gunship has to be taken down. | The player arrives at Lighthouse Point. The car has to be ditched here. Combine soldiers invade in dropships. After that, a single gunship has to be taken down. | ||
<gallery> | <gallery mode=packed> | ||
Hl2 d2 coast 10 lighthouse.png|The Lighthouse. | Hl2 d2 coast 10 lighthouse.png|The Lighthouse. | ||
</gallery> | </gallery> | ||
| Line 368: | Line 368: | ||
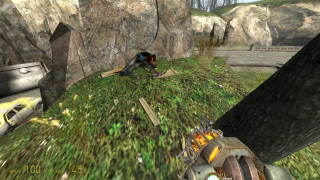
Gordon encounters Laszlo and his friend. Antlions kill Laszlo as he moves on the sand. Gordon continues carefully along (or recklessly if you do so desire) until encountering an antlion guard for the first time. After killing it, a vortigaunt extracts pheropods from the guard. The player is then taught how to use pheropod bugbait, then continues on toward Nova Prospekt. | Gordon encounters Laszlo and his friend. Antlions kill Laszlo as he moves on the sand. Gordon continues carefully along (or recklessly if you do so desire) until encountering an antlion guard for the first time. After killing it, a vortigaunt extracts pheropods from the guard. The player is then taught how to use pheropod bugbait, then continues on toward Nova Prospekt. | ||
<gallery> | <gallery mode=packed> | ||
Hl2 d2 coast 11 laszlo.png|Laszlo and friend. | Hl2 d2 coast 11 laszlo.png|Laszlo and friend. | ||
Hl2 d2 coast 11 guard.png|Antlion guard. | Hl2 d2 coast 11 guard.png|Antlion guard. | ||
| Line 377: | Line 377: | ||
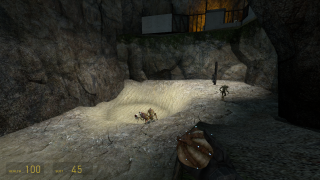
With antlions now turned allies, the player fights a long way across a beach and cliffs to ultimately finally enter the perimeter of Nova Prospekt through a tunnel. | With antlions now turned allies, the player fights a long way across a beach and cliffs to ultimately finally enter the perimeter of Nova Prospekt through a tunnel. | ||
<gallery> | <gallery mode=packed> | ||
Hl2 d2 coast 12 overview1.png | Hl2 d2 coast 12 overview1.png | ||
Hl2 d2 coast 12 overview2.png | Hl2 d2 coast 12 overview2.png | ||
| Line 385: | Line 385: | ||
The first map in Nova Prospekt, taking place in a courtyard. The player must defeat two gunships before proceeding. | The first map in Nova Prospekt, taking place in a courtyard. The player must defeat two gunships before proceeding. | ||
<gallery> | <gallery mode=packed> | ||
Hl2 d2 prison 01 hole.png|Path that opens after killing both gunships. | Hl2 d2 prison 01 hole.png|Path that opens after killing both gunships. | ||
</gallery> | </gallery> | ||
| Line 395: | Line 395: | ||
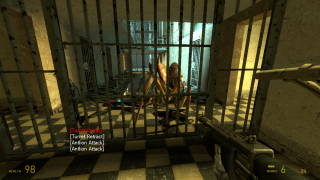
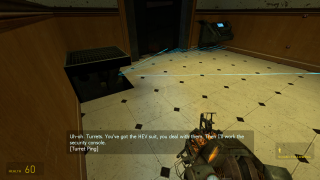
The first map inside the prison. Combine turrets are introduced for the first time, as well as the concept of knocking them over. | The first map inside the prison. Combine turrets are introduced for the first time, as well as the concept of knocking them over. | ||
<gallery> | <gallery mode=packed> | ||
Hl2 d2 prison 02 antlion turret.png|Antlion knocking over turrets. | Hl2 d2 prison 02 antlion turret.png|Antlion knocking over turrets. | ||
</gallery> | </gallery> | ||
| Line 402: | Line 402: | ||
The player encounters another antlion guard. This map has lots and lots of enemies, and antlions are very helpful. There's also a room where it looks like soldiers were attempting to experiment on a vortigaunt. It is dead. | The player encounters another antlion guard. This map has lots and lots of enemies, and antlions are very helpful. There's also a room where it looks like soldiers were attempting to experiment on a vortigaunt. It is dead. | ||
<gallery> | <gallery mode=packed> | ||
Hl2 d2 prison 03 vortigaunt.png|Vortigaunt bound to a chair. What's happening is not clear. | Hl2 d2 prison 03 vortigaunt.png|Vortigaunt bound to a chair. What's happening is not clear. | ||
</gallery> | </gallery> | ||
| Line 409: | Line 409: | ||
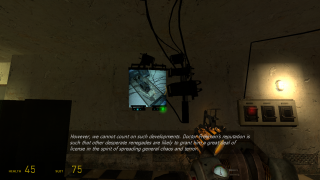
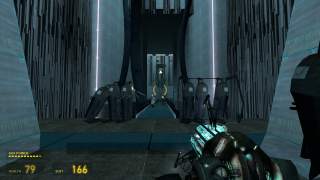
In this map, Breen is giving a berating speech about the current progress on capturing Gordon Freeman through a speaker. The main difficulties in this map are the height levels and multiple locked doors which are unlocked by pressing a button. | In this map, Breen is giving a berating speech about the current progress on capturing Gordon Freeman through a speaker. The main difficulties in this map are the height levels and multiple locked doors which are unlocked by pressing a button. | ||
<gallery> | <gallery mode=packed> | ||
Hl2 d2 prison 04 screen.png|Breen is never seen, only heard. The sound seems to emanate from here | Hl2 d2 prison 04 screen.png|Breen is never seen, only heard. The sound seems to emanate from here | ||
</gallery> | </gallery> | ||
| Line 416: | Line 416: | ||
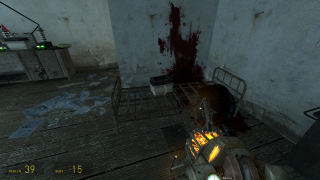
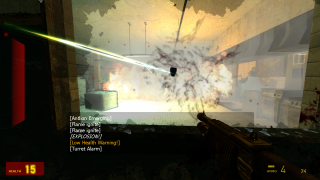
Fighting through more of the prison, starting from the laundry facilities. Following the laundry, there is a kitchen area that has a gas fire start inside it. In a cafeteria area, multiple combine soldiers fail to stop an antlion guard. At the end, combine-style moving walls attempt to crush the player. | Fighting through more of the prison, starting from the laundry facilities. Following the laundry, there is a kitchen area that has a gas fire start inside it. In a cafeteria area, multiple combine soldiers fail to stop an antlion guard. At the end, combine-style moving walls attempt to crush the player. | ||
<gallery> | <gallery mode=packed> | ||
Hl2 d2 prison 05 kitchenfire.png|Fire in the kitchen. | Hl2 d2 prison 05 kitchenfire.png|Fire in the kitchen. | ||
Hl2 d2 prison 05 moving walls.png|Moving walls. | Hl2 d2 prison 05 moving walls.png|Moving walls. | ||
| Line 429: | Line 429: | ||
First, Gordon and Alyx meet again. Alyx retrieves Eli's pod that he's been put inside and they communicate for a short time. Alyx stays behind to move Eli through the prison and to help Gordon find a way through the prison. | First, Gordon and Alyx meet again. Alyx retrieves Eli's pod that he's been put inside and they communicate for a short time. Alyx stays behind to move Eli through the prison and to help Gordon find a way through the prison. | ||
<gallery> | <gallery mode=packed> | ||
Hl2 d2 prison 06 alyx.png | Hl2 d2 prison 06 alyx.png | ||
Hl2 d2 prison 06 eli.png | Hl2 d2 prison 06 eli.png | ||
| Line 437: | Line 437: | ||
This map consists of two [[arena (level design)|arenas]] designed for standoffs where the player must make use of Alyx-reprogrammed combine turrets to fend off waves of attacking soldiers. After the first standoff, it is discovered that Mossman is a traitor. | This map consists of two [[arena (level design)|arenas]] designed for standoffs where the player must make use of Alyx-reprogrammed combine turrets to fend off waves of attacking soldiers. After the first standoff, it is discovered that Mossman is a traitor. | ||
<gallery> | <gallery mode=packed> | ||
Hl2 d2 prison 07 mossman.png | Hl2 d2 prison 07 mossman.png | ||
</gallery> | </gallery> | ||
| Line 444: | Line 444: | ||
Alyx and Gordon confront Mossman, and attempt to make her teleport them to Kleiner's lab. Mossman distracts Alyx, then teleports Eli and herself to an unknown, presumably Combine-controlled location. The final turret standoff then takes place, where Alyx and Gordon manage to hold off soldiers for long enough to teleport out of Nova Prospekt themselves. A soldier shoots an energy ball at the teleporter and the chamber starts crumbling just before they are teleported to Kleiner's lab. | Alyx and Gordon confront Mossman, and attempt to make her teleport them to Kleiner's lab. Mossman distracts Alyx, then teleports Eli and herself to an unknown, presumably Combine-controlled location. The final turret standoff then takes place, where Alyx and Gordon manage to hold off soldiers for long enough to teleport out of Nova Prospekt themselves. A soldier shoots an energy ball at the teleporter and the chamber starts crumbling just before they are teleported to Kleiner's lab. | ||
<gallery> | <gallery mode=packed> | ||
Hl2 d2 prison 08 teleporter.png | Hl2 d2 prison 08 teleporter.png | ||
</gallery> | </gallery> | ||
| Line 455: | Line 455: | ||
Alyx and Gordon arrive at Kleiner's lab. Kleiner reveals that they had spent over one week's time teleporting from Nova Prospekt to City 17. An uprising has started since then, initiated by the destruction of Nova Prospekt. Gordon and Dog head out to find Barney. | Alyx and Gordon arrive at Kleiner's lab. Kleiner reveals that they had spent over one week's time teleporting from Nova Prospekt to City 17. An uprising has started since then, initiated by the destruction of Nova Prospekt. Gordon and Dog head out to find Barney. | ||
<gallery> | <gallery mode=packed> | ||
Hl2 d3 c17 01 kleiner.png|Kleiner packing heat. | Hl2 d3 c17 01 kleiner.png|Kleiner packing heat. | ||
</gallery> | </gallery> | ||
| Line 465: | Line 465: | ||
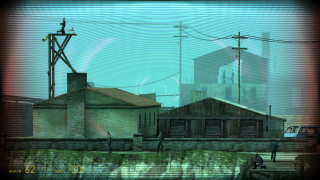
Dog fights Combine soldiers and an APC, then opens a gate for Gordon to go through before going back and fighting a dropship. There is a G-Man sighting with him briefly appearing on a tv screen. This map passes through some of the same areas that were in {{ent|d1_trainstation_03}} and {{ent|d1_trainstation_04}}. | Dog fights Combine soldiers and an APC, then opens a gate for Gordon to go through before going back and fighting a dropship. There is a G-Man sighting with him briefly appearing on a tv screen. This map passes through some of the same areas that were in {{ent|d1_trainstation_03}} and {{ent|d1_trainstation_04}}. | ||
<gallery> | <gallery mode=packed> | ||
Hl2 d3 c17 02 dog apc.png | Hl2 d3 c17 02 dog apc.png | ||
</gallery> | </gallery> | ||
| Line 472: | Line 472: | ||
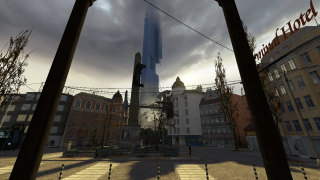
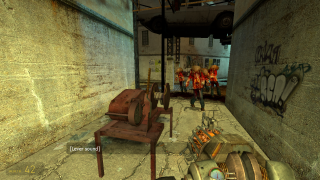
The player finds their first rebel allies and learns how to command them to go places. At the plaza, a group of rebels is seen tearing down one of Breen's giant monitors. This map passes through most of the area from {{ent|d1_trainstation_02}}. | The player finds their first rebel allies and learns how to command them to go places. At the plaza, a group of rebels is seen tearing down one of Breen's giant monitors. This map passes through most of the area from {{ent|d1_trainstation_02}}. | ||
<gallery> | <gallery mode=packed> | ||
Hl2 d3 c17 03 monitor.png | Hl2 d3 c17 03 monitor.png | ||
</gallery> | </gallery> | ||
| Line 479: | Line 479: | ||
This map introduces the player to hopper mines. Striders also make a re-appearance since the very beginning of the game, with both their turret and laser cannon seen in action. | This map introduces the player to hopper mines. Striders also make a re-appearance since the very beginning of the game, with both their turret and laser cannon seen in action. | ||
<gallery> | <gallery mode=packed> | ||
Hl2 d3 c17 04 mine hole.png | Hl2 d3 c17 04 mine hole.png | ||
</gallery> | </gallery> | ||
| Line 486: | Line 486: | ||
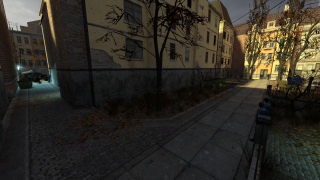
The player and allies storm a barricade with metrocops, then go through an apartment complex. | The player and allies storm a barricade with metrocops, then go through an apartment complex. | ||
<gallery> | <gallery mode=packed> | ||
Hl2 d3 c17 05 street.png | Hl2 d3 c17 05 street.png | ||
</gallery> | </gallery> | ||
| Line 493: | Line 493: | ||
This map takes place in an underground car tunnel. Eventually the player comes to an obstruction, where they must defend their area from Combine soldiers as a rebel on the other side plants explosives so that the player can come through. The player is then blocked by a door, which can be opened from the other side by going through a zombie-infested section of tunnel with toxic goo. | This map takes place in an underground car tunnel. Eventually the player comes to an obstruction, where they must defend their area from Combine soldiers as a rebel on the other side plants explosives so that the player can come through. The player is then blocked by a door, which can be opened from the other side by going through a zombie-infested section of tunnel with toxic goo. | ||
<gallery> | <gallery mode=packed> | ||
Hl2 d3 c17 06a medic.png | Hl2 d3 c17 06a medic.png | ||
Hl2 d3 c17 06a goo.png | Hl2 d3 c17 06a goo.png | ||
| Line 501: | Line 501: | ||
Mostly notable only for its drawbridges. Lots of fighting. | Mostly notable only for its drawbridges. Lots of fighting. | ||
<gallery> | <gallery mode=packed> | ||
Hl2 d3 c17 06b drawbridge.png | Hl2 d3 c17 06b drawbridge.png | ||
</gallery> | </gallery> | ||
| Line 508: | Line 508: | ||
Alyx and Gordon reunite again. They fight their way down to a plaza with a power generator. The player guards Alyx while she disables the generator's shields, then the player disables it with the gravity gun. Alyx and Gordon then split up again as Alyx is captured and stormed off the to Citadel. | Alyx and Gordon reunite again. They fight their way down to a plaza with a power generator. The player guards Alyx while she disables the generator's shields, then the player disables it with the gravity gun. Alyx and Gordon then split up again as Alyx is captured and stormed off the to Citadel. | ||
<gallery> | <gallery mode=packed> | ||
Hl2 d3 c17 07 plaza.png | Hl2 d3 c17 07 plaza.png | ||
</gallery> | </gallery> | ||
| Line 515: | Line 515: | ||
The player fights through underground sewers and industrial structures including a tall warehouse where they have to ascend on a physics-affected suspended platform. | The player fights through underground sewers and industrial structures including a tall warehouse where they have to ascend on a physics-affected suspended platform. | ||
<gallery> | <gallery mode=packed> | ||
Hl2 d3 c17 08 lift.png|The platform, activated by a button. | Hl2 d3 c17 08 lift.png|The platform, activated by a button. | ||
</gallery> | </gallery> | ||
| Line 530: | Line 530: | ||
Gordon kills Combine snipers to save Barney, then they continue onward. | Gordon kills Combine snipers to save Barney, then they continue onward. | ||
<gallery> | <gallery mode=packed> | ||
Hl2 d3 c17 09 barney.png | Hl2 d3 c17 09 barney.png | ||
</gallery> | </gallery> | ||
| Line 537: | Line 537: | ||
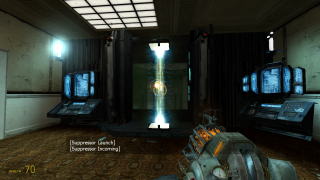
Barney and Gordon run to the Nexus building, dodging the [[Suppression Device]] along the way. | Barney and Gordon run to the Nexus building, dodging the [[Suppression Device]] along the way. | ||
<gallery> | <gallery mode=packed> | ||
Hl2 d3 c17 10a nexus front.png | Hl2 d3 c17 10a nexus front.png | ||
</gallery> | </gallery> | ||
| Line 544: | Line 544: | ||
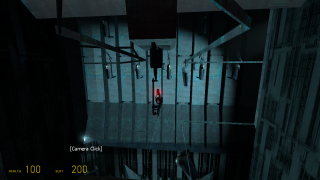
Inside the Nexus building. Gordon and Barney fight through many soldiers as they locate three Combine power generators that must be turned off in any sequence before proceeding to the roof, at which point Barney stays behind. Uniquely to this map, there are ground turrets activated by laser tripwires. One of the large rooms features an ambush followed by a short standoff, and another one is a platforming puzzle where the player must avoid laser tripwires. | Inside the Nexus building. Gordon and Barney fight through many soldiers as they locate three Combine power generators that must be turned off in any sequence before proceeding to the roof, at which point Barney stays behind. Uniquely to this map, there are ground turrets activated by laser tripwires. One of the large rooms features an ambush followed by a short standoff, and another one is a platforming puzzle where the player must avoid laser tripwires. | ||
<gallery> | <gallery mode=packed> | ||
Hl2 d3 c17 10b floor turret.png|Ground turret. | Hl2 d3 c17 10b floor turret.png|Ground turret. | ||
Hl2 d3 c17 10b laser room.png|High-security laser room. | Hl2 d3 c17 10b laser room.png|High-security laser room. | ||
| Line 553: | Line 553: | ||
The roof of the Nexus building. The suppression device is passed by (now inactive). A gunship must be defeated before proceeding. | The roof of the Nexus building. The suppression device is passed by (now inactive). A gunship must be defeated before proceeding. | ||
<gallery> | <gallery mode=packed> | ||
Hl2 d3 c17 11 overview.png | Hl2 d3 c17 11 overview.png | ||
</gallery> | </gallery> | ||
| Line 560: | Line 560: | ||
Mostly the same area as <code>d3_c17_10a</code> but now an active warzone with rebels, soldiers and striders. | Mostly the same area as <code>d3_c17_10a</code> but now an active warzone with rebels, soldiers and striders. | ||
<gallery> | <gallery mode=packed> | ||
Hl2 d3 c17 12 nexus front.png | Hl2 d3 c17 12 nexus front.png | ||
</gallery> | </gallery> | ||
| Line 567: | Line 567: | ||
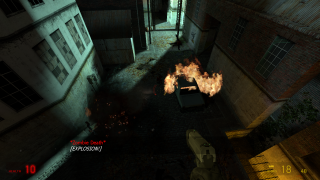
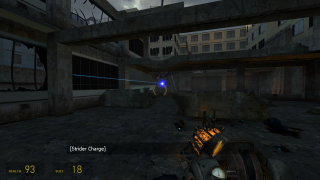
A strider harasses the player as they try to maneuver through a destroyed building. Scanners also relay information about the player to the strider. | A strider harasses the player as they try to maneuver through a destroyed building. Scanners also relay information about the player to the strider. | ||
<gallery> | <gallery mode=packed> | ||
D3 c17 12b strider shot.png|Strider firing a cannon shot. | D3 c17 12b strider shot.png|Strider firing a cannon shot. | ||
</gallery> | </gallery> | ||
| Line 574: | Line 574: | ||
The player and rebels overtake a heavily destroyed building near the Citadel. Two striders have to be defeated before proceeding out of the building. Back on the streets, Gordon runs into Dog and Barney. Dog lifts part of the Citadel wall up, exposing a hole in the ground that opens access into the Citadel. | The player and rebels overtake a heavily destroyed building near the Citadel. Two striders have to be defeated before proceeding out of the building. Back on the streets, Gordon runs into Dog and Barney. Dog lifts part of the Citadel wall up, exposing a hole in the ground that opens access into the Citadel. | ||
<gallery> | <gallery mode=packed> | ||
Hl2 d3 c17 13 overview.png | Hl2 d3 c17 13 overview.png | ||
</gallery> | </gallery> | ||
| Line 584: | Line 584: | ||
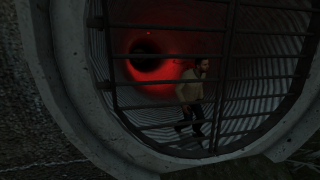
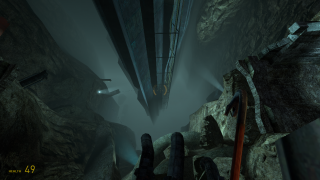
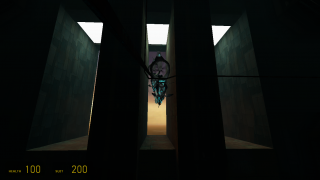
The player navigates a crumbling cliffside before jumping into the Citadel. They then get on a pod, because there is nowhere else to go. Taking the wrong pod results in inevitable death. | The player navigates a crumbling cliffside before jumping into the Citadel. They then get on a pod, because there is nowhere else to go. Taking the wrong pod results in inevitable death. | ||
<gallery> | <gallery mode=packed> | ||
Hl2 d3 citadel 01 outside.png|Outside the Citadel. | Hl2 d3 citadel 01 outside.png|Outside the Citadel. | ||
Hl2 d3 citadel 01 pods.png|One path is better than the other... | Hl2 d3 citadel 01 pods.png|One path is better than the other... | ||
| Line 592: | Line 592: | ||
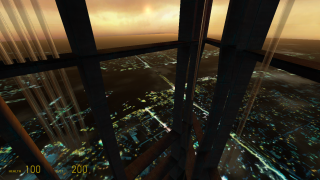
A breather. Just a scenic ride through the Citadel showing soldiers, stalkers, Combine synths and razor trains. At the end, the player is dropped in a weapon confiscation field. | A breather. Just a scenic ride through the Citadel showing soldiers, stalkers, Combine synths and razor trains. At the end, the player is dropped in a weapon confiscation field. | ||
<gallery> | <gallery mode=packed> | ||
Hl2 d3 citadel 02 ride1.png | Hl2 d3 citadel 02 ride1.png | ||
Hl2 d3 citadel 02 ride2.png | Hl2 d3 citadel 02 ride2.png | ||
| Line 601: | Line 601: | ||
The weapon confiscation field vaporizes every weapon the player has, except the gravity gun, which becomes supercharged, able to grab and punt living soldiers. The player uses their new super weapon to fight through the Citadel. | The weapon confiscation field vaporizes every weapon the player has, except the gravity gun, which becomes supercharged, able to grab and punt living soldiers. The player uses their new super weapon to fight through the Citadel. | ||
<gallery> | <gallery mode=packed> | ||
Hl2 d3 citadel 03 weapons.png | Hl2 d3 citadel 03 weapons.png | ||
</gallery> | </gallery> | ||
| Line 608: | Line 608: | ||
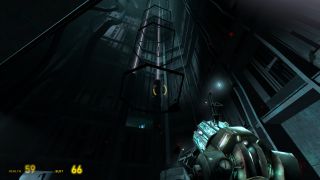
The player continues fighting through the Citadel. There is a long ride up on an exposed lift while soldiers attack from all sides. A strider is encountered at the very end, but defeating it is not required to progress. | The player continues fighting through the Citadel. There is a long ride up on an exposed lift while soldiers attack from all sides. A strider is encountered at the very end, but defeating it is not required to progress. | ||
<gallery> | <gallery mode=packed> | ||
Hl2 d3 citadel 04 lift.png|Lift. | Hl2 d3 citadel 04 lift.png|Lift. | ||
Hl2 d3 citadel 04 strider.png|Strider. | Hl2 d3 citadel 04 strider.png|Strider. | ||
| Line 616: | Line 616: | ||
The player is forced to take another scenic pod ride, seeing more stalkers as well as two Combine synths unique to this map. This time, they are spotted by a camera which sends the player in a special pod path up to Breen's office. | The player is forced to take another scenic pod ride, seeing more stalkers as well as two Combine synths unique to this map. This time, they are spotted by a camera which sends the player in a special pod path up to Breen's office. | ||
<gallery> | <gallery mode=packed> | ||
Hl2 d3 citadel 05 camera.png|Camera. | Hl2 d3 citadel 05 camera.png|Camera. | ||
Hl2 d3 citadel 05 gunships.png | Hl2 d3 citadel 05 gunships.png | ||
| Line 628: | Line 628: | ||
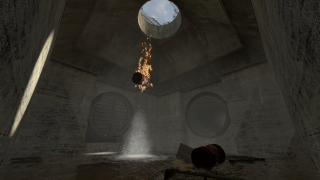
Gordon is now captured along with Eli and Alyx. Mossman has a change of heart and saves them all for the moment. Breen tries to escape the Citadel by teleporting out. Gordon stops this, and sends the Citadel into a meltdown. Gman comes and takes Gordon out before the explosion, seemingly leaving Alyx. | Gordon is now captured along with Eli and Alyx. Mossman has a change of heart and saves them all for the moment. Breen tries to escape the Citadel by teleporting out. Gordon stops this, and sends the Citadel into a meltdown. Gman comes and takes Gordon out before the explosion, seemingly leaving Alyx. | ||
<gallery> | <gallery mode=packed> | ||
Hl2 d3 breen 01 gravity gun.png | Hl2 d3 breen 01 gravity gun.png | ||
Hl2 d3 breen 01 advisor.png | Hl2 d3 breen 01 advisor.png | ||
| Line 634: | Line 634: | ||
</gallery> | </gallery> | ||
Day 3 events continue into Half-Life 2: Episode One. | Day 3 events continue into {{game name|ep1|name=Half-Life 2: Episode One}}. | ||
Revision as of 05:45, 9 October 2021
In the order commonly played, here is every Template:Game name map:
Day 1
Arriving in City 17, Route Kanal, Black Mesa East, and ending with Ravenholm.
Point Insertion
Arriving in City 17 all the way to meeting Alyx Vance.
d1_trainstation_01
The map with Gman's intro monologue. From there, the player arrives at the train station, encounters Barney, and leaves the interrogation room with the first freely openable door in the game.
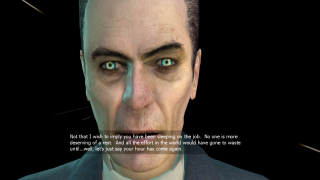
Gman speaking to Gordon before dropping him in City 17.
The outside.
Inside the station.


d1_trainstation_02
Starts with the well-known "pick up that can" cop. Goes through the train station, then out into a plaza with checkpoints. Through old streets, an alley and a playground with two citizens talking about Civil Protection. It ends with the player heading into an apartment building.
"Pick up that can."
The plaza Barney spoke of before.


d1_trainstation_03
The interior of an apartment complex. Takes a very long and specific path with lots of detail and dialogue to give players more insight into how life is in City 17. About half-way through, the player is detected as someone who should not be there and becomes a target of Civil Protection and is chased.
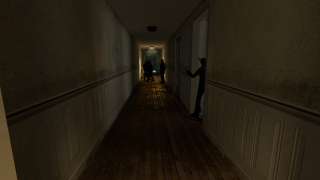
CP's raiding an apartment.


d1_trainstation_04
Continues the chase from the previous map across rooftops. Gordon is trapped by four metrocops in an attic. He is quickly saved by Alyx Vance, their first encounter. Alyx escorts the player over to Dr. Kleiner's lab, passing through a secret door with a poster of Breen on it.

The player's first view of Alyx.

The secret door.


"A Red Letter Day"
Kleiner and Gordon's first meeting, to fleeing City 17.
d1_trainstation_05
Alyx takes Gordon to Kleiner's lab, passing through another secret door. Barney arrives short time later, and Gordon gets his suit. Alyx is teleported to Black Mesa East. Lamarr interrupts Gordon's teleportation, he is teleported to several random destinations (a wasteland, Breen's office, and a coastline with an Ichthyosaur), the Combine become aware of his presence, and Gordon flees.
Secret door to Kleiner's lab.
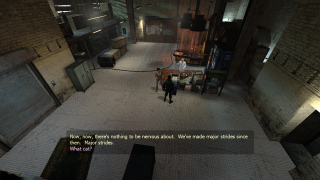
Kleiner's lab.
Teleporter room.


d1_trainstation_06
Gordon continues fleeing, but is blocked by wood planks. Barney appears on a platform, telling Gordon to escape through the canals via the refugee network. Barney also gives him the first weapon in the game, the crowbar. Gordon is able to break the planks, and enters the trainyard seen in d1_trainstation_01, pursued by Civil Protection.

Barney giving the crowbar. In the distance are the wood planks.
Trainyard. Compare with the second screenshot from the first map.


Route Kanal
The first part of Gordon's journey through the City 17 canals. Starts with two cops hurting two citizens, and ends with the Airboat.
d1_canals_01
Starts with two cops assaulting a citizen, as another citizen watches in fear. Gordon kills both and picks up the second weapon in the game, the pistol. The player fights on through a railway and comes across a boxcar. Inside, a human and a vortigaunt help the player keep going. Gman is briefly seen on a TV that they are both watching.
Police hurting a citizen.
The railroad followed through. Due to the forcefields in the way, the player has to detour around them.
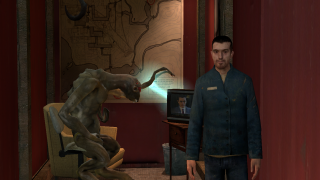
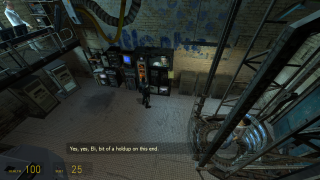
Inside the boxcar.


d1_canals_01a
The player sees a crow fly right into a barnacle tongue and be eaten. This is the first time in Half-Life 2 a barnacle is seen.
Ahead is Station 12, currently being raided by Civil Protection. One citizen escapes the initial massacre and tries to plead with Gordon to help him, but the citizen is quickly shot dead by a cop. In the lower bunker of Station 12, an unknown woman tries to radio the station. Station 8 gets on the line, saying they heard the Station 12 raid, refugees are coming in from Station 9, and stations are being raided. The man from Station 8 is interrupted by something before he can finish speaking. The woman speaks again, saying that manhacks are being deployed.
On the roof of Station 12, two metrocops man a mounted gun. If the player kills them and takes over, they can kill many enemies approaching easily. If they stay too long, a Combine APC will come and shoot the gun with rockets until it breaks.
Further along, a citizen calls for the player and reassures them that there are other stations who can help. Metrocops attempt multiple times to kill the player with explosive oil drums.
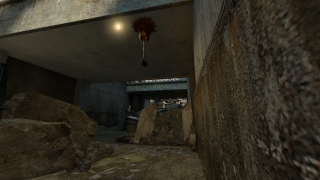
Crow caught by barnacle.
Station 12 members being shot. (It's hard to see them as they are shot.)
Escapee citizen.
The mounted gun on the roof of Station 12.
An attempt to kill Gordon with explosive barrels.


d1_canals_02
This map starts with a physics puzzle. A large wood board rests on a cement pipe and 8 cinder blocks are scattered around the room. The player cannot proceed because the only way out is high up. There are many ways to get past this issue:
- Put the cinder blocks on one end of the wood board so that the end nearest to the exit is raised high enough for the player to jump to the exit. (This is the intended way.)
- Jump on the far end of the board to temporarily nudge it downward and jump off the near end as it raises.
- Stack the cinder blocks and use them as a makeshift ladder/steps.
- In the previous map (
d1_canals_01a), before going off the slippery downward ramp at the end, try to jump across the gap to the exit platform. - Load the map directly (or restart in the console). You will spawn just past this physics puzzle.
After this puzzle, the player encounters a hunter chopper. It takes every opportunity to shoot at the player as they evade it.
d1_canals_03
The player encounters another station (11? The number is never stated) with a single person inside. Quickly, a group of manhacks crashes in and attacks. If the player does not attack the manhacks (sometimes just distracting them is enough) the citizen will be killed. This is the first time manhacks are seen. After going through many more areas, there is another small "puzzle" here. The player has to turn a valve to raise the water level in a room in order to pass through it.


d1_canals_04
This map was scrapped during development of Template:Game name.
d1_canals_05
Gordon encounters what is evidently Station 6. Black Mesa East (possibly Alyx speaking?) radios this station to tell them to give Gordon the airboat. Before the player can reach the boat, they must pass through a small area currently being bombarded with headcrab canisters. After this, a citizen gives the airboat over to the player, and says to drive to nearby Station 7.
Station 6.
Getting the boat.


Water Hazard
The complete boat journey from the City 17 canals to Black Mesa East.
d1_canals_06
Station 7 is close to the start. The occupants of this station have been zombified by headcrabs, though. On the radio, a woman is heard attempting to reach Station 12 again. Ahead is another physics puzzle. Usually, the player will solve this by putting a few barrels under a ramp, so that they can jump across with the boat. They can also choose to just abandon the boat and go on foot. (good luck)
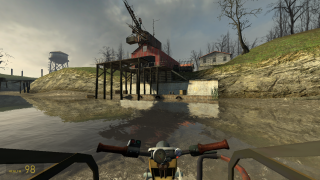
Station 7 from the river.

Ramp puzzle.


d1_canals_07
The player raids a Combine post and must destroy some explosive barrels to allow for a floodgate blocking their path to open. The enemy firepower increases as rocket-firing APCs are deployed more and more frequently.
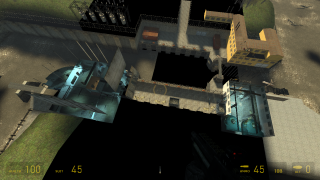
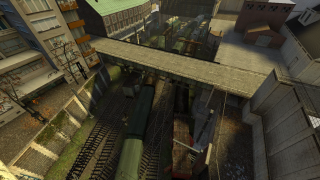
The post, from above.
The player breaks the barrels, and the explosion breaks the wood holding the i-beams in place. The beams become a battering ram for the large gates.


d1_canals_08
The player raids another Combine post, this time a hunter-chopper is summoned to harass them. As the player drives off, the helicopter starts using bombs on the player for the first time.

d1_canals_09
The helicopter continues chasing the boat. It mainly attacks by dropping more bombs on the player's path.
Bombs being dropped.

d1_canals_10
Yet another chase map. The helicopter loses track of the player as they drive through a tunnel.
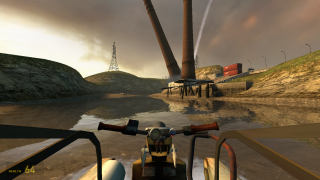
A chimney falls and interrupts the player's path.

d1_canals_11
The player encounters a rebel outpost. Here, a vortigaunt equips the airboat with a high-power gun, which is used to ward off the hunter-chopper for a while.
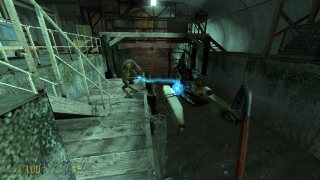
Vortigaunt welding gun.

d1_canals_12
Nothing too special about this map. It has lots of APCs and exploding barrels.

d1_canals_13
The final encounter with a hunter-chopper, which is persistent and fights to the end. After this, the player reaches Black Mesa East.
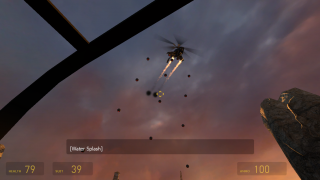
Helicopter entering "bullrush" mode.

Black Mesa East
The lab that Eli Vance does stuff in. When the player is here, the lab is raided by the Combine.
d1_eli_01
Gordon enters the airlock and meets Mossman and Eli again. After a long expository sequence, Alyx takes Gordon over to the scrapyard.
Outside.
Airlock.
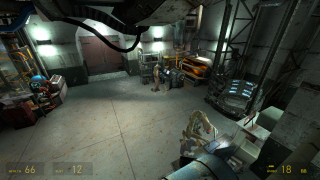
Eli's lab.

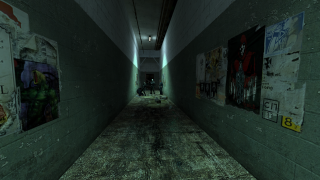
Tunnel to Ravenholm.


d1_eli_02
Alyx gives Gordon the gravity gun, and the player learns how to use it here. Gordon meets Dog and they play fetch. The Combine comes and begins to raid the base. Everyone rushes inside. Alyx has to stay behind but Gordon escapes by going through the Ravenholm tunnel.
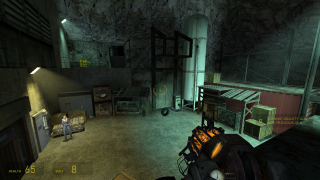
Scrapyard.

Scrapyard again.
Dog.


We Don't Go To Ravenholm...
Scary time with a monk guy and going around some mines, and ending up back in City 17, but not for long.
d1_town_01
The player enters Ravenholm. Father Grigori is first heard from a distance. At a certain point, Grigori is seen, helping the player fight off zombies. Most of the gameplay elements for the chapter are introduced here: the players uses blades, fire, and cars (crushing traps) to kill zombies.
Grigori.

A blade trap spinning.
Fire trap.
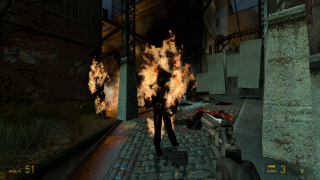
Fire trap.
A car about to crush some zombies.


d1_town_01a
Basically a continuation of the last map. Killing more zombies in various ways.
A chain reaction of explosive barrels.


d1_town_02
First Part
Fast zombies are encountered for the first time. Father Grigori gives the player a shotgun. Shortly after that, a poison zombie is also introduced. The player continues on into d1_town_03.

Second Part
After coming back from d1_town_03, the player eventually ends up at the top of a building connected to where Grigori is by a cart. The player must defend from zombies while waiting for Grigori to send the cart over. Grigori and Gordon finally meet, and they begin to travel over to the Ravenholm mines.

d1_town_03
The player reaches a street with constantly respawning zombies, which must be escaped by taking the higher ground on the rooftops. Grigori says to not go off-path. The exit of this map goes back to d1_town_02.

d1_town_02a
Grigori and the player travel through a zombie-occupied graveyard. At the end, Grigori opens a gate so the player can continue on to the mines.

d1_town_04
The Ravenholm mines, infested by a staggering number of headcrabs of each type. There is one last blade-cart-of-death thing at the end.
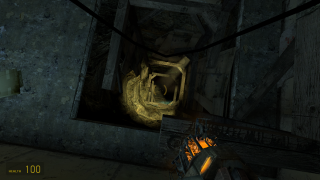

Blade minecart.


d1_town_05
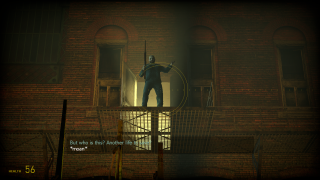
The player re-enters City 17 at one edge. Snipers are guarding the train tracks here, probably looking for Gordon. They player moves on to encounter an active battle between rebel and Combine forces at Shorepoint. After all the enemies are defeated, one of the allies takes Gordon to the back. Alyx is there by radio signal. This is where the player finds out that Eli has been taken to Nova Prospekt. Alyx asks the rebels to lend Gordon the buggy.
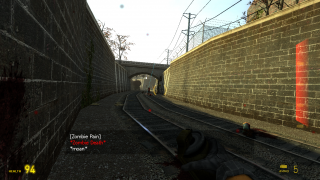
Sniper shooting zombies.
Talking to Alyx.


Day 2
Starting the journey to Nova Prospekt, entering, and then teleporting out of the prison.
Highway 17
Majority of the path to Nova Prospekt that is driven.
d2_coast_01
Gordon gets in the buggy and is... "lifted" down to the ground by crane. The player drives on toward Nova Prospekt.
Pier, with the car on it.
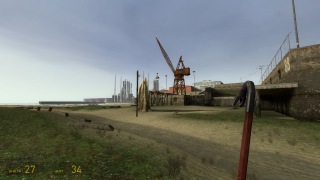
Same pier, from the opposite angle.
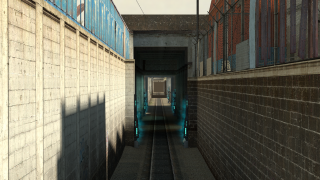
A gap which can only be crossed by using the buggy's turbo boost.


d2_coast_03
The player drives around a small bay and arrives at New Little Odessa. Here, Gordon meets Colonel Cubbage, gets the rocket launcher, and takes down a gunship.
A pair of binoculars, able to see across the bay to New Little Odessa.
New Little Odessa from the binoculars.
New Little Odessa in person.


d2_coast_04
The player arrives at another dock occupied by Combine soldiers. The player has to operate a magnetic crane to move their buggy to higher ground before continuing. Another gunship attack occurs as the player nears the top of the broken bridge.
Crane.
A bridge that is crossed under, then over.


d2_coast_05
This is the first map to have rollermines that attack the player and can latch onto the buggy, severely affecting its handling. It also has a forcefield that blocks the buggy, which can only be disabled by disconnecting the source of power, an APC.

Rollermines popping up out of the ground.
The first crossbow in the game.
APC.


d2_coast_07
First Part
The player encounters another forcefield blocking them from crossing a bridge. There is one other route that can be used to progress; a door on the side of the bridge leading to d2_coast_08. This route has access to the power source for the forcefield.
Forcefield (faint appearance).

Second Part
Now that the forcefield is down, the player can continue driving on the top of the bridge, but not before backing up, because a train comes from the other way, and it will kill the player if they collide. From here, the drive continues on, into Sandtraps, the next chapter.
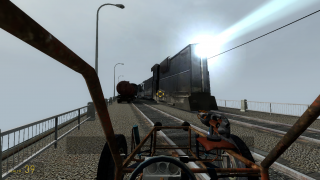
Train!

d2_coast_08
The underside of the large bridge seen in d2_coast_07. The player goes completely across the bottom of the bridge here to reach a button that will turn off the forcefield in d2_coast_07. The player goes back the way they came after pressing this button, except now being harassed by a gunship.

Room holding the button on the other side of the bridge.

d2_coast_02
This map was cut during development.
d2_coast_06
This map was cut during development.
Sandtraps
Ditching the car, getting bugbait, and arriving at Nova Prospekt.
d2_coast_09
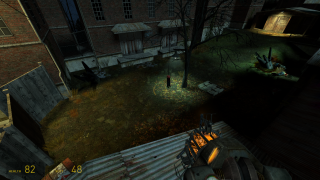
A run-in with zombies inside a tunnel, then passing through some Combine-occupied buildings. Finally, a puzzle that requires the player to find two car batteries to power a gate.
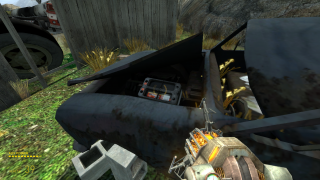
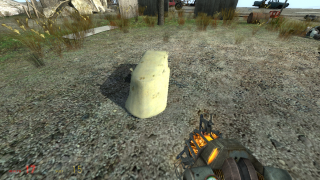
Battery is under this tub.
All batteries.


d2_coast_10
The player arrives at Lighthouse Point. The car has to be ditched here. Combine soldiers invade in dropships. After that, a single gunship has to be taken down.
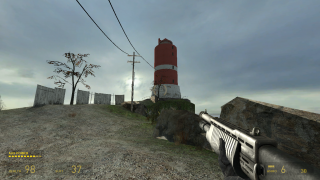
The Lighthouse.

d2_coast_11
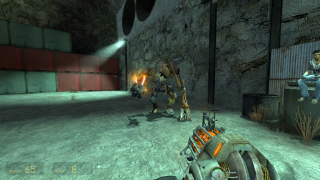
Gordon encounters Laszlo and his friend. Antlions kill Laszlo as he moves on the sand. Gordon continues carefully along (or recklessly if you do so desire) until encountering an antlion guard for the first time. After killing it, a vortigaunt extracts pheropods from the guard. The player is then taught how to use pheropod bugbait, then continues on toward Nova Prospekt.
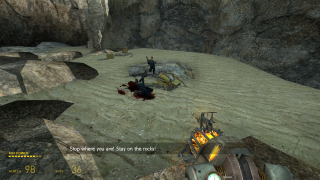
Laszlo and friend.
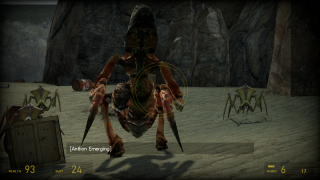
Antlion guard.
Area where player is taught to use bugbait.


d2_coast_12
With antlions now turned allies, the player fights a long way across a beach and cliffs to ultimately finally enter the perimeter of Nova Prospekt through a tunnel.


d2_prison_01
The first map in Nova Prospekt, taking place in a courtyard. The player must defeat two gunships before proceeding.
Path that opens after killing both gunships.

Nova Prospekt
The insides of the titular prison, until just before finding Alyx.
d2_prison_02
The first map inside the prison. Combine turrets are introduced for the first time, as well as the concept of knocking them over.
Antlion knocking over turrets.

d2_prison_03
The player encounters another antlion guard. This map has lots and lots of enemies, and antlions are very helpful. There's also a room where it looks like soldiers were attempting to experiment on a vortigaunt. It is dead.

Vortigaunt bound to a chair. What's happening is not clear.

d2_prison_04
In this map, Breen is giving a berating speech about the current progress on capturing Gordon Freeman through a speaker. The main difficulties in this map are the height levels and multiple locked doors which are unlocked by pressing a button.
Breen is never seen, only heard. The sound seems to emanate from here

d2_prison_05
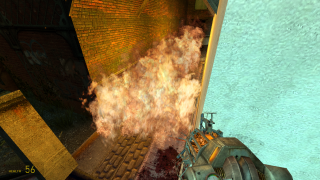
Fighting through more of the prison, starting from the laundry facilities. Following the laundry, there is a kitchen area that has a gas fire start inside it. In a cafeteria area, multiple combine soldiers fail to stop an antlion guard. At the end, combine-style moving walls attempt to crush the player.
Fire in the kitchen.
Moving walls.


Entanglement
- Not to be confused with Entanglement from Half-Life: Alyx.
Meeting Alyx, tracking down Eli, finding Mossman, and leaving Nova Prospekt.
d2_prison_06
First, Gordon and Alyx meet again. Alyx retrieves Eli's pod that he's been put inside and they communicate for a short time. Alyx stays behind to move Eli through the prison and to help Gordon find a way through the prison.


d2_prison_07
This map consists of two arenas designed for standoffs where the player must make use of Alyx-reprogrammed combine turrets to fend off waves of attacking soldiers. After the first standoff, it is discovered that Mossman is a traitor.

d2_prison_08
Alyx and Gordon confront Mossman, and attempt to make her teleport them to Kleiner's lab. Mossman distracts Alyx, then teleports Eli and herself to an unknown, presumably Combine-controlled location. The final turret standoff then takes place, where Alyx and Gordon manage to hold off soldiers for long enough to teleport out of Nova Prospekt themselves. A soldier shoots an energy ball at the teleporter and the chamber starts crumbling just before they are teleported to Kleiner's lab.

Day 3
Continuing the Entanglement chapter. Goes through all of the remaining City 17 maps, into the Citadel, and to the end of the game.
Entanglement (continued)
d3_c17_01
Alyx and Gordon arrive at Kleiner's lab. Kleiner reveals that they had spent over one week's time teleporting from Nova Prospekt to City 17. An uprising has started since then, initiated by the destruction of Nova Prospekt. Gordon and Dog head out to find Barney.
Kleiner packing heat.

Anticitizen One
The first part of Gordon's push through war-torn City 17. Ends just before meeting up with Barney.
d3_c17_02
Dog fights Combine soldiers and an APC, then opens a gate for Gordon to go through before going back and fighting a dropship. There is a G-Man sighting with him briefly appearing on a tv screen. This map passes through some of the same areas that were in d1_trainstation_03 and d1_trainstation_04.

d3_c17_03
The player finds their first rebel allies and learns how to command them to go places. At the plaza, a group of rebels is seen tearing down one of Breen's giant monitors. This map passes through most of the area from d1_trainstation_02.

d3_c17_04
This map introduces the player to hopper mines. Striders also make a re-appearance since the very beginning of the game, with both their turret and laser cannon seen in action.

d3_c17_05
The player and allies storm a barricade with metrocops, then go through an apartment complex.

d3_c17_06a
This map takes place in an underground car tunnel. Eventually the player comes to an obstruction, where they must defend their area from Combine soldiers as a rebel on the other side plants explosives so that the player can come through. The player is then blocked by a door, which can be opened from the other side by going through a zombie-infested section of tunnel with toxic goo.


d3_c17_06b
Mostly notable only for its drawbridges. Lots of fighting.

d3_c17_07
Alyx and Gordon reunite again. They fight their way down to a plaza with a power generator. The player guards Alyx while she disables the generator's shields, then the player disables it with the gravity gun. Alyx and Gordon then split up again as Alyx is captured and stormed off the to Citadel.

d3_c17_08
The player fights through underground sewers and industrial structures including a tall warehouse where they have to ascend on a physics-affected suspended platform.
The platform, activated by a button.

d3_c17_02_camera
Appears to be identical to d3_c17_02 except that the player spawns with no weapons or suit, and the scripted sequence with Dog starts automatically. This map is never entered at any point in regular gameplay. When the player tries to go to the next map, an error occurs because this map is not recognized by d3_c17_03. The vmf for this map in the files of the game.
"Follow Freeman!"
(The mod)
Meeting up with Barney, raiding the Nexus building, and breaching the Citadel's walls.
d3_c17_09
Gordon kills Combine snipers to save Barney, then they continue onward.

d3_c17_10a
Barney and Gordon run to the Nexus building, dodging the Suppression Device along the way.

d3_c17_10b
Inside the Nexus building. Gordon and Barney fight through many soldiers as they locate three Combine power generators that must be turned off in any sequence before proceeding to the roof, at which point Barney stays behind. Uniquely to this map, there are ground turrets activated by laser tripwires. One of the large rooms features an ambush followed by a short standoff, and another one is a platforming puzzle where the player must avoid laser tripwires.
Ground turret.

High-security laser room.
A generator.


d3_c17_11
The roof of the Nexus building. The suppression device is passed by (now inactive). A gunship must be defeated before proceeding.

d3_c17_12
Mostly the same area as d3_c17_10a but now an active warzone with rebels, soldiers and striders.

d3_c17_12b
A strider harasses the player as they try to maneuver through a destroyed building. Scanners also relay information about the player to the strider.
Strider firing a cannon shot.

d3_c17_13
The player and rebels overtake a heavily destroyed building near the Citadel. Two striders have to be defeated before proceeding out of the building. Back on the streets, Gordon runs into Dog and Barney. Dog lifts part of the Citadel wall up, exposing a hole in the ground that opens access into the Citadel.

Our Benefactors
Entering the Citadel, to the final pod ride up to Breen's office.
d3_citadel_01
The player navigates a crumbling cliffside before jumping into the Citadel. They then get on a pod, because there is nowhere else to go. Taking the wrong pod results in inevitable death.
Outside the Citadel.

One path is better than the other...


d3_citadel_02
A breather. Just a scenic ride through the Citadel showing soldiers, stalkers, Combine synths and razor trains. At the end, the player is dropped in a weapon confiscation field.


d3_citadel_03
The weapon confiscation field vaporizes every weapon the player has, except the gravity gun, which becomes supercharged, able to grab and punt living soldiers. The player uses their new super weapon to fight through the Citadel.

d3_citadel_04
The player continues fighting through the Citadel. There is a long ride up on an exposed lift while soldiers attack from all sides. A strider is encountered at the very end, but defeating it is not required to progress.
Lift.
Strider.


d3_citadel_05
The player is forced to take another scenic pod ride, seeing more stalkers as well as two Combine synths unique to this map. This time, they are spotted by a camera which sends the player in a special pod path up to Breen's office.
Camera.


Dark Energy
The finale of the game.
d3_breen_01
Gordon is now captured along with Eli and Alyx. Mossman has a change of heart and saves them all for the moment. Breen tries to escape the Citadel by teleporting out. Gordon stops this, and sends the Citadel into a meltdown. Gman comes and takes Gordon out before the explosion, seemingly leaving Alyx.


Day 3 events continue into Template:Game name.