Floor button: Difference between revisions
NickeLDare (talk | contribs) mNo edit summary |
Dr. Orange (talk | contribs) (Rewrite) |
||
| Line 2: | Line 2: | ||
|ru=Creating a button and door:ru | |ru=Creating a button and door:ru | ||
}} | }} | ||
__NOTOC__ | |||
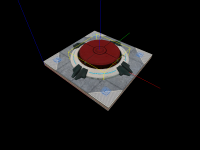
This tutorial will show step-by-step how to create the '''floor button''', a test element commonly seen throughout the [[Portal]] test chambers. The floor button is activated by a [[Box dropper|weighted storage cube]] being placed on it, or when a player stands on it, and it can be used to trigger other test elements such as doors, platforms and elevators. | |||
[[ | == Creation == | ||
=== Step 1 === | |||
[[File:Floor button base.png|200px|thumb|right|The base brush]] | |||
Create a <code>128w*128l*8h</code> [[brush]] and tie it to a <code>[[func_detail]]</code>. Texture the sides of the brush with <code>signage/hazard_orange_03b</code>, texture the top with <code>concrete/concrete_modular_floor001a</code>, and texture the bottom with <code>[[Tool_textures#nodraw|tools/toolsnodraw]]</code>. | |||
{{clr}} | |||
=== Step 2 === | |||
[[File:Floor button overlays.png|200px|thumb|right|Overlays]] | |||
Place four [[Hammer Overlay Tool|overlays]] with the texture <code>signage/overlay_button_accent</code> on top of the brush. Position them in the corners and rotate them so they look like in the picture on the right. | |||
{{clr}} | |||
== | === Step 3 === | ||
[[File:Floor button prop base.png|200px|thumb|right|Button base prop]] | |||
Create a <code>[[prop_static]]</code> entity and set its ''World Model'' to <code>models/props/button_base_reference.mdl</code>. Position it in the middle on top of the base brush. Rotate it so that the sign with a box and an arrow on the rim of the button faces the way the player will enter the room. | |||
{{clr}} | |||
=== | === Step 4 === | ||
[[File:Floor button door.png|200px|thumb|right|The door brush]] | |||
Create <code>60w*60l*8h</code> 8-sided [[Primitive#Cylinder|cylinder]] textured with <code>tools/toolsnodraw</code> above the base brush, in the same place as the button base prop. Tie this brush to a <code>[[func_door]]</code> entity and set the following keyvalues: | |||
{| class="standard-table sortable" | |||
|- | |- | ||
! Property Name !! Value | |||
|- | |- | ||
| Name || | | Name || floor_button_door | ||
|- | |- | ||
| Speed || 25 | |||
| Speed || | |||
|- | |- | ||
| | | Delay Before Reset || -1 | ||
|- | |- | ||
| Move Direction || | | Move Direction || {{vec3|90|0|0}} | ||
|} | |} | ||
Next, go to the flags section and make sure that all flags are unchecked. | |||
{{clr}} | |||
{{ | |||
[[ | === Step 5 === | ||
[[File:Floor button prop button.png|200px|thumb|right|The button prop]] | |||
[[File:Floor button origins.png|200px|thumb|right|Positioning of the button prop]] | |||
Create a <code>[[prop_dynamic]]</code> entity. Set its ''World Model'' to <code>models/props/button_top_reference.mdl</code>, set its ''Pitch Yaw Roll (Y Z X)'' to the same as the button base prop's and set its ''Parent'' to <code>floor_button_door</code>. Finally, position it in the same place as the base prop, except the origin of the button prop should be 2 units above the origin of the base prop. | |||
{{clr}} | |||
=== Step 6 === | |||
[[File:Floor button triggers.png|200px|thumb|right|The trigger brushes]] | |||
Create a <code>48w*48l*2h</code> brush textured with <code>[[Tool textures#trigger|tools/toolstrigger]]</code>. Tie this brush to a <code>[[trigger_multiple]]</code> entity and set its ''Name'' to <code>floor_button_trigger_player</code>. Go to its flags and make sure ''Clients'' is the only flag that is checked. | |||
Next create a <code>8w*8l*2h</code> 8-sided cylinder brush, also textured with <code>tools/toolstrigger</code> in the same place as the <code>floor_button_trigger_player</code> brush and tie it to a <code>trigger_multiple</code> entity. Set its ''Name'' to <code>floor_button_trigger_box</code> and make sure only the ''Physics Objects'' flag is checked. Next, set its ''Filter Name'' to <code>filter_boxes</code>. If you have created a [[box dropper]] in your level, you should already have this entity, but if you don't, create a new <code>[[filter_activator_name]]</code> entity with the ''Name'' <code>filter_boxes</code> and set its filter to the name of your weighted storage cube. | |||
Now add the following outputs to <code>floor_button_trigger_player</code>: | |||
{| {{OutputsTable}} | |||
|- | |- | ||
| | | [[Image:Io11.png]] || OnEndTouchAll || floor_button_door || Close || || 0.00 || No | ||
|- | |- | ||
| | | [[Image:Io11.png]] || OnEndTouchAll || floor_button_trigger_box || Enable || || 0.00 || No | ||
|- | |- | ||
| | | [[Image:Io11.png]] || OnTrigger || floor_button_door || Open || || 0.00 || No | ||
|- | |- | ||
| | | [[Image:Io11.png]] || OnTrigger || floor_button_trigger_box || Disable || || 0.00 || No | ||
|} | |} | ||
Next, add the following outputs to <code>floor_button_trigger_box</code>: | |||
{| {{OutputsTable}} | |||
|- | |- | ||
| | | [[Image:Io11.png]] || OnEndTouchAll || floor_button_door || Close || || 0.00 || No | ||
[[Image: | |||
|- | |- | ||
| | | [[Image:Io11.png]] || OnEndTouchAll || floor_button_trigger_player || Enable || || 0.00 || No | ||
|- | |- | ||
| | | [[Image:Io11.png]] || OnTrigger || floor_button_door || Open || || 0.00 || No | ||
|- | |- | ||
| | | [[Image:Io11.png]] || OnTrigger || floor_button_trigger_player || Disable || || 0.00 || No | ||
|} | |} | ||
{{ | {{clr}} | ||
=== Step 7 === | |||
[[File:Floor button ambients.png|200px|thumb|right|The <code>ambient_generic</code> entities]] | |||
! | Create two <code>[[ambient_generic]]</code> entities near the button. Set the following keyvalues on the first one: | ||
{| class="standard-table sortable" | |||
|- | |||
! Property Name !! Value | |||
|- | |- | ||
| Name || button_down | | Name || button_down | ||
| Line 142: | Line 91: | ||
| Sound Name || Portal.button_down | | Sound Name || Portal.button_down | ||
|- | |- | ||
| | | SourceEntityName || floor_button_door | ||
|} | |} | ||
Set the following keyvalues on the second <code>ambient_generic</code>: | |||
! | {| class="standard-table sortable" | ||
|- | |||
! Property Name !! Value | |||
|- | |- | ||
| Name || button_up | | Name || button_up | ||
| Line 152: | Line 103: | ||
| Sound Name || Portal.button_up | | Sound Name || Portal.button_up | ||
|- | |- | ||
| | | SourceEntityName || floor_button_door | ||
|} | |} | ||
Next, add the following outputs to <code>floor_button_door</code>: | |||
{| {{OutputsTable}} | |||
|- | |- | ||
| [[Image:Io11.png]] || OnClose || button_up || PlaySound || | | [[Image:Io11.png]] || OnClose || button_up || PlaySound || || 0.00 || No | ||
|- | |- | ||
| [[Image:Io11.png]] || OnOpen || button_down || PlaySound || || 0.00 || No | |||
| [[Image:Io11.png]] || OnOpen || button_down || PlaySound || | |||
|} | |} | ||
{{clr}} | |||
=== Step 8 === | |||
[[File:Floor button light.png|200px|thumb|right|The <code>light</code> entity]] | |||
Create a <code>[[light]]</code> entity in the middle of the base prop, 8 units above the base brush. Set the following keyvalues on it: | |||
{| class="standard-table sortable" | |||
|- | |- | ||
! Property Name !! Value | |||
! | |||
|- | |- | ||
| Brightness || 251 159 57 30 | | Brightness || 251 159 57 30 | ||
| Line 205: | Line 127: | ||
| BrightnessHDR || 251 159 57 20 | | BrightnessHDR || 251 159 57 20 | ||
|} | |} | ||
The button is now finished and ready to be implemented in a map. | |||
{{clr}} | {{clr}} | ||
== | == Implementation == | ||
[[File:Floor button ingame.png|300px|thumb|right|The floor button in-game]] | |||
=== Step 1 === | |||
Place the button where it should be in the map. | |||
=== Step 2 === | |||
Add the outputs that should fire when the button is activated. The outputs that should be fired when the button is pressed should be the ''OnOpen'' output on <code>floor_button_door</code>, and the ''OnClose'' output when the button is released. | |||
== | {{clr}} | ||
== | == See Also == | ||
* [ | * [[Button (Portal 2)]] - Portal 2 variant | ||
* [[Creating a switch]] - Pedestal button | |||
[[Category:Level Design Tutorials]] | [[Category:Level Design Tutorials]] | ||
[[Category:Portal]] | [[Category:Portal]] | ||
Revision as of 09:50, 13 July 2018
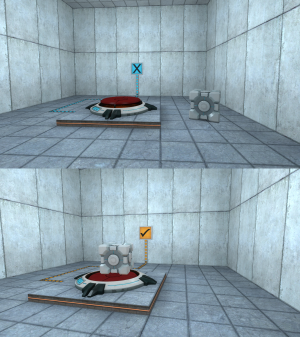
This tutorial will show step-by-step how to create the floor button, a test element commonly seen throughout the Portal test chambers. The floor button is activated by a weighted storage cube being placed on it, or when a player stands on it, and it can be used to trigger other test elements such as doors, platforms and elevators.
Creation
Step 1
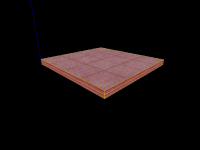
Create a 128w*128l*8h brush and tie it to a func_detail. Texture the sides of the brush with signage/hazard_orange_03b, texture the top with concrete/concrete_modular_floor001a, and texture the bottom with tools/toolsnodraw.
Step 2
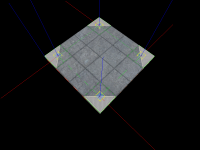
Place four overlays with the texture signage/overlay_button_accent on top of the brush. Position them in the corners and rotate them so they look like in the picture on the right.
Step 3
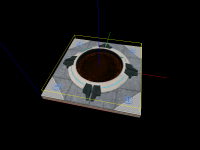
Create a prop_static entity and set its World Model to models/props/button_base_reference.mdl. Position it in the middle on top of the base brush. Rotate it so that the sign with a box and an arrow on the rim of the button faces the way the player will enter the room.
Step 4
Create 60w*60l*8h 8-sided cylinder textured with tools/toolsnodraw above the base brush, in the same place as the button base prop. Tie this brush to a func_door entity and set the following keyvalues:
| Property Name | Value |
|---|---|
| Name | floor_button_door |
| Speed | 25 |
| Delay Before Reset | -1 |
| Move Direction | 90 0 0 |
Next, go to the flags section and make sure that all flags are unchecked.
Step 5
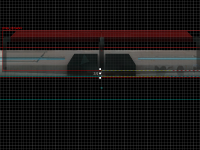
Create a prop_dynamic entity. Set its World Model to models/props/button_top_reference.mdl, set its Pitch Yaw Roll (Y Z X) to the same as the button base prop's and set its Parent to floor_button_door. Finally, position it in the same place as the base prop, except the origin of the button prop should be 2 units above the origin of the base prop.
Step 6
Create a 48w*48l*2h brush textured with tools/toolstrigger. Tie this brush to a trigger_multiple entity and set its Name to floor_button_trigger_player. Go to its flags and make sure Clients is the only flag that is checked.
Next create a 8w*8l*2h 8-sided cylinder brush, also textured with tools/toolstrigger in the same place as the floor_button_trigger_player brush and tie it to a trigger_multiple entity. Set its Name to floor_button_trigger_box and make sure only the Physics Objects flag is checked. Next, set its Filter Name to filter_boxes. If you have created a box dropper in your level, you should already have this entity, but if you don't, create a new filter_activator_name entity with the Name filter_boxes and set its filter to the name of your weighted storage cube.
Now add the following outputs to floor_button_trigger_player:
Next, add the following outputs to floor_button_trigger_box:
Step 7
Create two ambient_generic entities near the button. Set the following keyvalues on the first one:
| Property Name | Value |
|---|---|
| Name | button_down |
| Sound Name | Portal.button_down |
| SourceEntityName | floor_button_door |
Set the following keyvalues on the second ambient_generic:
| Property Name | Value |
|---|---|
| Name | button_up |
| Sound Name | Portal.button_up |
| SourceEntityName | floor_button_door |
Next, add the following outputs to floor_button_door:
| My Output | Target Entity | Target Input | Parameter | Delay | Only Once | |
|---|---|---|---|---|---|---|
| OnClose | button_up | PlaySound | 0.00 | No | ||
| OnOpen | button_down | PlaySound | 0.00 | No |
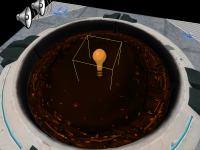
Step 8
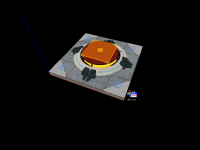
Create a light entity in the middle of the base prop, 8 units above the base brush. Set the following keyvalues on it:
| Property Name | Value |
|---|---|
| Brightness | 251 159 57 30 |
| BrightnessHDR | 251 159 57 20 |
The button is now finished and ready to be implemented in a map.
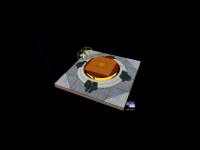
Implementation
Step 1
Place the button where it should be in the map.
Step 2
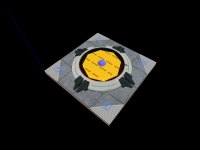
Add the outputs that should fire when the button is activated. The outputs that should be fired when the button is pressed should be the OnOpen output on floor_button_door, and the OnClose output when the button is released.
See Also
- Button (Portal 2) - Portal 2 variant
- Creating a switch - Pedestal button
