Create traffic lights: Difference between revisions
(I translate. sorry for baD english! ^-^) |
Le Glaconus (talk | contribs) (formatting) |
||
| (7 intermediate revisions by 5 users not shown) | |||
| Line 1: | Line 1: | ||
{{ | {{languageBar}} | ||
}} | |||
The {{hl2|4}} assets already provide a model of a signal light, this tutorial will explain how a dynamic traffic light can be set up using [[Inputs and Outputs|I/O]]. | |||
==Required entities== | |||
* One {{ent|prop_dynamic}} with the following keyvalues: | |||
{| class="wikitable" | |||
|- | |||
! Keyvalue !! Value | |||
|- | |||
| World Model || {{path|icon=file|props_c17\traffic_light001a|mdl}} | |||
|- | |||
| Disable Shadows || Yes | |||
|- | |||
| Collide with world || Not solid | |||
|} | |||
{{note|"Not solid" is necessary when you want to place the lights inside the model or very close to it}} | |||
* Three {{ent|point_spotlight|alt=point_spotlights}} placed at roughly the right position near the model. | |||
* One {{ent|logic_auto}}. | |||
* | * Two {{ent|logic_relay|alt=logic_relays}}. | ||
==I/O setup== | |||
[[File:CBETOFOPkpacHbIu.jpg|240px|thumb|right]] | [[File:CBETOFOPkpacHbIu.jpg|240px|thumb|right]] | ||
The input and output logic will define how long each light will be visible, this example will use the following durations: | |||
Red and | * Red and green - 30 seconds | ||
* Yellow - 3 seconds | |||
== | ===Entity names=== | ||
[[File:CBETOFOPredYellow.jpg|240px|thumb|right]] | |||
The {{mono|[[targetname]]}} keyvalue defines the name of the entities, the three point_spotlights should use the following names respectively: "{{mono|greenLight}}" "{{mono|redLight}}" "{{mono|yellowLight}}". The first logic_relay will be named "{{mono|traffLightRelay1}}" and the second one "{{mono|traffLightRelay2}}". | |||
===Outputs=== | |||
[[File:CBETOFOPgreen.jpg|240px|thumb|right]] | |||
[[File:CBETOFOPyellow.jpg|240px|thumb|right]] | |||
The logic_auto requires the following output: | |||
{| {{OutputsTable}} | {| {{OutputsTable}} | ||
| [[ | | [[File:Io11.png]] || OnMapSpawn || traffLightRelay1 || Trigger || || 0.00 || Yes | ||
|} | |} | ||
Add these outputs to the ''first'' {{ent|logic_relay}}: | |||
{| {{OutputsTable}} | {| {{OutputsTable}} | ||
| [[ | | [[File:Io11.png]] || OnTrigger || yellowLight || LightOn || || 28.00 || No | ||
|- | |- | ||
| [[ | | [[File:Io11.png]] || OnTrigger || redLight || LightOff || || 30.00 || No | ||
|- | |- | ||
| [[ | | [[File:Io11.png]] || OnTrigger || greenLight || LightOn || || 30.00 || No | ||
|- | |- | ||
| [[ | | [[File:Io11.png]] || OnTrigger || yellowLight || LightOff || || 30.00 || No | ||
|- | |- | ||
| [[ | | [[File:Io11.png]] || OnTrigger || traffLightRelay2 || Trigger || || 32.00 || No | ||
|} | |} | ||
{{ | {{note|This tutorial will use both {{ent|logic_relay|alt=logic_relays}} and trigger them one after another}} | ||
Add these outputs to the ''second'' {{ent|logic_relay}}: | |||
{| {{OutputsTable}} | {| {{OutputsTable}} | ||
| [[ | | [[File:Io11.png]] || OnTrigger || greenLight || LightOff || || 28.00 || No | ||
|- | |- | ||
| [[ | | [[File:Io11.png]] || OnTrigger || greenLight || LightOn || || 28.50 || No | ||
|- | |- | ||
| [[ | | [[File:Io11.png]] || OnTrigger || greenLight || LightOff || || 29.00 || No | ||
|- | |- | ||
| [[ | | [[File:Io11.png]] || OnTrigger || greenLight || LightOn || || 29.50 || No | ||
|- | |- | ||
| [[ | | [[File:Io11.png]] || OnTrigger || greenLight || LightOff || || 30.00 || No | ||
|- | |- | ||
| [[ | | [[File:Io11.png]] || OnTrigger || yellowLight || LightOn || || 30.00 || No | ||
|- | |- | ||
| [[ | | [[File:Io11.png]] || OnTrigger || redLight || LightOn || || 32.00 || No | ||
|- | |- | ||
| [[ | | [[File:Io11.png]] || OnTrigger || traffLightRelay1 || Trigger || || 32.00 || No | ||
|- | |- | ||
| [[ | | [[File:Io11.png]] || OnTrigger || yellowLight || LightOff || || 32.00 || No | ||
|} | |} | ||
Now the map can be compiled and the traffic lights should be working! | |||
=External links= | |||
[http://depositfiles.com/files/o2fdncelg '''vmf + bsp + screenshots <big>(Counter-Strike: Source!)</big>'''] {{dead link}} | |||
[[Category:Level Design Tutorials]] | [[Category:Level Design]] | ||
[[Category:Tutorials]] | |||
Latest revision as of 09:35, 28 May 2025
The ![]() Half-Life 2 assets already provide a model of a signal light, this tutorial will explain how a dynamic traffic light can be set up using I/O.
Half-Life 2 assets already provide a model of a signal light, this tutorial will explain how a dynamic traffic light can be set up using I/O.
Required entities
- One prop_dynamic with the following keyvalues:
| Keyvalue | Value |
|---|---|
| World Model | props_c17\traffic_light001a.mdl
|
| Disable Shadows | Yes |
| Collide with world | Not solid |
- Three point_spotlights placed at roughly the right position near the model.
- One logic_auto.
- Two logic_relays.
I/O setup
The input and output logic will define how long each light will be visible, this example will use the following durations:
- Red and green - 30 seconds
- Yellow - 3 seconds
Entity names
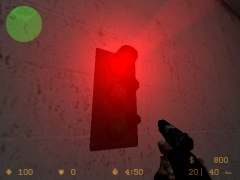
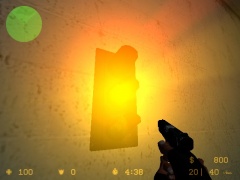
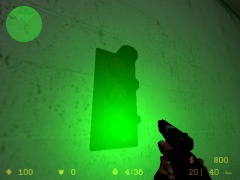
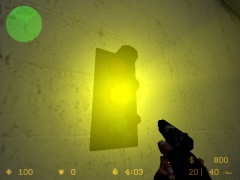
The targetname keyvalue defines the name of the entities, the three point_spotlights should use the following names respectively: "greenLight" "redLight" "yellowLight". The first logic_relay will be named "traffLightRelay1" and the second one "traffLightRelay2".
Outputs
The logic_auto requires the following output:
| My Output | Target Entity | Target Input | Parameter | Delay | Only Once | |
|---|---|---|---|---|---|---|
| OnMapSpawn | traffLightRelay1 | Trigger | 0.00 | Yes |
Add these outputs to the first logic_relay:
Add these outputs to the second logic_relay:
Now the map can be compiled and the traffic lights should be working!
External links
vmf + bsp + screenshots (Counter-Strike: Source!) [dead link]


