User:Mapping Process
Introduction
This is a layout of my mapping process from the very first thought of it until final release. The stages I follow will most likely not be the same for every mapper, but it gives a good time line for new mappers to follow.
Designing
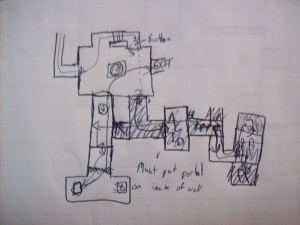
You must crawl before you can walk. In my opinion, the most important part of mapping is the design and layout on paper. I sketch (not draw, because I am a horrible artist) the entire map out before I even open Hammer. This help me make sure the map makes sense, works, and flows.
Shown to the right is the design sketch I made up for the last room in my map, remmizchamber1. As you can see, the final product is a little different but still sticks close to my first design. It's important to make notes to yourself on the drawings. To make sure I wanted what I was thinking at the moment, I made notes and drew arrows depicting the player's path through the level. I also made sure to sketch in location of objects and even some textures. The more complete you can make your map before you even open Hammer, the easier it will be to build it.
Brushes, brushes, brushes
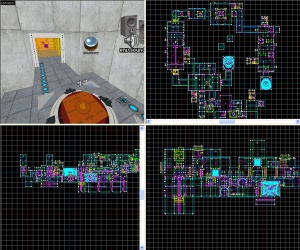
Once I felt I had a pretty complete map on paper, I opened up Hammer and started to go to work. I started off with the entrance and just worked my way through the map. I didn't complete many details during this stage. I just got all the brushes down and made sure it would work. I had to make some minor layout changes but it otherwise stayed pretty close to my initial design. During this stage I made sure to note any important things that I needed to add, change, or remove. This step will probably take the longest of all the stages so be sure to take your time on it. Sloppy brushwork makes everything harder to complete.
Detailing
After I had all the brushwork done, I went back to the start and began to add detail. (overlays, sounds, ect.) I also added entities like saves and cubemaps. During this part I start to compile the map after every room with a full compile (HDR, ect.) and test it in game to make sure it looks good. This can take a while but it worth it in the end as it's a lot easier to critique one room rather than the entire level.
Testing
Once you feel your map is pretty well detailed and looks good, you can begin testing it with other people. What I personally do it send it to a couple of my personal friends and have them give a shot at it. It is always better to have others test it before you release. Having them record a demo that you can playback and watch them go through is very helpful in targeting troublesome areas. I then took their comments and bugs back to Hammer and fixed them. You will have to repeat this a couple times as fixing one bug usually opens another.
Preparing for Release
Once you have throughly tested your map (sometimes releasing a beta version right before the final is best) and feel that it is bug-free, make sure everything is neatly organized in it's folder structure (custom materials and models should be bspziped) and be sure to include a readme.txt within the archive which contain the map info, installing instructions, credits and anything else that you feel is important.
Let it free!
Once you have your final archive ready to go, you should upload it to a couple different sites and start telling the world about it. Be sure to take some good screen shots of it first and show those in your thread or upload as a convincing screen shot will get you a lot more downloads than one without. There is no doubt that even after your extensive testing, someone will find a bug within the final release. If it's very, very minor...I would suggest just ignoring it and letting it stay but if it's game breaking and somewhat serious, you should update the map and re-upload a new version. Just be sure to clearly state what version of the map people are downloading so they know if it's been updated or not. After that, just sit back and start the entire process all over again!

