Your First Map
In ![]() Team Fortress 2, players can enjoy a wide variety of community-made maps, including jump maps, dodgeball, MGE, trading maps, training maps, and more. Even if you're only vaguely interested in map creation, there's probably a type of map you're eager to build. This article covers the basics common to all types of maps. It’s intended for anyone launching
Team Fortress 2, players can enjoy a wide variety of community-made maps, including jump maps, dodgeball, MGE, trading maps, training maps, and more. Even if you're only vaguely interested in map creation, there's probably a type of map you're eager to build. This article covers the basics common to all types of maps. It’s intended for anyone launching ![]() Hammer for the first time. Whether you're using the standard Hammer editor or
Hammer for the first time. Whether you're using the standard Hammer editor or ![]() Hammer++, either one will work just fine.
Hammer++, either one will work just fine.
Getting Started
The Hammer editor is packaged with TF2. Refer to Getting Started to learn how to launch the Source level editor.
Creating a Play Area and Adding a Skybox
Making a Cube
Before we jump in, let’s talk about how the sky works in the Source engine. Many players imagine the world as a flat surface with open sky above, but Source maps are actually built inside a sealed box! What looks like the sky is really a texture applied to the ceiling. Let's recreate that now by making a cube-shaped world.
- Press ⇧ Shift+B, or select the
 "Block Tool" in the left toolbar.
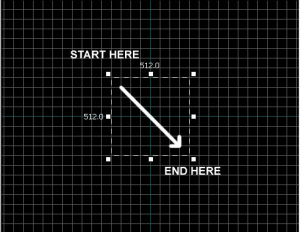
 - In the Top 2D view, left-click and drag from the top-left toward the bottom-right.
- As you drag, you'll see a dotted outline forming a rectangle or square.
- Make a 512×512 square, and make sure it’s visible in the Top, Right, and Side viewports.
- Press ↵ Enter to create the brush you've drawn.
Making It Hollow
Now let's hollow it out.
- Click the
 Selection Tool or press Esc to return to selection mode.
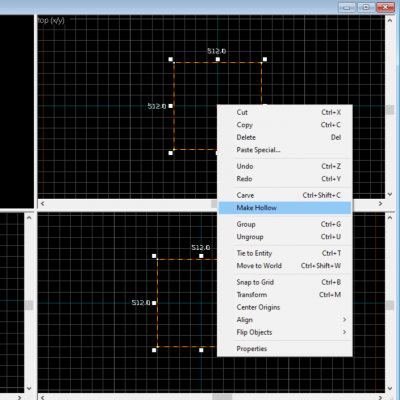
 - Right-click the "x" in the center of your cube to select it. Left-click again and choose Make Hollow. Set thickness to 16 units.
This will create inner walls, forming a playable hollow space.
3D navigation differs slightly from the 2D views:
- Hold Space and left-click + drag to rotate the camera.
- Hold Space and right-click + drag to move up/down and left/right.
- Hold Space, left + right-click + drag to move forward/backward.
- Use W, A, S, and D to move like in-game (forward, back, strafe left/right).
- Press Z in the 3D viewport to toggle "mouse look" mode, allowing free camera rotation with your mouse.
Applying a Skybox Texture
Let’s apply the sky texture.
- Move your 3D camera inside the cube.
- Press ⇧ Shift+A to activate the Texture Application Tool.
- Click a face inside the cube.
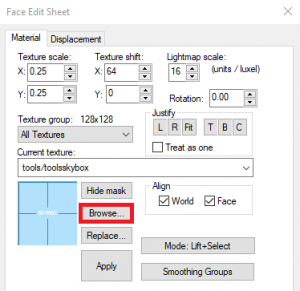
- In the Face Edit Sheet, click Browse...
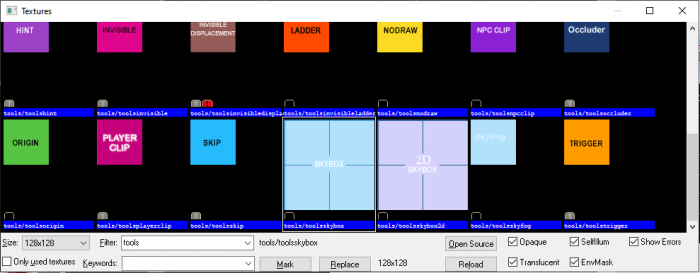
Search for tools/toolsskybox. Typing "tools" in the filter can help narrow it down.
Once selected, apply it to the ceiling (or whichever surface you want to act as the sky). You can also set it as the current texture to use it more easily later.
Any face with the toolsskybox texture will appear as sky in-game.
Adding a Player Spawn Point
Let’s add a spawn point so we can enter the map.
- Select the
 Entity Tool using ⇧ Shift+E or from the Tool Bar.
 - Click in the center of your cube to place the entity.
The Grid
All 2D views use a grid. Objects snap to the grid by default, which helps avoid bugs like leaks. It's best to leave this setting on.
The default grid size is 64 units. This value is shown in the status bar at the bottom of the Hammer window.
- Click the Smaller Grid icon
 or press [ to reduce the grid size for precision.
 - Click the Larger Grid icon
 or press ] to increase the grid size for faster layout.
To reduce the grid to 16 units, press [ twice. Confirm it says Grid: 16 in the bottom-right of the Hammer window.
Back to the Spawn Entity
Now, select the entity using the Selection Tool.
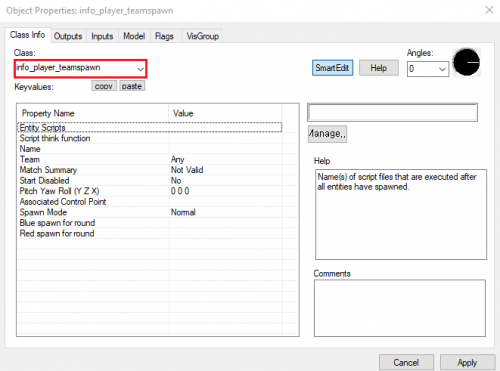
Let’s configure it.
Press Alt+↵ Enter, or right-click the entity and choose Properties.
Change the class name to info_player_teamspawn.
Compiling and Running the Map
Once your map is ready, press F9 to compile it.
To test it, move the compiled BSP file to:
[your Steam Directory]\steamapps\common\Team Fortress 2\tf\maps
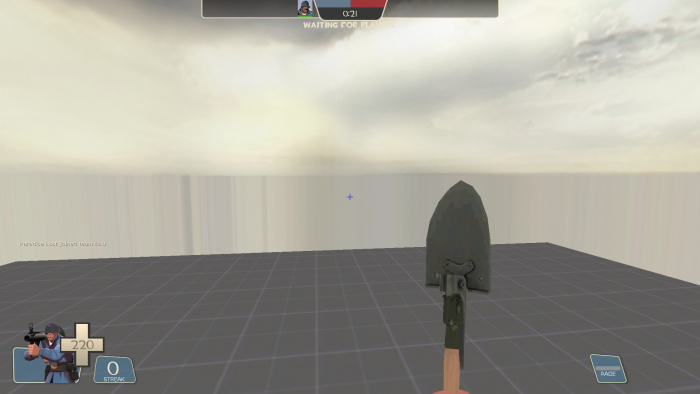
Then launch TF2, click "Create Server", and find your map in the list.
And there you have it—your first map!
