Copying shots from a different session
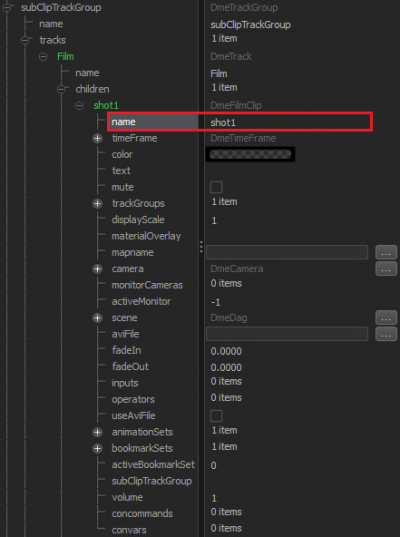
Each shot in a session must have a unique name. If you want to add a shot from session B to session A, make sure session A doesn't already contain a shot with that name. If session A already has a shot with that name, a dialog box will appear, asking you whether you want to replace the entire existing shot or replace specific elements of that shot. Click Cancel if you don't want to replace all or part of the existing shot.
For more information about replacing shots and animation sets, see Replacing shots and Replacing animation sets.
To add a shot from session B to session A:
- Follow the procedure in Importing a second session in the Element Viewer.
- Make sure the timeline is in Clip Editor mode.
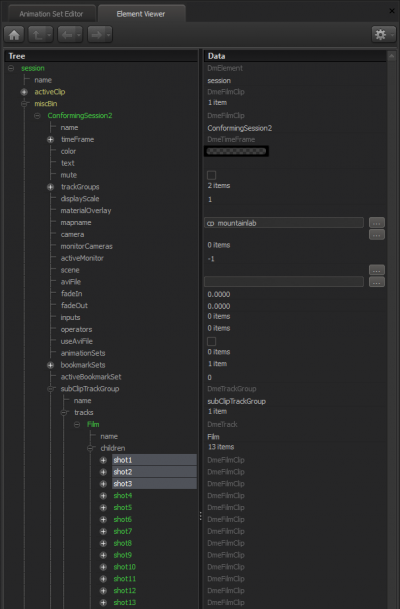
- Find the shot you want to add by expanding the sequence in the miscBin, and then expanding subClipTrackGroup, tracks, Film, and children. Note that the name of the new shot must be different from the names of the shots in session A.
- Drag the new shot from the miscBin onto the filmstrip. You can drop it at the beginning of the filmstrip, between two shots, or at the end of the filmstrip. Drop it where you want it to be. Any shots downstream of the new shot will ripple down the timeline, and any sound or effects clips associated with them will also ripple to maintain their synchronization with their shots. (If those sound or effects clips were unlocked beforehand, they won't ripple. For more information, see Track groups.)
- Because your sequence is now longer than it used to be, you must make the active playback range (the blue filmstrip) longer too. An easy way to do this is to drag the blue filmstrip to be a little longer than your shots, use ↓ to place the playhead at the end of the final shot, and then press Alt+O to set the end of the blue filmstrip exactly to the end of the final shot.
Render settings
You may find that the newly imported shot has different render settings than the shots in session A. For example, SFM_logo, the animated logo that ships with the SFM and can be found in game\tf_movies\elements\sessions\logo, has high-quality render settings that make it take a long time to render.
If you want the new shot to render more quickly, you can do any of the following:
- With the shot selected and the playhead inside the shot, right-click in the viewport, click Render Settings, and unselect Subpixel Jitter AA.
- With the shot selected and the playhead inside the shot, right-click in the viewport, click Render Settings, and change the number of samples for Depth of Field and/or Motion Blur to a lower number by using their drop-downs.
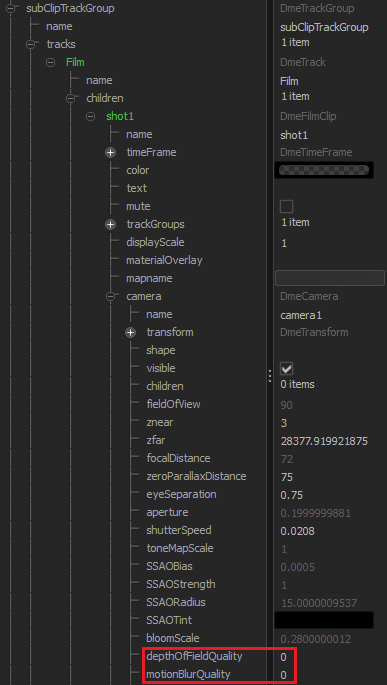
- Open the imported shot's scene camera in the Element Viewer, and change the values of depthOfFieldQuality and/or motionBlurQuality to 0. To open the imported shot's scene camera, in the miscBin, under activeClip, open subClipTrackGroup, tracks, Film, children, the name of the shot, and camera:
 Note:You can adjust these settings for multiple shots simultaneously by dragging the session B's active clip into the viewport, right-clicking the blue filmstrip, and clicking Edit Shot List. If you don't see all the shots listed in the Edit Shot List dialog box, click Refresh.


