Facial Expressions Primer
Suggested reads for this article
- Quick Start Facial Animation
- FacePoser Overview
- Expression Creation
- Choreography Tool
- Other FacePoser Tools
Introduction
The Source engine is capable of having characters convey a wide field of emotions by manipulating various facial muscles, among other things. Due to the complexity of the human face and the number of “flexes", it may be difficult to have a character accurately display a certain feeling. This article will act as a guide on the makeup of six basic facial expressions. By learning how to achieve these six basic expressions, scene designers will be able to having characters express more complex emotions.
Before going on, note that this article focuses on the face, and ignores the head, eyes, and the rest of the body. When working with characters in FacePoser, take into mind that these three ignored items play a significant part in displaying feelings, and shouldn’t be ignored when creating choreography.
Overview
- Load a model capable of facial animation
- Manipulate the model’s facial muscles
- Create a choreography file
- Transfer the facial animation data into an event
- Play the new choreography
- Conclusion & Links
Loading models
First, start Face Poser, and go to File -> Load Model. Choose a model that is capable of facial animation (This should be obvious; humanoid models such as Alyx or Breen can have animated faces, while models such as the airboat or the Combine gunship cannot. For example purposes, [ROOT]\Humans\Group03\Male_09 was chosen.)
Manipulating facial muscles
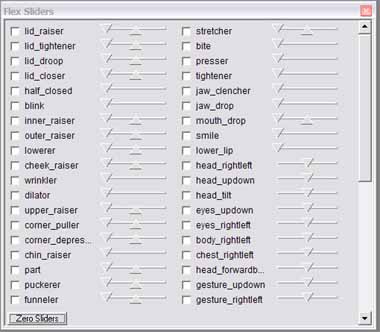
After loading a model, double-click on the Flex Sliders tab, and expand the dimensions of the window to display all of the fields, like this:
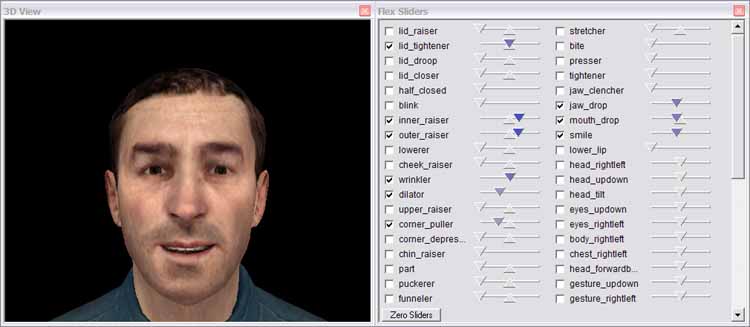
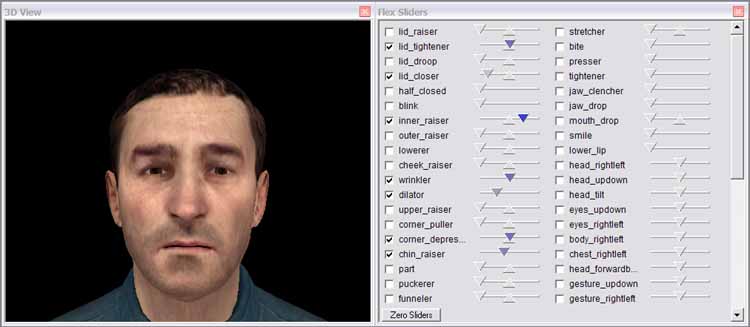
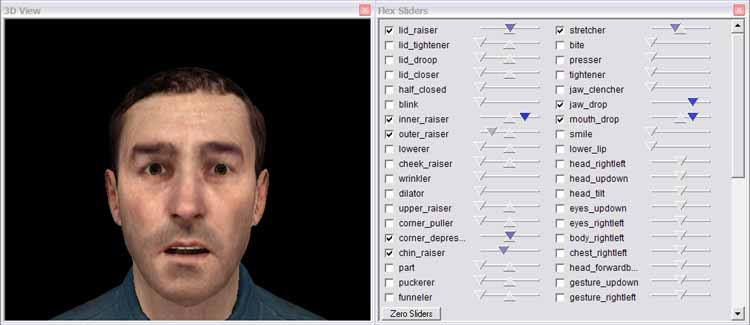
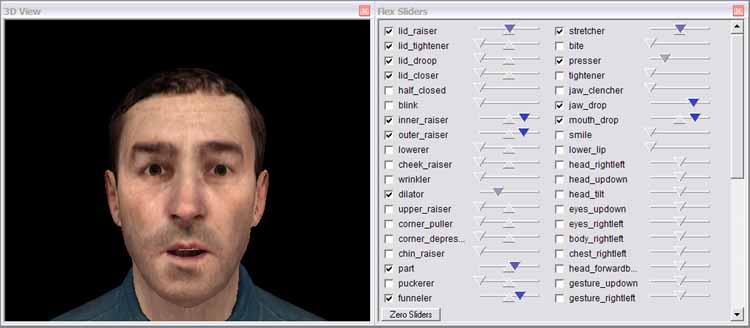
Each of these fields is a “flex" – a set pose authored into the model. By modifying the slide on each flex, the magnitude of the flex is adjusted, thus changing what the model looks like. Here are the flex settings for six basic expressions: Angry, Disgusted, Happy, Sad, Scared, and Shocked. A reference expression, Neutral, is included with the six. Choose one of the six expressions, and go on to the next section.
Take into mind that this is a subjective view on each expression, and not a concrete way on what each expression looks like. Adjust the flexes from these settings if needed to better suit the emotion.
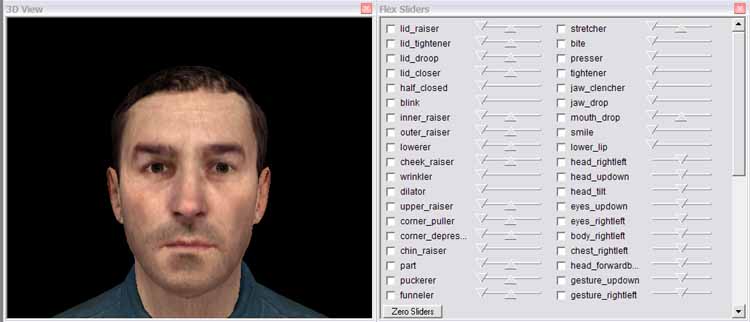
Neutral:
(Completely blank)
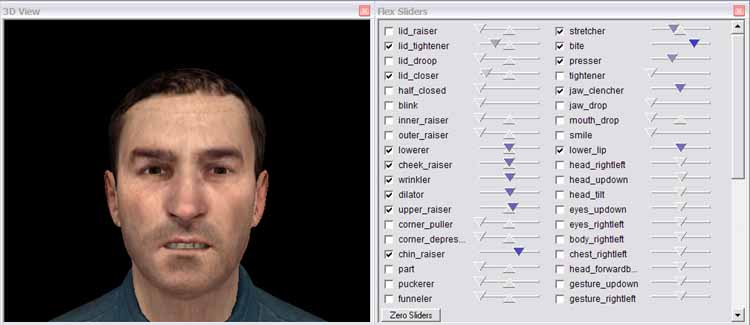
Angry:
(Lowered eyebrows, contracted eyelids, flared nostrils, horizontally stretched out mouth showing the teeth, pressed lips, and a clenched jaw)
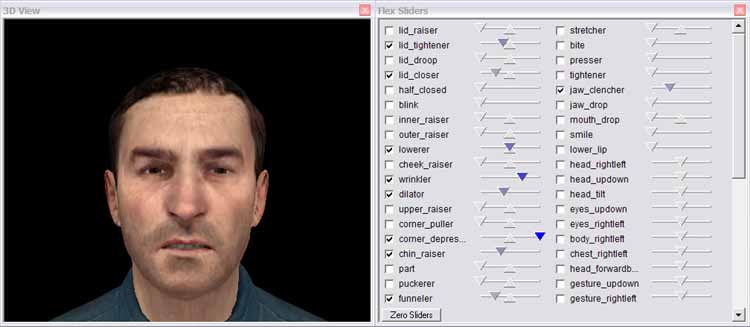
Disgusted:
(Similar to an angry expression, but with a much reduced view of the teeth and less pressure on the lips)
Happy:
(Raised brow, expanded eyelids, raised muscles near the nose, slightly flared nostrils, corners of the mouth pulled upwards, opened mouth showing a slight view of the upper teeth, and a lowered jaw)
Sad:
(Slightly raised inner eyebrows, contracted eyelids, raised muscles near the nose, flared nostrils, corners of the mouth pulled downwards, and a raised chin pushing the middle of the lips upwards)
Scared:
(Raised inner eyebrows, expanded eyelids, horizontally stretched and opened mouth, raised chin, and a lowered jaw)
Shocked:
(Similar to a scared expression, but with a raised brow, flared nostrils, and a more rounded out mouth opening)
Inserting an expression into a scene
Create a new choreography (.vcd) file, name the actor, and create a channel. Now, create a flex animation event, name it, and select the time span that it’ll encompass (for organizational purposes, name it after the expression that was chosen.) Select the event and double-click on the Flex Animation tab. The names of the flexes will appear on the screen (If not, select the event, then right-click the event and choose “Edit event ‘[Name of event]’ in expression tool.) Right-click in the Flex Animation tool and go to Flex -> Copy from Sliders. This copies the changes in the Flex Sliders tool into a series of splines in the Flex Animation tool.
Afterwards, play the scene or adjust the time bar so that it reaches the event. By watching the model, the flexes will change its appearance.
Conclusion
By achieving these six basic facial expressions, scene designers will be able to have their characters’ faces express the emotions that are associated with them at various situations. Further manipulation of the flexes can be used to create even more emotions, such as boredom or pain.
An example expression class is included with this article.
References and other links
- The Six Basic Facial Expressions (This article was based on this page.)
- Paul Ekman and the Facial Action Coding System
- Integrated Publishing - Facial Expressions
- Integrated Publishing - More Facial Expressions
