Terrain Blending
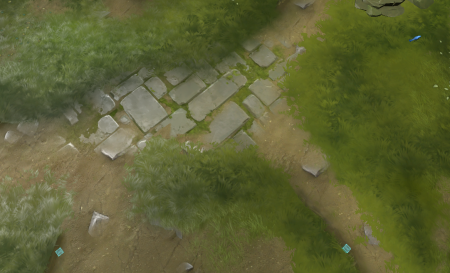
Terrain blending allows blending of multiple textures in a single material to create smooth transitions between two or more textures. In Dota 2 a lot of the visual depth in a scene is created by blending various textures together to create the illusion of depth.
Paint Tool
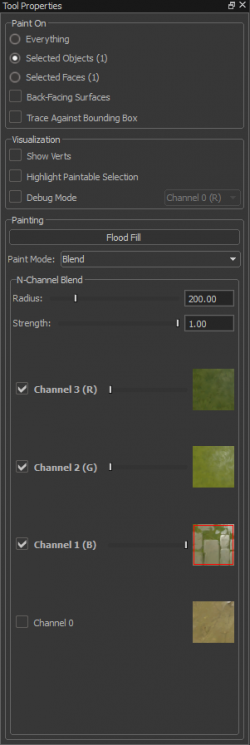
The Paint Tool when active has several panels controlling how textures are blended together.
- Click the paintbrush icon or press ⇧ Shift+V to enter the Paint Tool mode.
- To begin editing use ⇧ Shift+
 on a face with a multiblend material.
Paint On
- Everything - Blend across all objects assigned with the currently selected material.
- Selected Objects - Blend across selected objects only.
- Selected Faces - Blend on selected faces only.
- Back-Facing Surfaces - Allows blending to affect to back-facing faces.
- Trace Against Bounding Box -
Visualization
- Show Verts - Displays vertex positions near the painting reticle. Changes based on assigned reticle size.
- Highlight Paintable Selection - Highlights all faces that can be blended. This is mostly useful when working with a selection of faces and not larger chunks of geometry.
- Debug Mode -
Painting
- Flood Fill - Fills the entire material with the selected Texture Channel. This is across all objects with the current material selection.
- Paint Mode - Toggles between the two modes mentioned below.
- Blend
Sets the current mode to change the contribution of the selected texture channel at the vertex level.
- Color
Allows color tinting to be applied at the vertex level. Any color can be blended to the terrain to add variations to materials.
N-Channel Blend
- Radius - Left click and drag
 on the slider or Middle click and drag (HORIZONTAL)
 over the desired editing area to effect the radius of the paint reticle.
 - Strength - Left click and drag
 on the slider or Middle click and drag (VERTICAL)
  over the desired editing area to effect the strength of the paint reticle's application.
 - Channels - Select these to make changes to that particular blend layer. There are a maximum of 4 channels available.
- Channel 3
The third texture layer of the selected multiblend material, usually reserved for a darker texture that will blend with Channel 2's assigned texture (when used within a tileset).
- Channel 2
The second texture layer of the selected multiblend material, usually reserved for the most common ground material (when used within a tileset).
- Channel 1
The first texture layer of the selected multiblend material, usually reserved for cliffs (when used within a tileset).
- Channel 0
The base texture layer of the selected multiblend material, usually reserved for dirt paths when used within the tile editor. This layer cannot be softened or sharpened.

