New Tilesets
Overview
Tilesets are VMAPS that are referenced by the Tileset editor inside Hammer. They're the DNA of the tileset system. A few default tilesets are provided as examples to use, dissect, and rename/edit to create custom ones.
The supplied tilesets reside in dota_core/maps/tilesets. Each tileset is stored within it's own VMAP file but a map can be assigned multiple tilesets. Additional custom tilesets should be saved to their specific addons.
Tileset Walkthrough
The next section will step through the various aspects of a tileset and how the various components interact with each other.
In Hammer, open the radiant_basic tileset VMAP. This can be found in dota_core/maps/tilesets
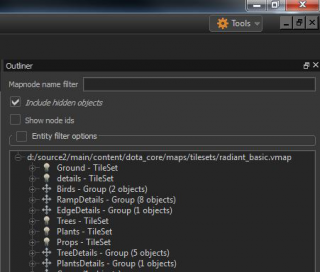
Within the Outliner panel shown to the right there are several "Tileset" groups listed and within each of these contain multiple "tiles." Expanding the "Ground - Tileset" for example will reveal the individual tiles.
Notes
- Each tile is its own group simply named "Tile." These can be named if desired; it has no effect on the tile editor.
- The tile system is organized by grouping geometry, props, proxies, etc, under individual tiles.
- The parent tiles are defined by which folder they are organized under (Ground, details, trees, etc.).
- Non-ground tiles can be referenced by other groups, primarily ground tiles, for more complex procedural behavior and organization.
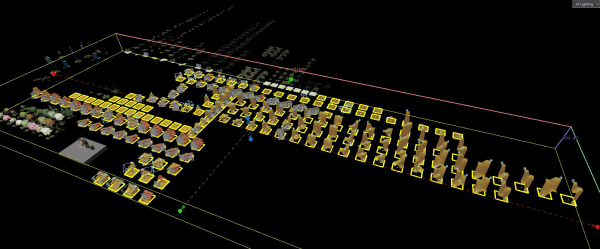
To see how things are organized, left click on the "Ground - Tileset" and note that the majority of the scene in the "radiant_basic" tileset is comprised of this group.
All of these tiles have various bits of data embedded in them which govern how they interact with each other within the Tile Editor.
Ground - Tileset
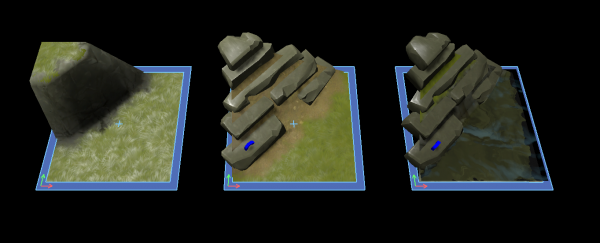
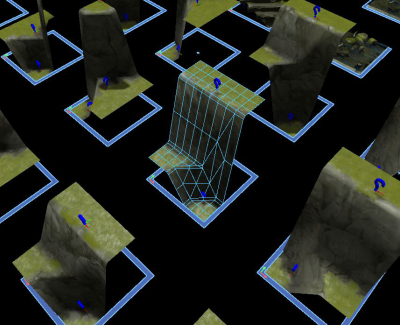
The Ground - Tileset is the root group that all terrain tiles are grouped under and contains the basic building blocks of a tileset scene. It defines all of the available possibilities of ground tile height and contour variation, the visual style, and collision function of the set. It also defines procedural prop placement, paths, ramps, and water when those elements are combined with terrain.
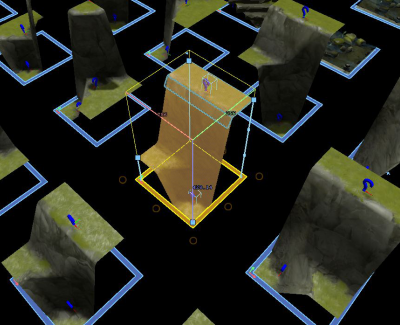
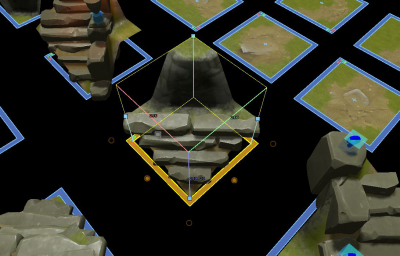
- A blue frame around each tile encompasses all tileset types.
- While in Group selection mode, left click
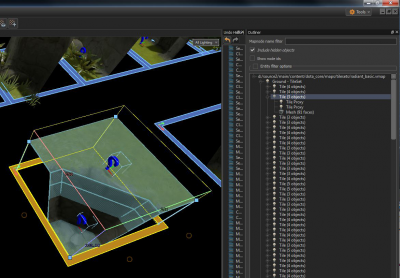
 on an individual ground tile frame. The tile frame will turn orange and reveal a few key inputs such as height and path nodes (covered below).
 - If frames and nodes are not displaying, press ⇧ Shift+O to toggle Editor-only object visibility
Height Nodes
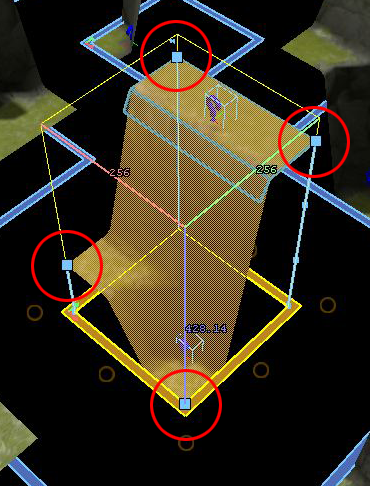
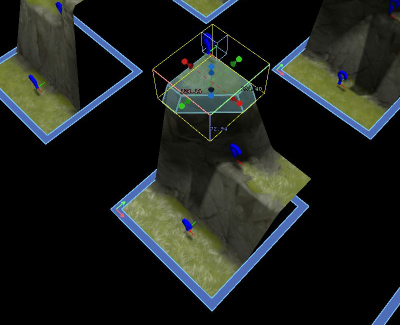
Height nodes are displayed as small cyan squares at the corners of selected tiles. Height nodes define the corner heights of each tile defining valid connectivity between all of the tiles.
Left-click ![]() drags them up or down in increments of 128, from an origin of 0 to 768.
drags them up or down in increments of 128, from an origin of 0 to 768.
Currently ground tile corner heights are limited to a max distance of 384 between any two corners sharing a tile edge. This is intended to keep the number of required ground tile variations to a reasonable number.
Path Nodes
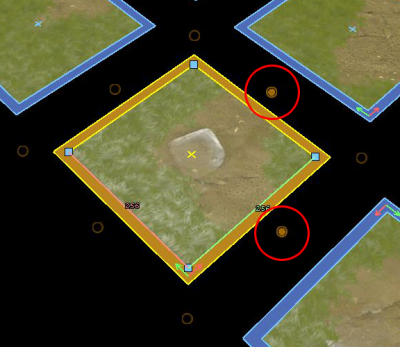
Displayed as small orange circles at the corners and mid points of selected tiles. They define path directions across tiles that have been visually authored to serve as path variations of non-path tiles.
- Left click
 path nodes to toggle them on or off.
Proxies
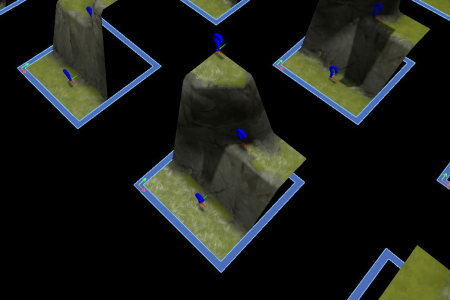
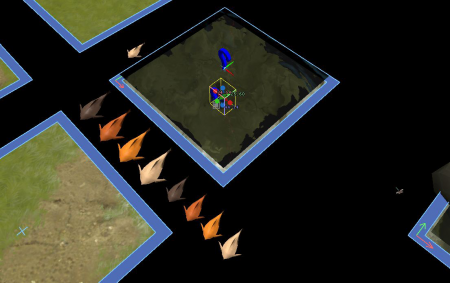
Proxies are the blue question marks placed at various positions on tiles or nested within other proxy groups. Proxies are variable instances that can randomly load a detail variation from a classified group. There are two types of proxies, Tile Proxies and Group Proxies, which are covered below.
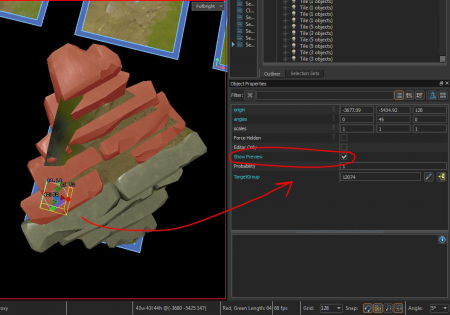
- When selected, Show Preview can be checked under the Object Properties panel (lower-right sidebar), which will enable the preview reticle at the origin of the entity.
- Mouse-wheel with the reticle highlighted (small grey square under the question mark) to scroll through the available variations for the selected proxy. Also under Object Properties for each proxy is a probability (to appear) variable. 0 = never / 1 = 100%.
Tile Proxies
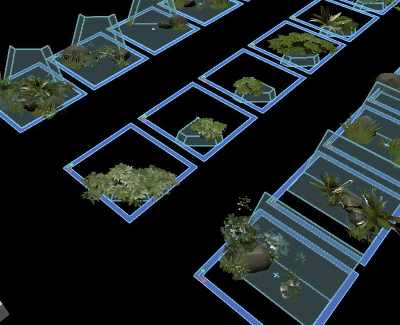
Tile proxies are an integral part of ground tiles, useful for aligning procedural object lookups to terrain height change contours. They reference tile categories from the details-tileset folder in the outliner.
For this example a detail tile can be used.
- From the 'Tiles' menu, choose 'Create Tile Proxy'.
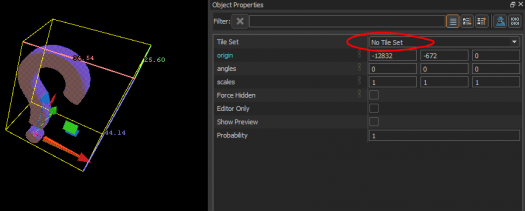
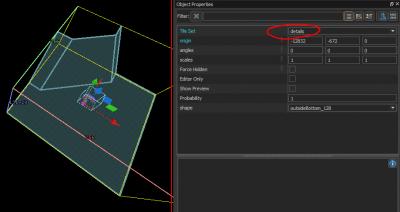
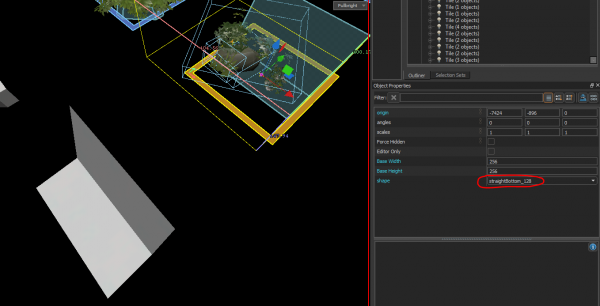
- Under Object Properties Alt+↵ Enter, a Tile set category can be chosen from the drop down at the top of the list. (See images below)
- For now, a details tile category will be chosen.
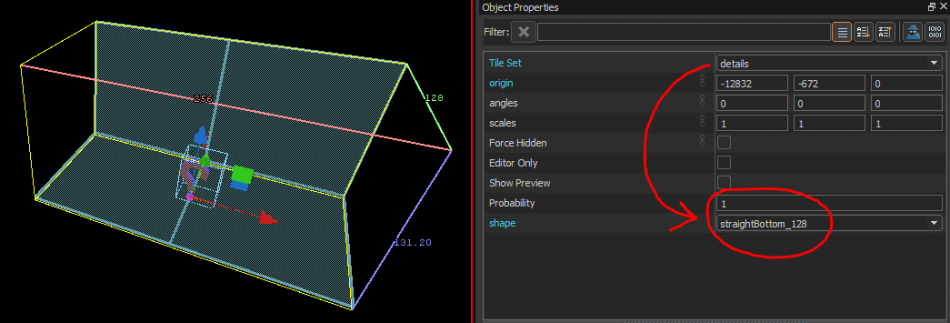
- With details chosen under the Tile set pulldown, new fields become available that are specific to the chosen tile type. (See the above right image)
- All proxy types have the probability field that allows them a lower chance to appear when used within the editor.
- The shape field (seen above right) is specific to details tile proxy types. It consists of category Values that are definable by the user.
- For information on creating these category Values see Details - Tileset below)
Shapes are a combination of a set of procedural groups, plus a user defined, ghosted geometric shape (generally a section copied from a ground tile for height profile reference), and allows tile proxies to be precisely matched along walls, or inner and outer corners. They can be given custom classifications and placement rules to keep them flexible to suit the needs of custom ground tile contours.
Group Proxies
Group proxies are useful for loading variable single objects or simple grouped objects from a larger group.
- With a desired set of objects selected, press Ctrl+G to group them, then with that group selected, choose 'Create Group Proxy' from the Tile menu in the top left.
- Once created this entity can be placed, grouped under tiles, or duplicated to other tiles.
Details - Tileset
The details - tileset folder is used to categorize tiles that are referenced by other tile types (eg. Ground, Trees, etc.) Detail tile proxies are generally clumps of environmental props that are created to align with cliff edges, tree bases, etc.
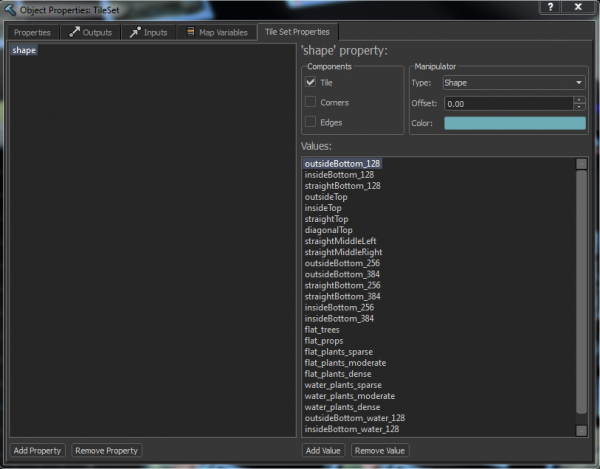
In the above image, The radiant_basic tileset has a shape Property defined (left field), which contains different values for tile proxie groups (right field).
- Shape contains Values (groups) of variations for parallel usage , and thus share ghosted geo for reference.
- Shape values can be added or edited from the Tile Set Properties tab by left clicking
 details - Tileset in the Outliner (upper right in hammer UI), and pressing Alt+↵ Enter. (See image above)
 - Edit Values with the Add Value+Remove Value buttons at the bottom right of the tab. (removing Values will break any associations with tile assignments)
- Value entries can be double-clicked to rename them. (Renaming them will automatically update any tile assignments that reference them)
Above, once Values have been edited in the Tile Set Properties tab for the details-Tilesets group, they can then be assigned to individual tiles under details-Tileset.
Trees - Tileset
Trees - tileset contains tree specific tiles that are similar in structure to detail tiles (tile proxies). These do not need to be referenced by other tiles since they are sprayed down in the tile editor with the tree tool.
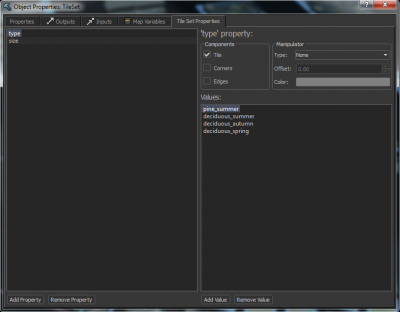
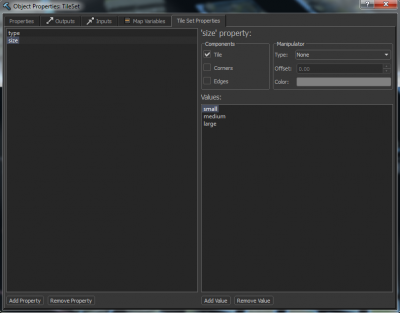
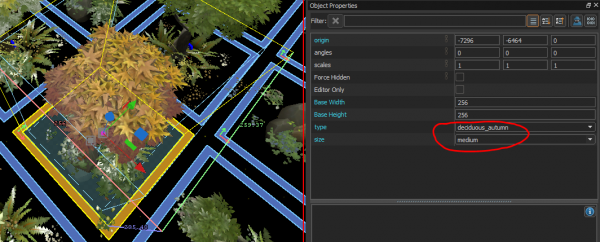
In the above images, the Trees - Tileset has a type and size property defined (left field), which each containing different values (right field). For tree behavior in the tile editor, size and type are used together. So there will be a small/medium/large version of trees within the pine_summer category.
- Values can be added or edited from the properties tab by left clicking
 Trees - Tileset, and pressing Alt+↵ Enter.
 - Edit Values with the Add Value+Remove Value buttons at the bottom right of the tab. (removing Values will break any associations with tile assignments)
- Value entries can be double-clicked to rename them. (Renaming them will automatically update any tile assignments that reference them)
Above, once values have been added in the Tile Set Properties tab of the Trees-Tileset group, they can then be assigned to individual tiles under Trees-Tileset.
TreeDetails
This folder is user defined and does not have a specific role within the tile system. Various user defined folders like this can be added when needed to any tileset scene to keep non-grouped elements from cluttering the Outliner. In the radiant basic tileset it exists simply to organize individual elements used as proxies within tree tiles.
Plants - Tileset
Plants - tileset contains plants and rock tiles that are similar in structure to detail tiles (tile proxies). These are not referenced by other tiles since they are sprayed down in the tile editor with the plant tool.
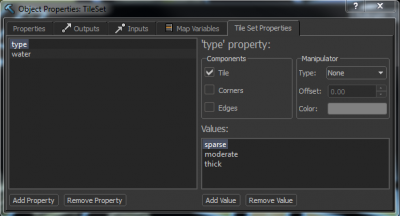
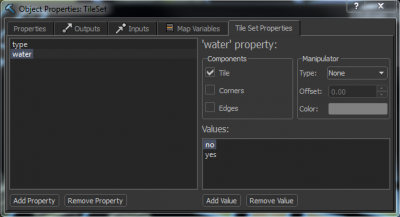
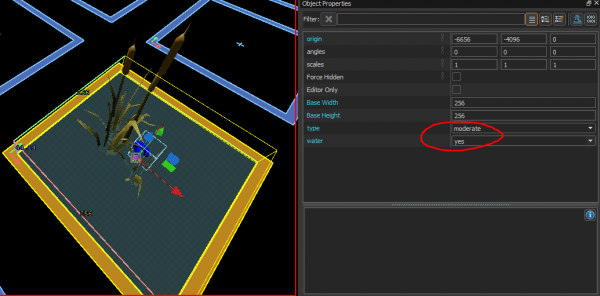
In the above images, the Plants - Tileset has a type and water property defined (left field), which each containing different Values (right field). For tree behavior in the tile editor, type and water are used together. So there will be sparse / moderate / thick versions of plants that are either standard, or set for use in water.
- Values can be edited from the Tile Set properties tab by left clicking
 Plants - Tileset, and pressing Alt+↵ Enter.
 - Edit Values with the Add Value+Remove Value buttons at the bottom right of the tab. (removing Values will break any associations with tile assignments)
- Value entries can be double-clicked to rename them. (Renaming them will automatically update any tile assignments that reference them)
Above, once Properties or Values have been edited in the Tile Set Properties tab of the Plants-Tileset group, they can then be assigned to individual tiles under Plants-Tileset.
PlantDetails
This folder is user defined and does not have a specific role within the tile system. Various user defined folders like this can be added when needed to any tileset scene to keep non-grouped elements from cluttering the Outliner. In the radiant basic tileset it exists simply to organize individual elements used as proxies within plants tiles.
Props - Tileset
props - Tileset is used to categorize prop tiles. Prop tiles are not referenced by other tiles since they are placed in the editor by the prop tool.
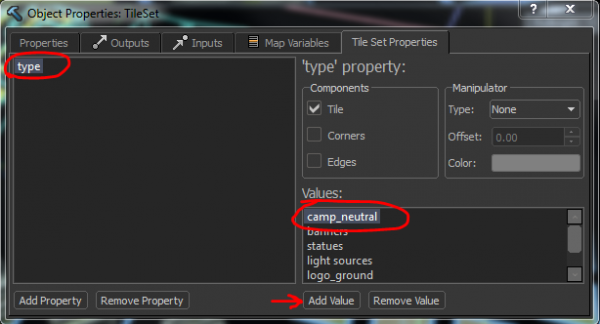
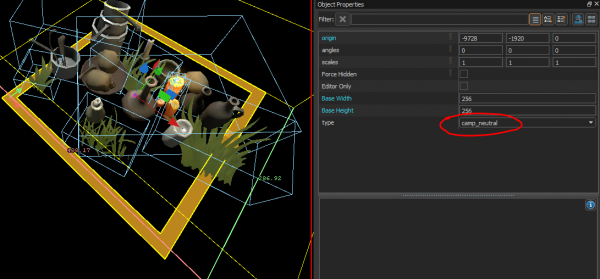
In the above image, Props have a type Property defined (left field), which contains different Values (right field).
- Values can be edited from the properties tab by left clicking
 details - Tileset, and pressing Alt+↵ Enter.
 - Edit Values with the Add Value+Remove Value buttons at the bottom right of the tab. (removing Values will break any associations with tile assignments)
- Value entries can be double-clicked to rename them. (Renaming them will automatically update any tile assignments that reference them)
Shown above, once Values have been edited in the Tile Set Properties tab of the Props-Tileset group, they can then be assigned to individual tiles under Props-Tileset.
