Collision Mesh
A collision mesh is a cheap 3D mesh used by VPhysics. It is sometimes called a collision model, after the C++ object that loads it into the engine, but as far as creating models is concerned, it is a vertex mesh more or less like any other.
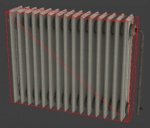
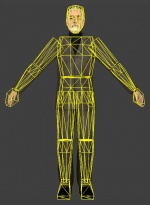
Collision meshes are invisible, and should be extremely low-detail compared to the model's visible components (see the images to the right for two examples). The lack of precision will not be noticed, except in that it doesn't grind the simulation to a halt!
Caveats
- Collision meshes consist of convex elements only
- Any Concave elements will be made into convex elements via the "shrink wrapping" method.
- To create a concave mesh build separate convex objects, intersecting each other if necessary, and compile with
$concave. Every convex piece adds to the simulation cost so be sparing. - All collision elements must be sealed
- There can be no holes anywhere. If studiomdl says "Model has 2-dimensional geometry," you've made a mistake (or at least need to thicken your mesh).
- All collision elements must be fully smooth and share the same texture
- Source uses the vertex normals of a mesh to determine whether or not the mesh is a sealed element. If a model shares more than one texture it will also cause the "Model has 2-dimensional geometry" error.
- If you are making a collision model for a ragdoll or any model with bones, each piece must be fully weighted to a single bone.
- Collision pieces must have a weight of "1" to only one bone. If a piece shares weights across multiple bones, it will generate an error on compile.
Smoothing
This section covers how to make a smoothed collision mesh in various modelling packages. Remember that you also need to eliminate any holes in each convex shape.
 Blender
- In
 Edit Mode, select all edges, right click, and choose "clear sharp".
 - In
 Object Mode, run the "Shade Smooth" operator on your mesh.
 - In
 Edit Mode, select a face, then press f3 and enter "Convex Hull". This will create a hull around your model that fills any cavities.
 Maya
Maya
- Use the Combine command to combine every part into a single editable mesh.
- Do NOT append edges or merge verticies after using the Combine command.
- Set selection mode to Edges, then select all edges in your collision mesh, then click on the Normals menu and click Soften Edge.
- Set up a very basic UVW map, such as an Automatic unwrap.
 Softimage Mod Tool
- Select every part of the collision mesh and use Model -> Create -> Polymesh -> Merge to combine them into one object.
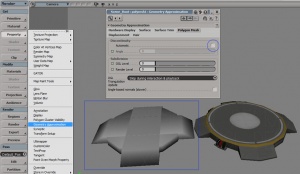
- Use Render -> Get-> Property-> Geometry Approximation. In the Polygon Mesh tab, uncheck Discontinuity: Automatic. All hard edges on the model will disappear.
- Apply a texture and a projection to the collision mesh. Anything will do.
 3DS Max
- Create individual pieces of collision out of simple shapes, or break apart your reference mesh and cap all of the holes as well as well all verts.
- Use the Attach function to combine every part into a single editable mesh. (optional)
- Do NOT weld vertices together after using the Attach function. All objects within the mesh should be individually selectable using the "Select Element" option within the Edit Mesh modifier.
- In Edit Poly, or Edit Mesh, go into either element mode or polygon mode and select all the faces in the mesh. Set them to "smoothing group" "1" in the modifier panel.
- Apply a single texture to the collision mesh with at least a basic UWV map. It does not matter what texture as long as the entire collisionmodel uses only 1 material. If you do not specify a texture some exporters will not properly export the face.
 3DS Max with Wall Worm
- Select your hull mesh(es).
- Click Wall Worm > Wall Worm Model Tools > Hull Helper.
- In Hull Helper, Click Process Hulls. This will add smoothing for each element of each select object.
SketchUp
- Build a collision mesh out of one or more groups of faces. Each group must form a solid convex shape.
- Smooth each edge in the group by selecting all the faces inside and then right clicking and selecting "Soften/Smooth Edges". Set the slider to the 180 degrees to smooth all edges.
- Apply the same material to each face of the collision model. Note you must apply the material to each face, not the group as a whole.
- Combine multiple groups of faces into a single component.
- Set the axis of the component to the same as your reference model.
 Lightwave
- Build a collision mesh out of primitives such as boxes and cylinders. As noted above, make sure each primitive is entirely solid and a separate object.
- Hit Q to add the mesh to a new surface, and give it a name.
- In the Surface Editor (F5), select the new surface, and check the smoothing checkbox. Give it a smoothing threshold of 180.
 Cinema 4D
- Build a collision mesh out of primitives. Each group must form a solid convex shape.
- Create a new Connect Object and drag every primitive into it.
- Remove all tags from the primitives (Phong, Textures..) except the UVW tag.
- Apply your model's material to the Connect Object and export as SMD.
 MilkShape 3D
- Build your collision mesh. Each group must form a solid convex shape.
- Clear all smoothing groups and assign all your meshes into smoothing group 1.
- Export your smd.
Creating Hulls in  3DS Max With Wall Worm
Wall Worm offers many ways to generate collision hulls if you are using 3ds Max. Below are a few methods. See the WW docs for complete information.
From a Reference Mesh
- Click Wall Worm > Wall Worm Model Tools > Hull Helper.
- Select the reference mesh.
- Click Prepare From Selection in Hull Helper.
- With the newly created mesh, selected parts that represent each hull and click the Detach button in Hull Helper.
- Repeat previous step until all parts are represented.
- Click the Create Hulls From Selection button.
From a WWMT Helper
Assuming that you want to make a hull from each element of each object of the model:
- Click Wall Worm > Wall Worm Model Tools > Wall Worm Model Tools.
- Click the Pick Model button and select the model or existing WWMT Helper in the viewport.
- In the Collision Model rollout, click the Quick Hull button.
See also
- $collisionmodel - QC command for collision meshes without moving parts
- $collisionjoints - QC command for collision meshes with moving parts
- VPhysics
- Physics and Ragdolls
- Collision Hulls in 3ds Max for Source


