Создание лифта для Portal/Portal 2
Введение
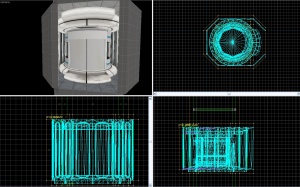
Не смотря на кажущуюся сложность, создание лифта достаточно простой процесс. А при желании можно создать заготовку с лифтом (prefab) и необходимыми атрибутами для последующего дублирования в ваших картах, что в конечном итоге позволит избежать лишней работы.
Основа лифта
Первое, что нужно сделать, это создать основу для лифта. Она состоит из браша и энтити ![]() func_detail.
func_detail.
Посадочная платформа
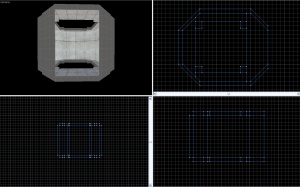
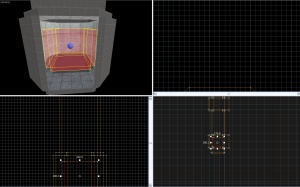
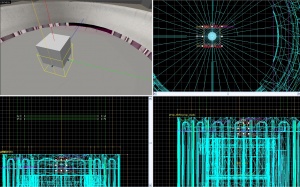
Наша платформа будет состоять из 7 стен, пола и потолка с отверстием как на рисунке справа. Пожалуйста, обратите внимание, что на изображение справа сетка равна 16 юнитам. По образу и подобию создайте ещё одну платформу (достаточно просто скопировать) и разместите её чуть выше первой. Таким образом у нас получилось две платформы, между которыми будет ходить наш лифт.
Основа шахты лифта
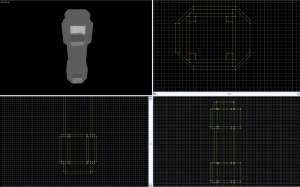
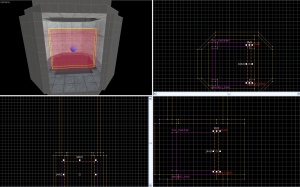
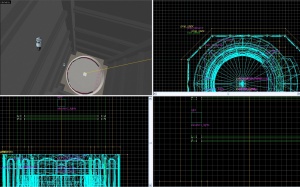
Шахта будет состоять из 3 частей. Средняя часть шахты будет соединять наши 2 платформы, а верхняя и нижняя части будут закрывать вверх и низ у платформ соответственно (смотри рисунок справа). Среднею часть шахты сделайте высотой 384 юнита, верхнею и нижнею части высотой 64 юнита. Длину и ширину стен у всех частей шахты сделайте 192*16 юнитов. Текстуру для нашей шахты можно использовать plasticwall002a.
Доработка шахты лифта (использование func_detail)
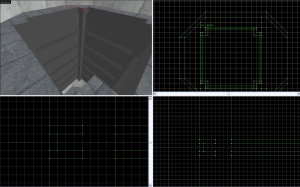
- 1. Создайте 4 браша размерами 16*16 и разместите их по углам шахты. Далее превратите их в func_detail.
- 2. Затем, создайте блок, размерами 8*8*160 (это у нас будут балки шахты лифта, тем самым мы придадим более реалистичный вид нашей шахте):
- A. Примените к блоку текстуру - plasticwall002a.
- B. Разделите наш блок при помощи инструмента Clipping Tool по вертикали на 3 части: 2, 4 и 2 юнита соответственно.
- C. Затем возьмите среднею часть, которая у нас 4 юнита и уменьшите по ширине до 2х юнитов. Примените к этой части текстуру white008. В итоге у вас должна получиться балка в виде лежащей буквы П. (смотрите рисунок, шаг 3 нижняя проекция).
- D. Продублируйте нашу балку по периметру шахты. Т.е. в итоге у нас получилось 4 балки.
- E. Преобразуйте наши балки в func_detail и разместите их через каждые 64 юнита в центральной части шахты (смотрите рисунок справа, шаг 3).
Доработка посадочной платформы
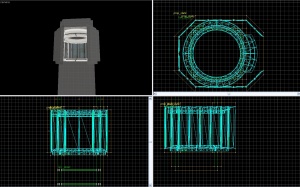
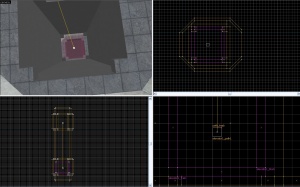
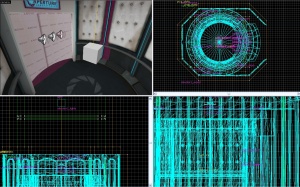
На посадочной платформе также можно разместить источники света по периметру как в оригинальных картах игры. Для простоты вы может открыть карту с примерами из SDK и скопировать оттуда. В примерах карт используется 16 источников света. (смотрите рисунок шаг 4, проекция вида сверху)
Лифт
Модель лифта
Разместите ![]() prop_dynamic со следующими параметрами:
prop_dynamic со следующими параметрами:
| Property Name | Value |
|---|---|
| Name | elevator1_model |
| Parent | elevator1_train |
| World Model | models/props/round_elevator_body.mdl |
Добавление func_ tracktrain
Hide world details and make a func_tracktrain out of invisible brushes as shown.
| Property Name | Value |
|---|---|
| Change Angles | None |
| First Stop Target | elevator1_path1 |
| Height Above Track | 0 |
| Max Speed | 65 |
| Name | elevator1_train |
| Stop Sound | eli_lab.elevator_stop |
| Volume | 1 |
Check every flag except Fixed Orient, and Use Max Speed. Set these settings:
Fixing door collisions
Create a brush textured with tools\toolsinvisible and place it as shown. Tie this brush to a func_brush. This will stop a player from getting stuck in the door when collisions are enabled.
| Property Name | Value |
|---|---|
| Name | elevator1_block |
| Parent | elevator1_train |
| Start Disabled | Yes |
The Paths
Place two paths in the center of the room. Call the first one "elevator1_path1," and the second one "elevator1_path2." Do not set the second path to point to anything. Enable props and test the map using ent_fire. Determine if the paths need to be repositioned. In my case I needed to move it back 8 units and down 16.
The Details
Beams
Place an info_particle_system with the following values:
| Property Name | Value |
|---|---|
| Name | elevator1_beam |
| Parent | elevator1_train |
| Particle System Name | elevator_beam |
| Start Active | Yes |
Place an env_citidel_energy_core with these settings:
| Property Name | Value |
|---|---|
| Name | elevator1_core |
| Parent | elevator1_train |
Lights
Place two lights with the following settings:
| Property Name | Value |
|---|---|
| Name | elevator1_lights |
| Appearence | Slow strobe |
| Brightness | 183 204 218 60 |
| Brightness HDR | 183 204 218 40 |
Also, set initially dark.
Sounds
Place three sounds, with their source set to the elevator model. They should be:
- Portal.elevator_chime
- Portal.elevator_start
- Doors.FullClose11
Name them something unique.
Shake
Add an env_shake with these settings:
| Property Name | Value |
|---|---|
| Duration | 2 |
| Name | elevator1_shake |
| Parent | elevator1_train |
The Trigger
Create a trigger brush inside the elevator with these outputs:
Set the second path track to have these outputs:
Final Touches
Place a soundscape (portal_testchmb.elevator_shaft) in the center of the shaft. You may add a changelevel, which fires with the path_track. Change levels will not be covered in this tutorial.
To make this an elevator at the beginning, simply change the train's first stop target to elevator1_path2.
Note: You should save the elevator in its own file and copy and paste it to preserve the grouping, so you can easily turn it into a multi stop elevator.
To make a multiple stop elevator, simply add another path track, and set the middle path tracks to fire a stop event to the train. A trigger can be placed at every floor and disabled until required.
Remember to disable collision when placing your trigger in your level. Otherwise, you will not be able to enter the elevator.
См. также
[[Category::Category:Portal level design/ru]]
