Mod wizard complete: Difference between revisions
Jump to navigation
Jump to search
TomEdwards (talk | contribs) (redone) |
|||
| Line 1: | Line 1: | ||
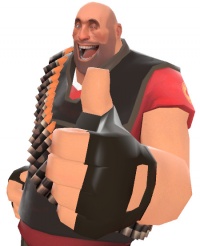
[[ | [[Image:Heavy welcome.jpg|right|200px|He is very, very happy!]] | ||
You have successfully completed the mod wizard! The folder you chose to install to now has several sub-folders beneath it: | |||
;mapsrc\ | |||
:For your uncompiled [[VMF]] map files. | |||
;materialsrc\ | |||
:For your uncompiled [[material]]s. | |||
;modelsrc\ | |||
:For your uncompiled [[model]]s. | |||
;src\ | |||
:All of the C++ game source code for [[Half-Life 2: Episode One]] or [[Half-Life 2: Deathmatch]], or just the "scratch" code, depending on which option you chose in the mod wizard. | |||
;src\utils\ | |||
:All of the source code for most of the Source SDK's content creation tools. | |||
Additionally, a folder with your mod's name has been created in <code><Steam install path>\steamapps\sourcemods\</code>. This is where data compiled from the folders above will be loaded from, and the only folder people playing your mod will need. | |||
== | == What now? == | ||
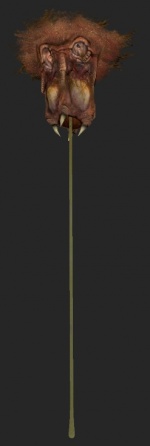
[[Image:Barnacle.jpg|right|150px|A barnacle, from Half-Life 2.]] | |||
There are many areas in modding. For a complete overview, visit the main [[SDK Docs]] page. Here are some highlights for beginners: | |||
;[[:Category:Modding|General advice]] | |||
:[[Making a MOD|From Valve]] | |||
:[[Successful Mod Team Tips|From other modders]] | |||
;[[:Category:Programming|Programming]] | |||
:[[Compiler Choices|Choosing a compiler]] | |||
:[[My First Mod]] (if you chose the Episode One or Deathmatch source code) | |||
:[[My First Entity]] | |||
;[[:Category:Level Design|Mapping]] | |||
:[[Your First Map]] | |||
:[[:Category:Hammer]] | |||
;[[:Category:Modeling|Modeling & Animation]] | |||
:[[Model Creation Overview]] | |||
:[[XSI Mod Tool]] | |||
:[[Compiling Models]] | |||
;[[:Category:Material System|Art]] & [[:Category:Sound System|Sound]] | |||
:[[Material Creation]] | |||
:[[Soundscripts]] | |||
;[[:Category:Choreography|Choreography]] | |||
:[[Choreography creation]] | |||
== Get help == | |||
Help is available from: | |||
* | *The [[:Category:Source SDK FAQ|Source SDK FAQ]] | ||
* | *The [http://forums.steampowered.com/forums/forumdisplay.php?f=191 Steam User Forums] | ||
* | *The [[Help Desk]] | ||
*The [http://list.valvesoftware.com/mailman/listinfo/hlcoders hlcoders mailing list] (for programmers) | |||
Good luck! | |||
__NOTOC__ | __NOTOC__ | ||
__NOEDITSECTION__ | |||
[[Image:Source-logo-300px.png|center|Source]] | |||
Revision as of 13:16, 24 February 2008
You have successfully completed the mod wizard! The folder you chose to install to now has several sub-folders beneath it:
- mapsrc\
- For your uncompiled VMF map files.
- materialsrc\
- For your uncompiled materials.
- modelsrc\
- For your uncompiled models.
- src\
- All of the C++ game source code for Half-Life 2: Episode One or Half-Life 2: Deathmatch, or just the "scratch" code, depending on which option you chose in the mod wizard.
- src\utils\
- All of the source code for most of the Source SDK's content creation tools.
Additionally, a folder with your mod's name has been created in <Steam install path>\steamapps\sourcemods\. This is where data compiled from the folders above will be loaded from, and the only folder people playing your mod will need.
What now?
There are many areas in modding. For a complete overview, visit the main SDK Docs page. Here are some highlights for beginners:
- General advice
- From Valve
- From other modders
- Programming
- Choosing a compiler
- My First Mod (if you chose the Episode One or Deathmatch source code)
- My First Entity
- Mapping
- Your First Map
- Category:Hammer
- Modeling & Animation
- Model Creation Overview
- XSI Mod Tool
- Compiling Models
- Art & Sound
- Material Creation
- Soundscripts
- Choreography
- Choreography creation
Get help
Help is available from:
- The Source SDK FAQ
- The Steam User Forums
- The Help Desk
- The hlcoders mailing list (for programmers)
Good luck!


