Zh/Creating a working mini-map: Difference between revisions
No edit summary |
No edit summary |
||
| Line 29: | Line 29: | ||
<li>用[[console command|控制台指令]] map <code><mapname></code> 打开地图并输入 <code>"sv_cheats 1"</code>。</li> | <li>用[[console command|控制台指令]] map <code><mapname></code> 打开地图并输入 <code>"sv_cheats 1"</code>。</li> | ||
<li>随便选择一个队伍加入。</li> | <li>随便选择一个队伍加入。</li> | ||
<li>用[[console|控制台]]输入指令 <code>"bot_quota 1"</code> 来停用机器人。</li> | <li>用[[console|控制台]]输入指令<code>"bot_quota 1"</code>来停用机器人。</li> | ||
<li>用[[console|控制台]]输入指令 <code>"bind p screenshot"</code> 来将"[[screenshot|屏幕截图]]"指令绑定到一个按键上。</li>这一点真的很重要,因为默认截图方式(F5截图)会产生一张压缩过的[[JPEG]]格式图片而不是无损的[[TGA]]格式图片。 | <li>用[[console|控制台]]输入指令<code>"bind p screenshot"</code>来将"[[screenshot|屏幕截图]]"指令绑定到一个按键上。</li>这一点真的很重要,因为默认截图方式(F5截图)会产生一张压缩过的[[JPEG]]格式图片而不是无损的[[TGA]]格式图片。 | ||
<li>用[[console command|控制台指令]]<code>"cl_drawhud 0"</code>,<code>"r_drawviewmodel 0"</code>以及<code>"hidepanel all"</code>来去除HUD。</li> | <li>用[[console command|控制台指令]]<code>"cl_drawhud 0"</code>,<code>"r_drawviewmodel 0"</code>以及<code>"hidepanel all"</code>来去除HUD。</li> | ||
<li>用[[console command|控制台指令]]来去除一些无用的效果,例如天空盒(<code>"r_skybox 0"</code>),烟雾(<code>"fog_override 1"</code> 和 <code>"fog_enable 0"</code>),物体(''optional:'' <code>"r_drawstaticprops 0"</code>)及其他。</li> | <li>用[[console command|控制台指令]]来去除一些无用的效果,例如天空盒(<code>"r_skybox 0"</code>),烟雾(<code>"fog_override 1"</code>和<code>"fog_enable 0"</code>),物体(''optional:'' <code>"r_drawstaticprops 0"</code>)及其他。</li> | ||
<li>用[[console|控制台]]输入指令 <code>"noclip"</code> 来停用玩家碰撞,接着移动到一个能俯视全图的完美的位置。</li> | <li>用[[console|控制台]]输入指令<code>"noclip"</code>来停用玩家碰撞,接着移动到一个能俯视全图的完美的位置。</li> | ||
<li>用[[console command|控制台指令]] <code>"cl_leveloverview ''x''"</code> 来切换到俯视模式(指令中的 x 指的是比例大小)。</li> | <li>用[[console command|控制台指令]]<code>"cl_leveloverview ''x''"</code>来切换到俯视模式(指令中的 x 指的是比例大小)。</li> | ||
<li>用[[console|控制台]]输入指令 <code>"cl_leveloverviewmarker 1024"</code> 可以显示一条红色的辅助线,不过你需要在[[console|控制台]]输入 <code>cl_drawhud 1</code> 来暂时重启HUD。将视角对好,然后记得关闭HUD</li> | <li>用[[console|控制台]]输入指令<code>"cl_leveloverviewmarker 1024"</code>可以显示一条红色的辅助线,不过你需要在[[console|控制台]]输入<code>cl_drawhud 1</code>来暂时重启HUD。将视角对好,然后记得关闭HUD</li> | ||
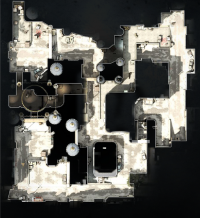
[[Image:Dust2_Overview_CSGO.png|200px|thumb|关卡俯视图的一个例子(de_dust2)]] | [[Image:Dust2_Overview_CSGO.png|200px|thumb|关卡俯视图的一个例子(de_dust2)]] | ||
Revision as of 23:05, 24 August 2018
基本介绍
部分模组(反恐精英:起源,胜利之日:起源)拥有一个能显示地图概要,玩家和物体位置的俯视小地图。构建这样一张由游戏内屏幕截图所修改的小地图对于制作新关卡来说十分重要。
反恐精英:全球攻势也提供小地图功能,它看上去和前几代反恐精英里的小地图没什么太大区别,但对于开发者来说,小地图的制作过程早已大相径庭。
主要的变动有:
- 在CS:GO里小地图被称为"雷达。"
- CS:GO里的雷达并不使用VTFs和VMTs。
- CS:GO里的雷达图片被保存为".DDS"格式。
- 现在只需要两个文件就能让小地图正常显示,一个'.DDS"文件以及一个".txt"文件。".DDS"文件就是小地图显示的地图图片本身,".txt"文件则是用来设定如何让游戏显示小地图。
如果你真的想仔细看看有什么具体的改变,又或者你想制作的是反恐精英:起源的小地图,请查阅:关卡俯视图
获取一张俯视图
- 首先开始游戏,接着打开选项界面,并切换到视频设置,然后将分辨率调整为"1280x1024"并把纵横比切换到"标准"。如果你无法调整分辨率(因为屏幕过小或其他原因),亦可以在启动选项中加上" -width 1280 -height 1024"。
- 用控制台指令 map
<mapname>打开地图并输入"sv_cheats 1"。 - 随便选择一个队伍加入。
- 用控制台输入指令
"bot_quota 1"来停用机器人。 - 用控制台输入指令
"bind p screenshot"来将"屏幕截图"指令绑定到一个按键上。 这一点真的很重要,因为默认截图方式(F5截图)会产生一张压缩过的JPEG格式图片而不是无损的TGA格式图片。
- 用控制台指令
"cl_drawhud 0","r_drawviewmodel 0"以及"hidepanel all"来去除HUD。 - 用控制台指令来去除一些无用的效果,例如天空盒(
"r_skybox 0"),烟雾("fog_override 1"和"fog_enable 0"),物体(optional:"r_drawstaticprops 0")及其他。 - 用控制台输入指令
"noclip"来停用玩家碰撞,接着移动到一个能俯视全图的完美的位置。 - 用控制台指令
"cl_leveloverview x"来切换到俯视模式(指令中的 x 指的是比例大小)。 - 用控制台输入指令
"cl_leveloverviewmarker 1024"可以显示一条红色的辅助线,不过你需要在控制台输入cl_drawhud 1来暂时重启HUD。将视角对好,然后记得关闭HUD - 你可以在cl_leveloverview模式启用时自由移动,不过记住移动方向键将会把你带向与平时不同的方向。适应操作后,仔细调整镜头,注意地图的最右边不应该超出辅助红线,不然你会发现超出的部分在接下来的制作过程中会被整个砍掉。调整时你可以参考右边
de_dust2的俯视图。 - 当前的镜头信息(位置和比例)都会在控制台中显示并实时更新,例如:"Overview:
scale 6.00, pos_x -2651, pos_y 4027"。 - 当一切都接近完美之时,按下截图键(之前用控制台绑定的)并记下控制台显示的镜头信息,之后会用到。
Here are all the needed commands as bind:
- o => Overview-Mode
- p => Take screenshot
//Overview-Mode
//Script by The RaZZeR App
bind "o" "change_resolution; clear_view; clear_map; clear_game; record_config; radar_image";
bind "p" "screenshot";
alias "change_resolution" " mat_setvideomode 1280 1024 1;";
alias "clear_view" "sv_cheats 1; cl_drawhud 0; r_drawviewmodel 0; hidepanel all; net_graph 0;";
alias "clear_map" "bot_quota 1; bot_kick all; r_skybox 0; fog_override 1; fog_enable 0";
alias "clear_game" "mp_freezetime 0; mp_roundtime 9999; mp_roundtime_defuse 9999; mp_roundtime_hostage 9999; mp_roundtime_deployment 9999; mp_warmup_end;";
alias "record_config" "con_logfile overview_info.log;";
alias "radar_image" "noclip; cl_leveloverviewmarker 1024; cl_leveloverview 5";
This script dumps the console output in a log file which is saved at "csgo/overview_info.log". Also the resolution gets changed to 1280x1024 (4:3) windowed.
Create the .DDS
Using Photoshop
- Start up Photoshop and open the .TGA file that you created. It should be located at
"%STEAMINSTALL%\SteamApps\common\Counter-Strike Global Offensive\csgo\screenshots". Where"%STEAMINSTALL%"is the directory in which you have steam installed. This is most likely"C:\Program Files (x86)\Steam". - Using the Canvas Size tool (Image -> Canvas Size) set the new width of the image to be 1024 pixels. And in the anchor section click the top-left box.
- In the layers panel double click on the layer labeled Background. A "New Layer" window will pop up, press OK.
- Select areas of the image which you wish to be transparent when on the mini-map, then press the backspace key.
- Some people like to add different colored features to their mini-maps, if you wish to do so do that now.
- Save the image as a .DDS file. (File -> Save As). The file name should be your map name followed by
"_radar"ex. (de_dust_radar.dds). The file format should be D3D/DDS. Save the file to"%STEAMINSTALL%\SteamApps\common\Counter-Strike Global Offensive\csgo\resource\overviews" - When the DDS dialog box opens click the drop down box at the top left, and change the option from
"DXT1 RGB 4 bpp | no alpha"to"DXT1 ARGB 4 bpp | 1 bit alpha"As shown in the image below. - You now have successfully created the .DDS file for your map.
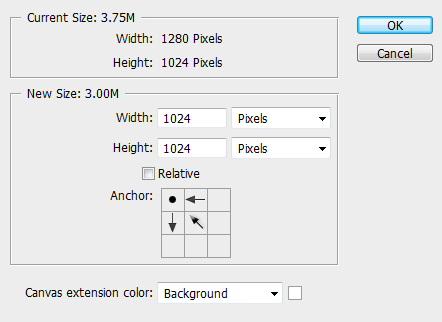
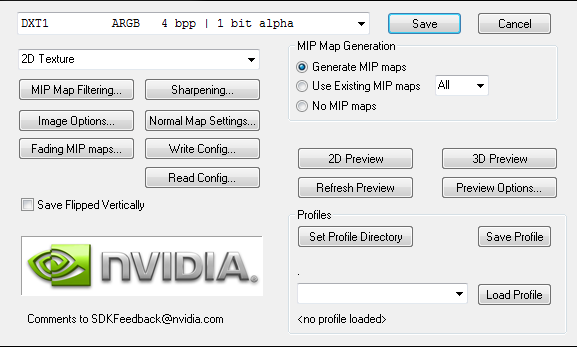
NOTE: If the "Save As..." .DDS file option is not available to you, then you might need to download a photoshop plug-in. You can get it off of the NVIDA website here: NVIDA .DDS Plug-In
Using GIMP
(this tutorial was written using GIMP 2.6, but should work for all GIMP 2.x)
- Download and install the GIMP DDS Plugin 2.0.2.
- Start up GIMP and open the .TGA file that you created. It should be located at "%STEAMINSTALL%\SteamApps\common\Counter-Strike Global Offensive\csgo\screenshots". Where "%STEAMINSTALL%" is the directory in which you have steam installed. This is most likely "C:\Program Files (x86)\Steam".
- Using the Canvas Size tool (Image -> Canvas Size) set the new width of the image to be 1024 pixels. keep the Height at 1024.
- Select areas of the image which you wish to be transparent when on the mini-map, then press the delete key.
- Some people like to add different colored features to their mini-maps, if you wish to do so do that now.
- Save the image as a .DDS file. (File -> Save As). The file name should be your map name followed by "_radar" ex. (de_dust_radar.dds). The file format should be D3D/DDS. Save the file to "%STEAMINSTALL%\SteamApps\common\Counter-Strike Global Offensive\csgo\resource\overviews".
- When the DDS dialog box opens click the drop down box at the top left, and change the compression drop down from "None", to "BC1/DXT1". Click "OK".
- You now have successfully created the .DDS file for your map.
Create the overview script
Finally, create a text file called <mapname>.txt in <game dir>\resource\overviews\. This file will define the precise numbers needed to align the overview. The following is an example taken from de_vertigo:
For your map's script use the projection data that you wrote down in step 12 of Make the raw overview image
// HLTV overview description file for de_vertigo.bsp
"de_vertigo"
{
	"material"	"overviews/de_vertigo_radar"	// texture file
	"pos_x"		"-3168"				// X coordinate
	"pos_y"		"1762"				// Y coordinate
	"scale"		"4.0" 				// scale used when taking the screenshot
	"rotate"	"0"				// map was rotated by 90 degrees in image editor
	"zoom"		"1.3"				// optimal zoom factor if map is shown in full size

	//loading screen icons and positions
	"CTSpawn_x"	"0.22"
 	"CTSpawn_y"	"0.73"
	"TSpawn_x"	"0.63"
	"TSpawn_y"	"0.10"

	"bombA_x"	"0.17"
	"bombA_y"	"0.78"
	"bombB_x"	"0.73"
	"bombB_y"	"0.68"

	"Hostage1_x"	"0.56"
	"Hostage1_y"	"0.83"
	"Hostage2_x"	"0.48"
	"Hostage2_y"	"0.64"
	"Hostage3_x"	"0.47"
	"Hostage3_y"	"0.78"
	"Hostage4_x"	"0.30"
	"Hostage4_y"	"0.88"
	"Hostage5_x"	"0.42"
	"Hostage5_y"	"0.86"
}
"pos_x" (red line) and "pos_y" (green line) correspond to the top view of Hammer where X is left/right and Y is down/up. Lowering the scale makes the radar bigger.
To get the correct positions of all loading screen icons you have to open up your finished radar file in Photoshop. Then press Ctrl+R to get the Ruler-Tool (make sure it's set to percent). You get the correct value by dragging the top and left ruler. Note that for example 31.12% are written like 0.31.
Adding Multiple Heights
After the Wildfire update to CSGO you can now have multiple height images added to your radar. This is done by creating multiple radar files with your different paths highlighted depending on the player's height in the world. You can reference the new de_nuke for examples inside your game's files.
- mapname_lower_radar
- mapname_radar (This is the ground floor)
- mapname_higher_radar
Then add the following to your overview text file.
"verticalsections"
{
	"default" // use the primary radar image
	{
		"AltitudeMax" "600"
		"AltitudeMin" "-500"
	}
	"lower" // lower radar file
	{
		"AltitudeMax" "-500"
		"AltitudeMin" "-10000"
	}
	"higher" // higher radar file
	{
		"AltitudeMax" "10000"
		"AltitudeMin" "600"
	}
}
- Type "cl_showpos 1" in game console check the Altitude.
- The higher/lower .dds files will not be included by the Workshop publishing tool, and must be packed manually to be used on the Steam Workshop.
Conclusion
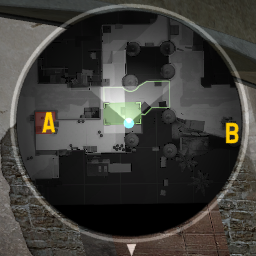
Below is a screen capture of the radar in game. If you followed all the steps correctly, then the finished product should look something like this:
Resource
Bombsite Clear Bombsite A
  Bombsite B

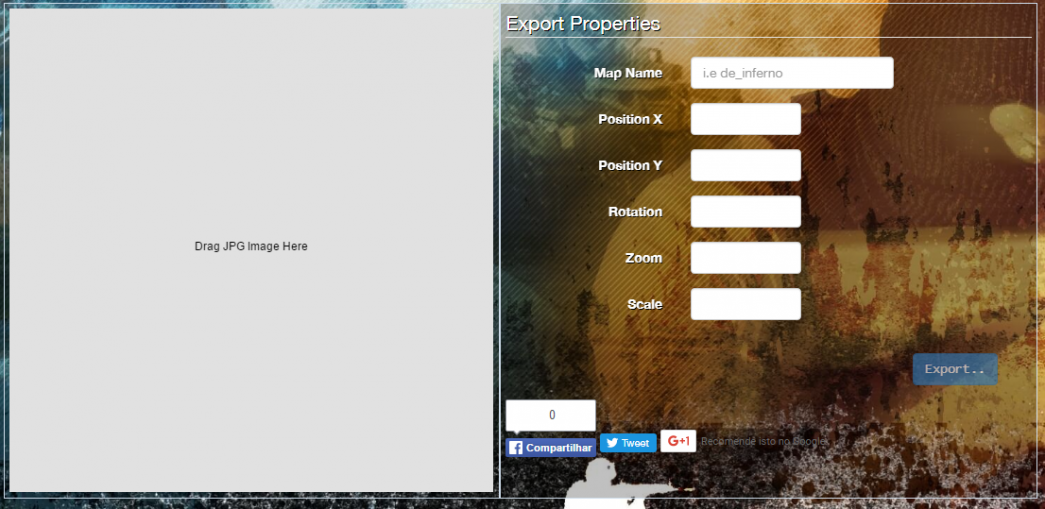
Introducing: CS-GO Minimap Icon Placer beta 2.0
CS:GO-MIP is a ONLINE tool that facilitates the creation minimaps for Counter-Strike: Global Offensive's maps. While the user is still required to perform the basic tradition steps of the minimap making, CS:GO-MIP makes it easy to place the minimap icons (Spawn areas, Hostages and Bombsites) without needing the user to manually edit the text file for the same. You can access it at http://www.minimap.ga.
OBS: The site let you edit and convert your images to dds, look at tools sections. It is still under construction, but works already!
