WiseDoor: Difference between revisions
m (category & minor tidy) |
m (oops, reverted galery pictures!) |
||
| Line 64: | Line 64: | ||
Here are the 14 doors | Here are the 14 doors | ||
<gallery> | <gallery> | ||
Image:wisepropdoors0000.jpg | |||
Image:wisepropdoors0001.jpg | |||
Image:wisepropdoors0002.jpg | |||
Image:wisepropdoors0003.jpg | |||
Image:wisepropdoors0004.jpg | |||
</gallery> | </gallery> | ||
Revision as of 17:07, 16 February 2008
Model Doors
There are other Door tutorials on this site
- This door can be Flagged to be Oneway and Reverse direction: Breakable door
- These doors can be made to move in directions: Sliding doors
- Directional door: One-way
This is the fastest way to create a door in the Source engine and it’s much easier now than it ever was.
The first thing to do is create a prop_door_rotating and we’re going to use a HL2 door model for it. The door we are using has 14 skins, which means that with this same tutorial you have 14 doors you can use.
The door can also have a Lever or Pushbar style handle, which won't show in Hammer but will when you run the map.
prop_door_rotating
- World Model: models/props_c17/door01_left.mdl
- Skin: 4
- Hardware Type: Lever
- Spawn Position: Closed
- Rotation Degrees: 95
- Speed: 80
- Fully Open Sound: Doors.FullOpen4
- Fully Closed Sound: Doors.FullClose4
- Moving Sound: Doors.Move3
- Delay Before Close: 30
- Damage Inflicted when Blocked: 10
- Health: 0
- Locked Sound: DoorHandles.Locked1
- Unlocked Sound: DoorHandles.Unlocked1
- Force Closed: Yes
- Flag - Uses closes: Checked
Experiment with these settings to fit your own needs, you may not for example want the door to close by itself.
There’s a few ways to place your door, I find it easiest to put the door in place and then build the wall around it but that method obviously doesn’t always fit the need.
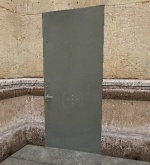
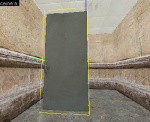
In this example I’ve placed the prop_door_rotating and set the World model to the door model we are going to use, now I’ve placed it in the spot I want it and will create a few walls for this tutorial. You will probably want to create a door frame for most of your doors so allow enough space for the frame and the door when you do, for this example it’s just the door and the walls.
I’m using the basic room from the Clipping tutorial for our door.
Once I create the walls around the door and apply the texture to my walls, which only took a few minutes, our door doesn’t look too bad. Granted it would be improved if I took the time to create a door frame before I build the walls. You’ll find the method that works best for your needs.
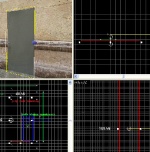
The only thing left is to use the Helper tool to set the hinge for this door. This is the part a lot of mappers are missing in Source but it’s really very easy.
- With the selection tool click on our door in the 3D view port to select it.
- Press Ctrl+E to center all the 2D views over our door.
- Now at the top of Hammer click on the little world looking icon “Toggle Helpers”, make sure it’s enabled.
- Move the white handles with your mouse until you have created the hinge joint for your door.
- Click to turn the Helpers back off. Only use them when you need too.
It helps to experiment with the placement of this hinge, a little forward or back can make a big difference.
Here are the 14 doors
Wrap up
There’s a lot more you can do, hopefully this article have stimulated your imagination.
- The example used in this tutorial.
- If you need further help please use the forum for Source level Design
Credits
- The tutorial was originally created by wisemx, and ported from sdknuts.net/wiseDoor to the VDC by Peter [AGHL] 20:35, 5 Feb 2008 PST)
- Sample maps hosted by http://type3studios.com


