Basic Construction: Difference between revisions
mNo edit summary |
m (Temporary save. How do I make the next chapter appear UNDER the pictures??) |
||
| Line 1: | Line 1: | ||
[[Category:Level Design Tutorials]] | [[Category:Level Design Tutorials]] | ||
{{first room menu}} | {{first room menu}} | ||
= | =View Navigation= | ||
To | To get a proper 3D perspective of your work, you will need to control setting its view. | ||
This can be done in two ways: You can either use the keyboard to navigate through your map, or you can rig up cameras. | |||
==Keyboard Navigation== | |||
Keyboard navigation will let you fly freely through the map. You will not collide with anything while doing this. Just make sure not to stray too far from your work, or you might not find your way back to it again. | |||
The controls are simple: The W, A, S and D keys works like the default in-game steering, moving your position up, left, down and right, while the arrow keys will steer the direction you're facing. | |||
As you haven't created any brushes yet, you can use the maps origin mark for something to move around. | |||
==Creating a Camera== | |||
[[Image:hammer_camera.jpg |thumb|left|100px| Select the Camera Tool.]] | |||
[[Image:Hammer_top2dview2.jpg |thumb|right|400px| Create a camera by dragging its position.]] | |||
To set up a camera, select the ''Camera Tool'' icon from the left side of the Hammer window. Then click and drag your mouse in a 2D view to create the Camera, as shown to the right. | |||
The 3D view will change to the new camera, and the 2D windows will display blue circle with a line leading from it, which is your camera. | |||
You can change the position of the camera by dragging this blue circle around, and where it will point by dragging the other end of the line around. | |||
==Magnify== | |||
Now | [[Image:hammer_magnifytool.jpg|thumb|left|100px]] | ||
You can use the ''Magnify Tool'' to zoom in and zoom out of the 2D viewports. First select the ''Magnify Tool'' from the icon bar. Now left-click in a 2D viewport to increase the magnification, and right-click to zoom back out. | |||
If your mouse is equipped with a mouse wheel, you can use it instead to change the zoom level in all of the viewports: Forward will zoom in and backwards will zoom out. | |||
=Basic Construction= | |||
You are now ready to create the most basic geometry: The [[brush]] object. Brushes are the basic building block for all maps built in the Source engine. Floors, walls and ceilings, and all geometry that aren't models, consists of brushes. | |||
==Creating a brush== | |||
[[Image:hammer_blocktool.jpg |thumb|left|100px| Select the Block Tool.]] | |||
To build your first brush, select the white box from the list of icons on the left side of the Hammer window by clicking on it. This is the ''Block Tool''. | |||
[[Image:hammer_top2dview1.jpg |thumb|right|400px| Clicking and dragging to create a brush.]] | |||
Specify the size of your brush by clicking and dragging your mouse in the Top 2D View (the upper-right window pane) to create a box, as shown in this image. | |||
[[Image:hammer_createobject.jpg |thumb|left|400px| Creating the brush object.]] | |||
Now that you've set the shape and size of the brush, you can create it by pressing your <Return> key. You can also do this by clicking your right mouse-button inside the brush to open its menu. As it is not yet created, there is only one choice in it at the moment: "Create Object". Left-click this choice to create the brush. | |||
The brush you just created has been textured with a default texture in the 3D window, but as this probably is the first time that you're using Hammer, you'll need to change your view to see these textures. Click on the 3D window to select it, then go to the ''View'' menu and choose ''3D Textured Polygons'' (or ''3D Shaded Textured Polygons'' for even fancier results). | |||
==Selecting brushes== | |||
Select the red arrow on top of the list of icons. This is the ''Selection Tool''. It is used to select different objects in the map. With the ''Selection Tool'' selected, select your brush by clicking on it in one of the windows. (In the 2D windows you will need to click on the edges or center of the brush. It is easier to select a brush on the 3D window.) | |||
You will notice that the selected brush will be marked red, and get eight little white square handles in the 2D panes. | |||
[[Image:hammer_selectiontool.jpg |thumb|left|100px| Select the Selection Tool.]] | |||
==Resizing brushes== | |||
Now we'll increase the height of the brush we've made. | |||
(Need to set the grid first.) | |||
Click and drag the square edge handle in the Side 2D View (the lower-right window pane). | |||
The cursor should change to the move handle cursor when you have the correct handle. | |||
Drag the height so that it is 128, as shown in this image. If you make a mistake, simply grab the handle and try again. | |||
[[Image: | [[Image:hammer_brushheightediting.jpg | Changing the height of the brush.]] | ||
Now onto [[Creating a Room]]! | Now onto [[Creating a Room]]! | ||
Revision as of 23:39, 14 February 2006
To get a proper 3D perspective of your work, you will need to control setting its view.
This can be done in two ways: You can either use the keyboard to navigate through your map, or you can rig up cameras.
Keyboard navigation will let you fly freely through the map. You will not collide with anything while doing this. Just make sure not to stray too far from your work, or you might not find your way back to it again.
The controls are simple: The W, A, S and D keys works like the default in-game steering, moving your position up, left, down and right, while the arrow keys will steer the direction you're facing.
As you haven't created any brushes yet, you can use the maps origin mark for something to move around.
Creating a Camera
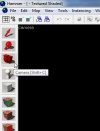
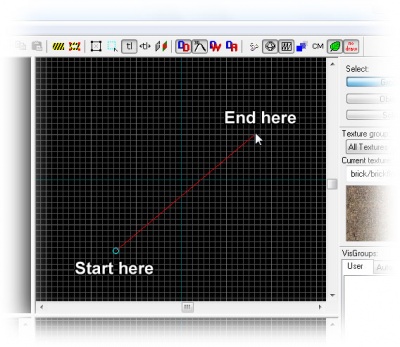
To set up a camera, select the Camera Tool icon from the left side of the Hammer window. Then click and drag your mouse in a 2D view to create the Camera, as shown to the right.
The 3D view will change to the new camera, and the 2D windows will display blue circle with a line leading from it, which is your camera.
You can change the position of the camera by dragging this blue circle around, and where it will point by dragging the other end of the line around.
Magnify
You can use the Magnify Tool to zoom in and zoom out of the 2D viewports. First select the Magnify Tool from the icon bar. Now left-click in a 2D viewport to increase the magnification, and right-click to zoom back out.
If your mouse is equipped with a mouse wheel, you can use it instead to change the zoom level in all of the viewports: Forward will zoom in and backwards will zoom out.
Basic Construction
You are now ready to create the most basic geometry: The brush object. Brushes are the basic building block for all maps built in the Source engine. Floors, walls and ceilings, and all geometry that aren't models, consists of brushes.
Creating a brush
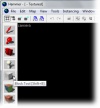
To build your first brush, select the white box from the list of icons on the left side of the Hammer window by clicking on it. This is the Block Tool.
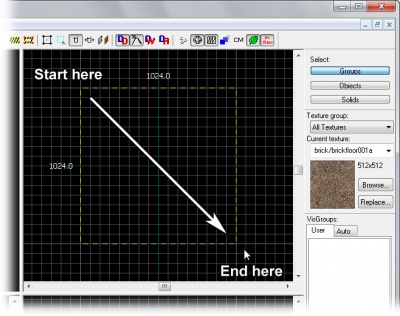
Specify the size of your brush by clicking and dragging your mouse in the Top 2D View (the upper-right window pane) to create a box, as shown in this image.
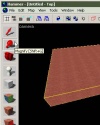
Now that you've set the shape and size of the brush, you can create it by pressing your <Return> key. You can also do this by clicking your right mouse-button inside the brush to open its menu. As it is not yet created, there is only one choice in it at the moment: "Create Object". Left-click this choice to create the brush.
The brush you just created has been textured with a default texture in the 3D window, but as this probably is the first time that you're using Hammer, you'll need to change your view to see these textures. Click on the 3D window to select it, then go to the View menu and choose 3D Textured Polygons (or 3D Shaded Textured Polygons for even fancier results).
Selecting brushes
Select the red arrow on top of the list of icons. This is the Selection Tool. It is used to select different objects in the map. With the Selection Tool selected, select your brush by clicking on it in one of the windows. (In the 2D windows you will need to click on the edges or center of the brush. It is easier to select a brush on the 3D window.)
You will notice that the selected brush will be marked red, and get eight little white square handles in the 2D panes.
Resizing brushes
Now we'll increase the height of the brush we've made. (Need to set the grid first.)
Click and drag the square edge handle in the Side 2D View (the lower-right window pane).
The cursor should change to the move handle cursor when you have the correct handle.
Drag the height so that it is 128, as shown in this image. If you make a mistake, simply grab the handle and try again.
Now onto Creating a Room!
