Indicator Lights (Portal 2): Difference between revisions
(Hopefully, I'll finish tomorrow. Hope to hear what you have to say.) |
m (I'm working on it! Again. For people who don't know how. And for fun) |
||
| Line 1: | Line 1: | ||
{{wip}} | |||
[[File:Indiclights 1.png|right|130px]] | [[File:Indiclights 1.png|right|130px]] | ||
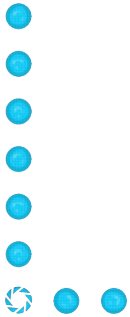
'''Indicator Lights''' are lines of small lights that are present in test chambers to indicate the interaction between two or more entities in the map, typically between a button and another entity in the world. | '''Indicator Lights''' are lines of small lights that are present in test chambers to indicate the interaction between two or more entities in the map, typically between a button and another entity in the world. | ||
| Line 6: | Line 7: | ||
This tutorial assumes basic knowledge of [[Hammer]]. | This tutorial assumes basic knowledge of [[Hammer]]. | ||
=== Step 1 === | === Step 1 === | ||
In your map, create two entities you want to interact with each other. These could varied from a [[Button (Portal 2)#Floor Button|Heavy Duty Super-Colliding Super-Button]] opening a simple exit [[Test Door (Portal 2)|door]], to a [[Button (Portal 2)#Button|button]] that will temporarily interact with a [[Diversity Vent]] | In your map, create two entities you want to interact with each other. These could varied from a [[Button (Portal 2)#Floor Button|Heavy Duty Super-Colliding Super-Button]] opening a simple exit [[Test Door (Portal 2)|door]], to a [[Button (Portal 2)#Button|button]] that will temporarily interact with a [[Diversity Vent]] which will deliver [[Gel (Portal 2)|gel]] to bounce on one step closer to the solution. Whatever you decide to do is up to you, but always next to the '''activator''' place an [[env_texturetoggle]] entity - this will help us change the indicator colors further in the tutorial and help you remember were you place your entities, resulting in a cleaner map. | ||
=== Step 2 === | === Step 2 === | ||
Revision as of 22:11, 14 August 2011
As a courtesy, please do not edit this while this message is displayed.
If this page has not been edited for at least several hours to a few days, please remove this template. This message is intended to help reduce edit conflicts; please remove it between editing sessions to allow others to edit the page.
The person who added this notice will be listed in its edit history should you wish to contact them.
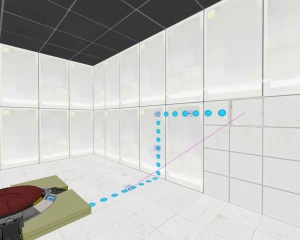
Indicator Lights are lines of small lights that are present in test chambers to indicate the interaction between two or more entities in the map, typically between a button and another entity in the world. The typical usage of the lights are the lights being blue when inactive, and orange when active.
How to make Indicator Lights
This tutorial assumes basic knowledge of Hammer.
Step 1
In your map, create two entities you want to interact with each other. These could varied from a Heavy Duty Super-Colliding Super-Button opening a simple exit door, to a button that will temporarily interact with a Diversity Vent which will deliver gel to bounce on one step closer to the solution. Whatever you decide to do is up to you, but always next to the activator place an env_texturetoggle entity - this will help us change the indicator colors further in the tutorial and help you remember were you place your entities, resulting in a cleaner map.
Step 2
Select a texture for the lights in the texture browser, for this tutorial use "signage/indicator_lights/indicator_lights_floor" (Easily found by typing "indicator" in the filter bar).
signage/indicator_lights/indicator_lights_floorsignage/indicator_lights/indicator_lights_wallsignage/indicator_lights/indicator_lights_corner_wallsignage/indicator_lights/indicator_lights_corner_floorsignage/indicator_lights/indicator_neon_straight
Step 3
Select the Overlay option in hammer, and place your lights overlays as desired. Functionally it doesn't matter how they're placed, though a logical line between the entities interacting is desired, usually the shortest way between the two entities; don't forget the shortest way could travel on walls at some point. Also, to keep consistent with Valve's approach to these lights, when the line turns a signage/indicator_lights/indicator_lights_corner_wall should be in the corner, thus his name came to be.
The length of one strip is four circles, however sometimes you might want to have fewer overlays to keep your map clean. Luckily you can adjust the overlay properties to make it longer rather than make duplicates of the strip. This is accomplished by editing the U Start or U End keyvalue in the properties window for the overlay. Another way of accomplishing this is to stretch 'physically' the overlay in one of the 2D views - make sure that the 'Texture Lock' is unchecked.
Step 4
Select the overlays you just placed (and ONLY the overlays you want) and name them all the same. Use "indlights_1" for this tutorial. Then open up the env_texturetoggle you previously placed, and enter the same name into the Target Brush(es) field. Now name the env_texturetoggle "texturetoggle_lights_01"
Step 5
Select the activator entity, and go to the outputs menu. In this tutorial a simple button entity was used, so all output parameters in the table would relate to it. All you need to do is to add these two outputs to your activator:
My Output > Target Entity Target Input Parameter Delay Only Once 
OnPressed texturetoggle_lights_01 SetTextureIndex 1 0.00 No 
OnButtonReset texturetoggle_lights_01 SetTextureIndex 0 0.00 No
So basically, now when the button is pressed the texturetoggle_lights_01 will change the overlays connected to it to the alternate "skin" of their's - the appropriate orange texture. After that when the button will reset the "skin" would return to the normal color - blue.
Done, your indicator lights should now be working!
Checkmark Box
Step 1
Create a prop_static with the following properties:
Property Name Value World Model models/props/sign_frame01/sign_frame01.mdl
Align it so it will be at the end of your light path.
Step 2
At the exact same spot, with the exact same "Pitch Yaw roll" place a prop_indicator_panel. The best way to do this is to shift-drag the prop_static to the same place by moving it a unit to one direction and returning it.
models/props/sign_frame01/sign_frame01.mdl is needed as well.Step 3
Fill the prop_indicator_panel's fields as desired. Give the entity a name, and make sure it is linked to the overlay not the env_texturetoggle.
Property Name Value Name checkmark_indlights_1 Indicator Lights indlights_1
Step 4
Add to the activator entity another two outputs:
My Output > Target Entity Target Input Parameter Delay Only Once 
OnPressed checkmark_indlights_1 Check 0.00 No 
OnButtonReset checkmark_indlights_1 Uncheck 0.00 No
So now you have an operating checkmark box as well, don't forget to link the activator to the activated entity too.

