Direct Intervention: Difference between revisions
(Created the page.) |
No edit summary |
||
| (7 intermediate revisions by 2 users not shown) | |||
| Line 1: | Line 1: | ||
{{LanguageBar}} | |||
{{toc-right}}{{hl2ep1 topicon}}<!-- this topicon template adds HL2 Ep1 category automatically--> | {{toc-right}}{{hl2ep1 topicon}}<!-- this topicon template adds HL2 Ep1 category automatically--> | ||
{{ | {{Background | ||
| file = HL2EP1 GamepadUI - Chapter 2.jpg | |||
| opacity = 0.10 | |||
| gradient-height = 400px | |||
}} | |||
'''Direct Intervention''' is the second chapter of {{hl2ep1|4}}. | '''Direct Intervention''' is the second chapter of {{hl2ep1|4}}. | ||
== Introduction == | == Introduction == | ||
The primary objective in this chapter is containing the critical [[Citadel]] Core. | The primary objective in this chapter is containing the critical [[Citadel]] Core. | ||
== Maps == | |||
*ep1_citadel_03 - bulk of the chapter, dealing with the Core. | |||
*ep1_citadel_04 - escaping from the [[npc_combine_s|Soldiers]], getting onto the train. | |||
== Environment == | == Environment == | ||
| Line 13: | Line 23: | ||
The centerpiece of the first map is the Core itself. It is a [[prop_coreball]], and unless mapping for {{mapbase|4}}, it needs to be placed at the specific coordinates to look right. | The centerpiece of the first map is the Core itself. It is a [[prop_coreball]], and unless mapping for {{mapbase|4}}, it needs to be placed at the specific coordinates to look right. | ||
The examples of damage in this chapter mostly have to do with the expanded Core melting some of its surrounding metal, and the power grid of the Citadel exploding under the strain, with [[prop_combine_ball|Combine | The examples of damage in this chapter mostly have to do with the expanded Core melting some of its surrounding metal, and the power grid of the Citadel exploding under the strain, with [[prop_combine_ball|Combine Energy Balls]] flying out of their conduits. | ||
Due to the technical and high security nature of this environment, the player often has to navigate tight passages, maintenance tunnels, and even power conduits with active Energy Ball lanes. This gives the opportunity to feature less standard lighting, environmental hazards, crawl spaces. | Due to the technical and high security nature of this environment, the player often has to navigate tight passages, maintenance tunnels, and even power conduits with active Energy Ball lanes. This gives the opportunity to feature less standard lighting, environmental hazards, crawl spaces. | ||
| Line 20: | Line 30: | ||
The soundscapes include powerful droning, sizzling of hot air, alarms, and energy-related sounds. As the player stabilizes the Core, old soundscapes are switched off and others are turned on to make it sound more and more 'normal', quieter and less strained. | The soundscapes include powerful droning, sizzling of hot air, alarms, and energy-related sounds. As the player stabilizes the Core, old soundscapes are switched off and others are turned on to make it sound more and more 'normal', quieter and less strained. | ||
As the Core chamber is described to be 'bathed in radiation', it is appropriate to have the Geiger counter going off. The simplest way to do so is to place a [[trigger_hurt]] with <code>RADIATION</code> damage type. It doesn't have to be touched by the player - being in the vicinity will activate the HEV Suit's Geiger counter. | |||
The superheated air around the Core warrants the use of warped heatwave effect. One way to do so is with [[env_steam]] entity; another, used in '''ep1_citadel_03''', is to have a [[func_smokevolume]] with the material <code>sprites/heatwave.vmt</code>. | |||
== NPC's == | == NPC's == | ||
| Line 25: | Line 39: | ||
[[npc_stalker|Stalkers]] are encountered, mostly serving as part of the Energy Ball puzzles, disrupting the receptacles unless dealt with (or outpaced), and later seen as cargo on the Combine Train. | [[npc_stalker|Stalkers]] are encountered, mostly serving as part of the Energy Ball puzzles, disrupting the receptacles unless dealt with (or outpaced), and later seen as cargo on the Combine Train. | ||
[[npc_manhack|Manhacks]] appear in several places, apparently being deployed by the Combine Soldiers. | |||
[[npc_rollermine|Roller Mines]] are encountered in the second map, being useful against the soldiers after being reprogrammed by Alyx. | [[npc_rollermine|Roller Mines]] are encountered in the second map, being useful against the soldiers after being reprogrammed by Alyx. | ||
| Line 41: | Line 57: | ||
== Reference == | == Reference == | ||
<gallery mode=packed heights=180px> | <gallery mode=packed heights=180px> | ||
File:Direct_intervention_logo.jpg|'''The entrance to the Core control room''', with characteristic white paint and special Core-related logo. | |||
File:Direct_intervention_core.jpg|'''The Citadel Core'''. | |||
File:Direct_intervention_core2.jpg|Ditto, from below. | |||
File:Direct_intervention_interface.jpg|'''A Combine Interface''' with Core-related graphics displaying. | |||
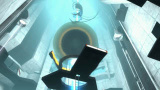
File:Direct_intervention_kitbash.jpg|'''The stabilization device'''. A kitbash of several Combine props: an upside-down <code>props_combine/combine_tptimer.mdl</code> from the [[Nova Prospekt]] teleport with twin [[npc_combine_camera|Combine Cameras]]. | |||
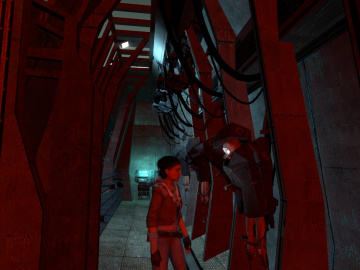
File:Direct_intervention_maintenance.jpg|'''A maintenance passage'''. More recycled props, and again the <code>props_combine/combine_tptimer.mdl</code>. | |||
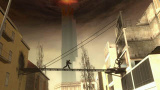
File:Direct_intervention_ball_tunnel.jpg|'''The Energy Ball conduit'''. | |||
File:Direct_intervention_hall.jpg|'''A hallway''' with irregularly-shaped thresholds. | |||
File:Direct_intervention_kitbash2.jpg|More kitbash. Framing the Rollermine box are actually parts of [[Suppression Device]] model. | |||
File:Direct_intervention_stalker_car.jpg|'''The Stalker car''' interior. | |||
</gallery> | </gallery> | ||
Latest revision as of 11:16, 6 April 2025

Direct Intervention is the second chapter of ![]() Half-Life 2: Episode One.
Half-Life 2: Episode One.
Introduction
The primary objective in this chapter is containing the critical Citadel Core.
Maps
- ep1_citadel_03 - bulk of the chapter, dealing with the Core.
- ep1_citadel_04 - escaping from the Soldiers, getting onto the train.
Environment
Direct Intervention features less damage and grime compared to Undue Alarm.
Many surfaces are covered in white paint, intended to set it apart from the rest of the Citadel, show the importance of this space, and relay the sense of heat and radiation.[1]
The centerpiece of the first map is the Core itself. It is a prop_coreball, and unless mapping for ![]() Mapbase, it needs to be placed at the specific coordinates to look right.
Mapbase, it needs to be placed at the specific coordinates to look right.
The examples of damage in this chapter mostly have to do with the expanded Core melting some of its surrounding metal, and the power grid of the Citadel exploding under the strain, with Combine Energy Balls flying out of their conduits.
Due to the technical and high security nature of this environment, the player often has to navigate tight passages, maintenance tunnels, and even power conduits with active Energy Ball lanes. This gives the opportunity to feature less standard lighting, environmental hazards, crawl spaces.
The second map features the Citadel train system, with Gordon and Alyx utilizing an outbound Stalker train to escape the Citadel.
The soundscapes include powerful droning, sizzling of hot air, alarms, and energy-related sounds. As the player stabilizes the Core, old soundscapes are switched off and others are turned on to make it sound more and more 'normal', quieter and less strained.
As the Core chamber is described to be 'bathed in radiation', it is appropriate to have the Geiger counter going off. The simplest way to do so is to place a trigger_hurt with RADIATION damage type. It doesn't have to be touched by the player - being in the vicinity will activate the HEV Suit's Geiger counter.
The superheated air around the Core warrants the use of warped heatwave effect. One way to do so is with env_steam entity; another, used in ep1_citadel_03, is to have a func_smokevolume with the material sprites/heatwave.vmt.
NPC's
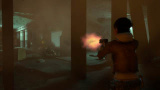
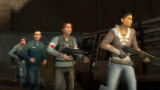
Numerous Combine Soldiers, including Elites, are remaining here to ensure the Core goes critical, and ward off Gordon Freeman and Alyx Vance.
Stalkers are encountered, mostly serving as part of the Energy Ball puzzles, disrupting the receptacles unless dealt with (or outpaced), and later seen as cargo on the Combine Train.
Manhacks appear in several places, apparently being deployed by the Combine Soldiers.
Roller Mines are encountered in the second map, being useful against the soldiers after being reprogrammed by Alyx.
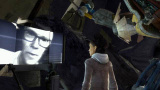
An Advisor is seen communicating with the Elite soldiers upon entering the first map.
Trivia
- Like the previous chapter, the name comes from Dr. Kleiner's line of dialogue,
- "The core is exceedingly close to collapse. Why, there's no way to get far enough without first...well...nothing short of a direct intervention in the core could possibly retard the reaction."
- The white-and-red hazard stripes inside the Core chamber are actually a concrete material,
concrete/concretewall075d. This is an unusual material choice for the Citadel, as it is mostly decorated with metal, glass, and sometimes marble tiles.
- There is an achievement in
 Half-Life 2: Episode One for stabilizing the Core without harming the Stalkers. It requires being quite fast while powering the forcefield bridges inside the Core chamber. To make it possible, unless any of the Stalkers are killed, they will remain neutral to the player.
Reference
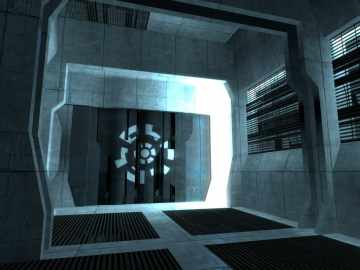
The entrance to the Core control room, with characteristic white paint and special Core-related logo.
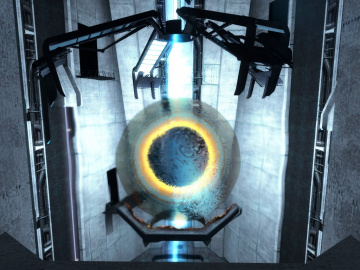
The Citadel Core.
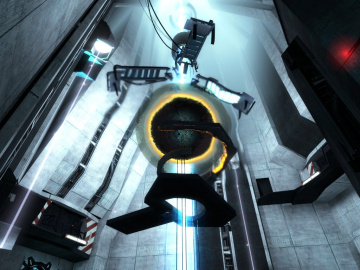
Ditto, from below.
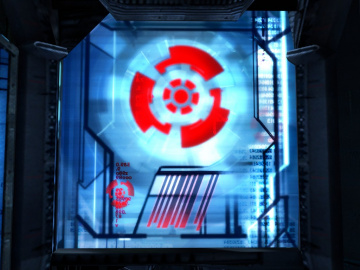
A Combine Interface with Core-related graphics displaying.
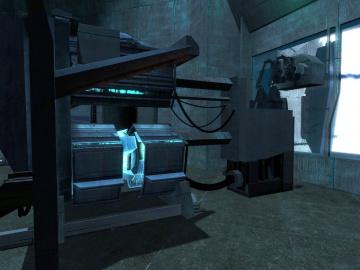
The stabilization device. A kitbash of several Combine props: an upside-down
props_combine/combine_tptimer.mdlfrom the Nova Prospekt teleport with twin Combine Cameras.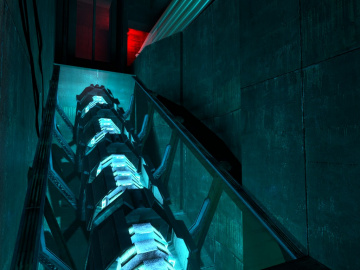
A maintenance passage. More recycled props, and again the
props_combine/combine_tptimer.mdl.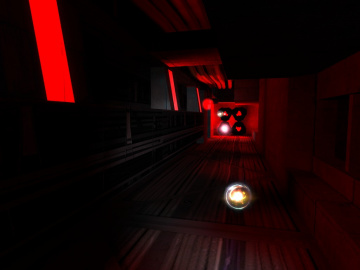
The Energy Ball conduit.
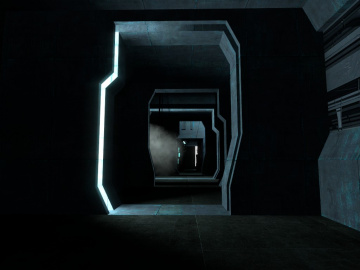
A hallway with irregularly-shaped thresholds.

More kitbash. Framing the Rollermine box are actually parts of Suppression Device model.
The Stalker car interior.


See also
| Toggle chapters |
||||||||||||||||||||||||||||||||||||||||||||||||||||||||||||||||||||||||||||||||||||||||||||||||||
|---|---|---|---|---|---|---|---|---|---|---|---|---|---|---|---|---|---|---|---|---|---|---|---|---|---|---|---|---|---|---|---|---|---|---|---|---|---|---|---|---|---|---|---|---|---|---|---|---|---|---|---|---|---|---|---|---|---|---|---|---|---|---|---|---|---|---|---|---|---|---|---|---|---|---|---|---|---|---|---|---|---|---|---|---|---|---|---|---|---|---|---|---|---|---|---|---|---|---|
 Undue Alarm ep1_citadel_00
|
 Direct Intervention ep1_citadel_03
|
 Lowlife ep1_c17_00
|
 Urban Flight ep1_c17_01
|
|||||||||||||||||||||||||||||||||||||||||||||||||||||||||||||||||||||||||||||||||||||||||||||||
 Exit 17 ep1_c17_05
|
||||||||||||||||||||||||||||||||||||||||||||||||||||||||||||||||||||||||||||||||||||||||||||||||||