DODS/Creating the Mini-Map: Difference between revisions
< DODS
Jump to navigation
Jump to search
mNo edit summary |
|||
| (7 intermediate revisions by 6 users not shown) | |||
| Line 1: | Line 1: | ||
==Creating the Mini-Map== | ==Creating the Mini-Map== | ||
To create a map overview, follow these steps: | To create a map overview, follow these steps: | ||
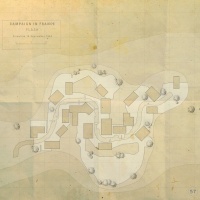
[[File:Flash-map.jpg|200px|thumb|Sample Map Overview from dod_flash.]] | |||
#Load your map with | #Start the game using 1280x1024 Video settings on Normal | ||
#Make sure the "Far Z Clip Plane" is disabled in the env_fog_controller | |||
#Load your map with {{command|sv_cheats|1}} | |||
#Join a team | #Join a team | ||
#Disable any fog with | #Disable any fog with {{command|fog_override|1}} | ||
#Switch to the overhead view with | #Switch to the overhead view with {{command|cl_leveloverview}} X, where X is the scale factor you wish to use | ||
#Walk around (use | #Turn on the 1024 marker by using {{command|cl_leveloverviewmarker|1024}}, to place a red marker on the right. | ||
#Hide the game interface with | #Walk around (use {{command|noclip}} or change the scale factor if needs be) until the entire map is on the screen and left of the red marker | ||
#Hide the game interface with {{command|cl_drawhud|0}} | |||
#Take your screenshot, ideally in [[TGA]] format | #Take your screenshot, ideally in [[TGA]] format | ||
#Note down the most recent position information displayed in the console | #Note down the most recent position information displayed in the console | ||
#Resize your screenshot from 1280x1024 to 1024x1024 using a photo editor of your choice. | |||
#Create a [[VTF]] from your screenshot (see [[Creating a Material]]) | #Create a [[VTF]] from your screenshot (see [[Creating a Material]]) | ||
#*Due to | #*Due to how mini-maps are displayed, transparency is generally something to avoid. | ||
#*You can find a generic background image for your mini-map on the Day of Defeat forums. [http://www.dayofdefeat.net/forums/showthread.php?s=&threadid=3871] | #*You can find a generic background image for your mini-map on the Day of Defeat forums. [http://www.dayofdefeat.net/forums/showthread.php?s=&threadid=3871] | ||
#Create a [[VMT]] for your new texture (see below for code) | #Create a [[VMT]] for your new texture (see below for code) | ||
| Line 56: | Line 61: | ||
Sometimes it also depends on what roof is your character on, before <code>[[cl_leveloverview]] X</code> command. Try to do various screens, by moving the character on different roofs before using <code>[[cl_leveloverview]] X</code>, then patch them all for better result. | Sometimes it also depends on what roof is your character on, before <code>[[cl_leveloverview]] X</code> command. Try to do various screens, by moving the character on different roofs before using <code>[[cl_leveloverview]] X</code>, then patch them all for better result. | ||
== See | == See also == | ||
* [[Level Overviews]] | * [[Level Overviews]] | ||
[[Category:Day of Defeat: Source]] | |||
Latest revision as of 07:39, 8 May 2024
Creating the Mini-Map
To create a map overview, follow these steps:
- Start the game using 1280x1024 Video settings on Normal
- Make sure the "Far Z Clip Plane" is disabled in the env_fog_controller
- Load your map with
sv_cheats 1 - Join a team
- Disable any fog with
fog_override 1 - Switch to the overhead view with
cl_leveloverviewX, where X is the scale factor you wish to use - Turn on the 1024 marker by using
cl_leveloverviewmarker 1024, to place a red marker on the right. - Walk around (use
noclipor change the scale factor if needs be) until the entire map is on the screen and left of the red marker - Hide the game interface with
cl_drawhud 0 - Take your screenshot, ideally in TGA format
- Note down the most recent position information displayed in the console
- Resize your screenshot from 1280x1024 to 1024x1024 using a photo editor of your choice.
- Create a VTF from your screenshot (see Creating a Material)
- Due to how mini-maps are displayed, transparency is generally something to avoid.
- You can find a generic background image for your mini-map on the Day of Defeat forums. [1]
- Create a VMT for your new texture (see below for code)
- Do not include the
.bspextension in$basetexturewhen creating the VMT - Ensure both files have the same name as your map, again without the
.bspextension
- Do not include the
- Place both the VTF and VMT in the
dod/materials/overviews/folder - Create an overview file in
dod/resource/overviews(see below for code)- The file should be called
mapname.txt
- The file should be called
- Load the map and ensure that the overview is working
You may wish to use BSPZIP to embed the files you created in your BSP.
VMT code
"UnlitGeneric"
{
	"$basetexture" "overviews/mapname"
	"$vertexcolor" "1"
	"$vertexalpha" "1"
	"$no_fullbright" "1"
	"$ignorez" "1"
}
Do not include the .bsp extension in $basetexture!
Overview definition code
"mapname"
{
	"material" "overviews/mapname"
	"pos_x" "Your position data"
	"pos_y" "Your position data"
	"scale" "Your scale"
	"rotate" "0"
	"zoom" "1"
}
- Do not include the
.bspextension for mapname! - Fill in
pos_x,pos_y, andscalefrom the console message you noted down.
My overview is missing bits of my map!
The overview tool attempts to intelligently remove portions of the map that are not wanted on an overview: roofs, inaccessible areas, and so on. However, it is not perfect.
Required: how to get round these issues
Sometimes it also depends on what roof is your character on, before cl_leveloverview X command. Try to do various screens, by moving the character on different roofs before using cl_leveloverview X, then patch them all for better result.
