SteamVR/Environments/Overlay Tutorial
Adding Overlays to your Environments
In this tutorial we will not only teach you how to create overlay textures and materials, but also how to apply them to your maps.
Overlays are a type of material or “decal” that is projected onto a surface, like a type of digital sticker. They are most commonly used to add an additional layer of 2D detail to a surface that the underlying texture does not contain.
Some common uses for overlays include:
- Posters
- Graffiti
- Logos
- Signage
- Destruction
- Dirt and grime
- Blood splatters
- Roads and paths
- Industrial markings
SteamVR Home handles overlays somewhat differently to Source 1's implementation. If you're familiar with that engine, then you'll be happy to hear that these new overlays are much more capable and have a wide range of options, making them an extremely flexible resource for adding an additional layer of detail to your environments.
Overlays support the same vr_standard shading model that’s used by most other renderable entities - this means that specular, normal mapping, texture animation, self-illumination and most of the other standard material features can also be used in your overlay, allowing for interesting special effects.
Creating an Overlay material
We will not cover the basics of material creation in this tutorial, for an in-depth look at material creation see this article.
Creating an overlay material is as simple as checking the 'Overlay' parameter in the Material Editor, although there are a few requirements to getting there. Firstly, by default, the overlay parameter in your material is greyed out - you must first have the transparency parameter checked. And for that, you really ought to have a transparency texture.
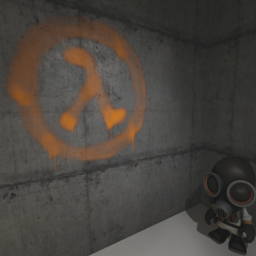
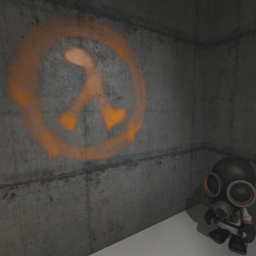
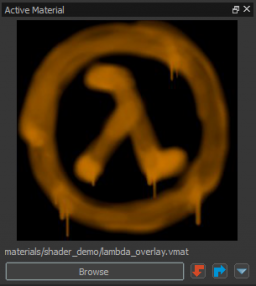
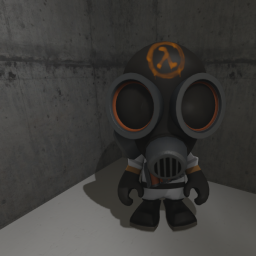
For the Lambda overlay shown in the screenshots, the colour texture is a mostly flat orange, while the transparency texture does most of the work - essentially being a white Lambda logo against a black background, with in-between shades indicating partial coverage of the spray paint.
materialname_trans.tga or similar, to define the transparency of a material - with black being fully transparent and white being fully opaque. The engine’s resource compiler will combine the various input textures from your material into runtime optimised formats.banana01.vmat, then when looking for a normal map the material editor will search for files matching the material name banana01 with the appropriate suffix - _color, _normal and so on. In this case, the material editor will look for banana01_color, banana01_normal etc. Also, when bringing up a file selector for a particular texture, by default it will be set to search for texture files with suffixes of the necessary type - looking for a transparency texture will initially only show _trans files.So, for a typical overlay you should have a colour texture and a transparency texture. For specular effects, a gloss texture can also be provided - along with reflectance, metalness and whatever else you might need. This is the standard shader with all its capabilities.
Overlays don't necessarily need specular enabled. Wherever possible, it's recommended to save on performance by not ticking the specular box in your material, thus excluding the overlay from expensive specular calculations. Likewise, in many cases you can also save on texture memory by omitting a normal map for overlays that don't need to show any visible surface variation. For whatever material you're creating, opting in to only the features you require can help performance throughout your environment.
Applying an Overlay
To apply overlays to geometry in your environment, first set the Active Material to one that has the overlay parameter checked - see above for information on setting this. Once you have an overlay material selected, change the active tool to the Block Tool by pressing Shift-B. The Block Tool will display a helpful notice informing you that it is now in overlay creation mode - there is no separate 'overlay tool'.
Next, drag out a block volume to represent the rough shape that you wish your overlay to encompass. When you are happy with the rough position of your overlay volume (you can tweak it later!), press Enter to confirm the creation of your overlay.
You will now see a static overlay helper attached to your volume. Left clicking this with the selection tool will display the object properties for this entity. You can also translate the overlay through the world with the standard translation tools, as well as modify the shape of the overlay by pressing Q to enable the editing gizmo. Copying and pasting these overlay helpers also works - rotating the helpers to face the correct surface direction may be necessary.
You can also drag an overlay material from the "Materials" tab of the asset browser into the world.
Additional Parameters
Below is a description of the different options that are available to edit in the overlay entities object properties.
- Projection Distance
- You may notice that the Z axis (depth) of your overlay’s projection volume cannot be modified, this is because it is controlled directly in the object properties as the parameter projection distance.
- By default your overlay will be set to project up to a distance of 128 world units, this means all faces up to a depth of 128 units will be covered with your overlay texture. This can lead to artifacts where overlays project through walls; it’s important to tweak this value appropriately for your specific scene so that only the faces you intended receive the overlay.
- Render Order
- If you have multiple overlays that share the same space, they will flicker and fight for priority. A solution to this problem is to specify a rendering order in the overlay entities' object properties - give a separate number for each fighting overlay, with higher numbers being rendered later.
- Colour
- For some extra variation in overlay appearance, you can specify a render colour to tint the whole overlay. This saves having to create new colour textures and materials for each one - saving both texture memory and production time. In situations when using numerical or alphabetical signage it may be useful to place overlays with these colour variations. For example, as the player progresses through an environment that is comprised of several different areas, you may want the same sign displayed in each area but coloured differently to represent difficulty, progress, or orientation. Alternatively, you can subtly tweak the colour of dirt or grime, to add naturalistic variation to your environment.
- Projection Mode
- It is possible to restrict the projection type of overlays to only cast onto one type of receiver. The projection mode option lets you choose between casting on to only world geometry, models or both. By default, both the world and models will receive an overlay projection.
- Project On Backfaces
- In some rare cases you will want your overlay to render on both sides of your geometry's faces, enabling projection on to backfaces in the entity's object properties will allow for two-sided projection.
- Projection Targets
- By default, overlays will cast on to anything in their projection path - however it is possible to set a specific projection target or targets to limit overlays to cast on to particular objects only.
Example Materials
To help you get to grips with SteamVR Home's new overlay system, we shall include an example overlay material, texture and a basic map to demonstrate the steps mentioned in this tutorial.
Credit and thanks to Adam Foster (CargoCult) for originally explaining this entity's functionality here on the SteamVR Home discussion boards.


